Introducing the latest enhancement in devices with firmware version 1.6.002! We now offer a new, faster, and more reliable way to add devices through Bluetooth, ensuring a seamless connection experience. With improved success rates, even updating WiFi settings while the device is offline becomes effortless. Allow us to guide you through the steps of using this exciting new connection method to add devices effortlessly. Let's get started!
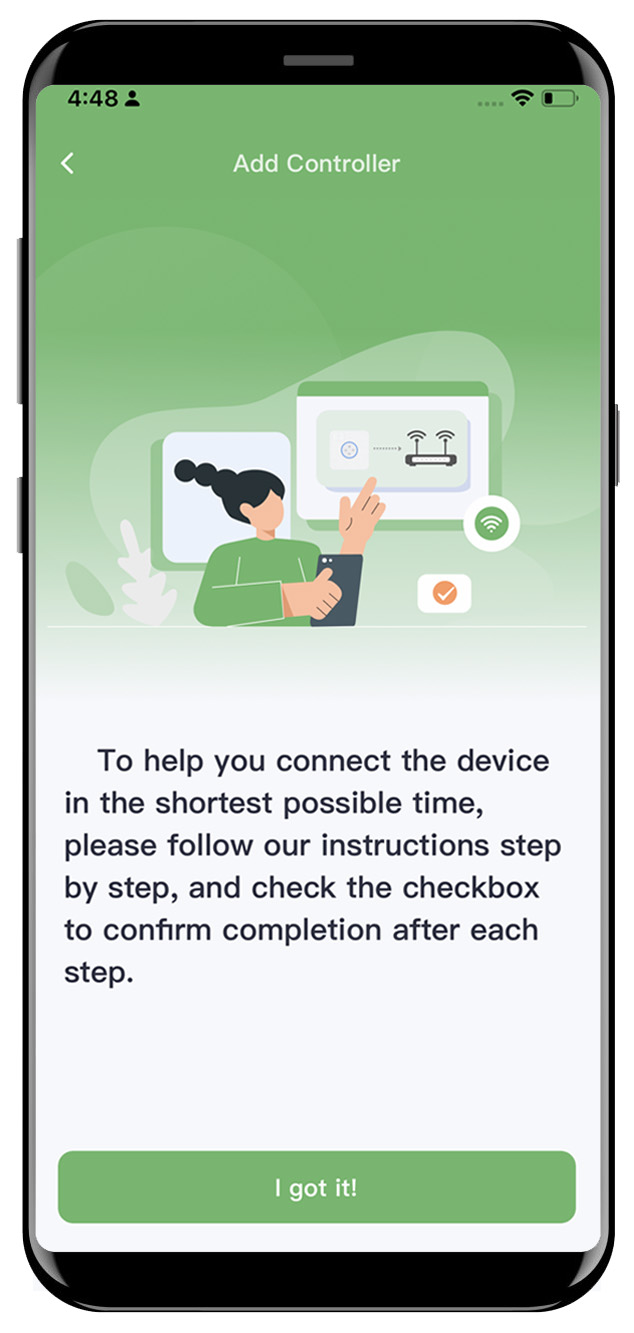
Step1: Please follow the instructions provided in the application and observe the indicator lights on the controller to complete the reset process.
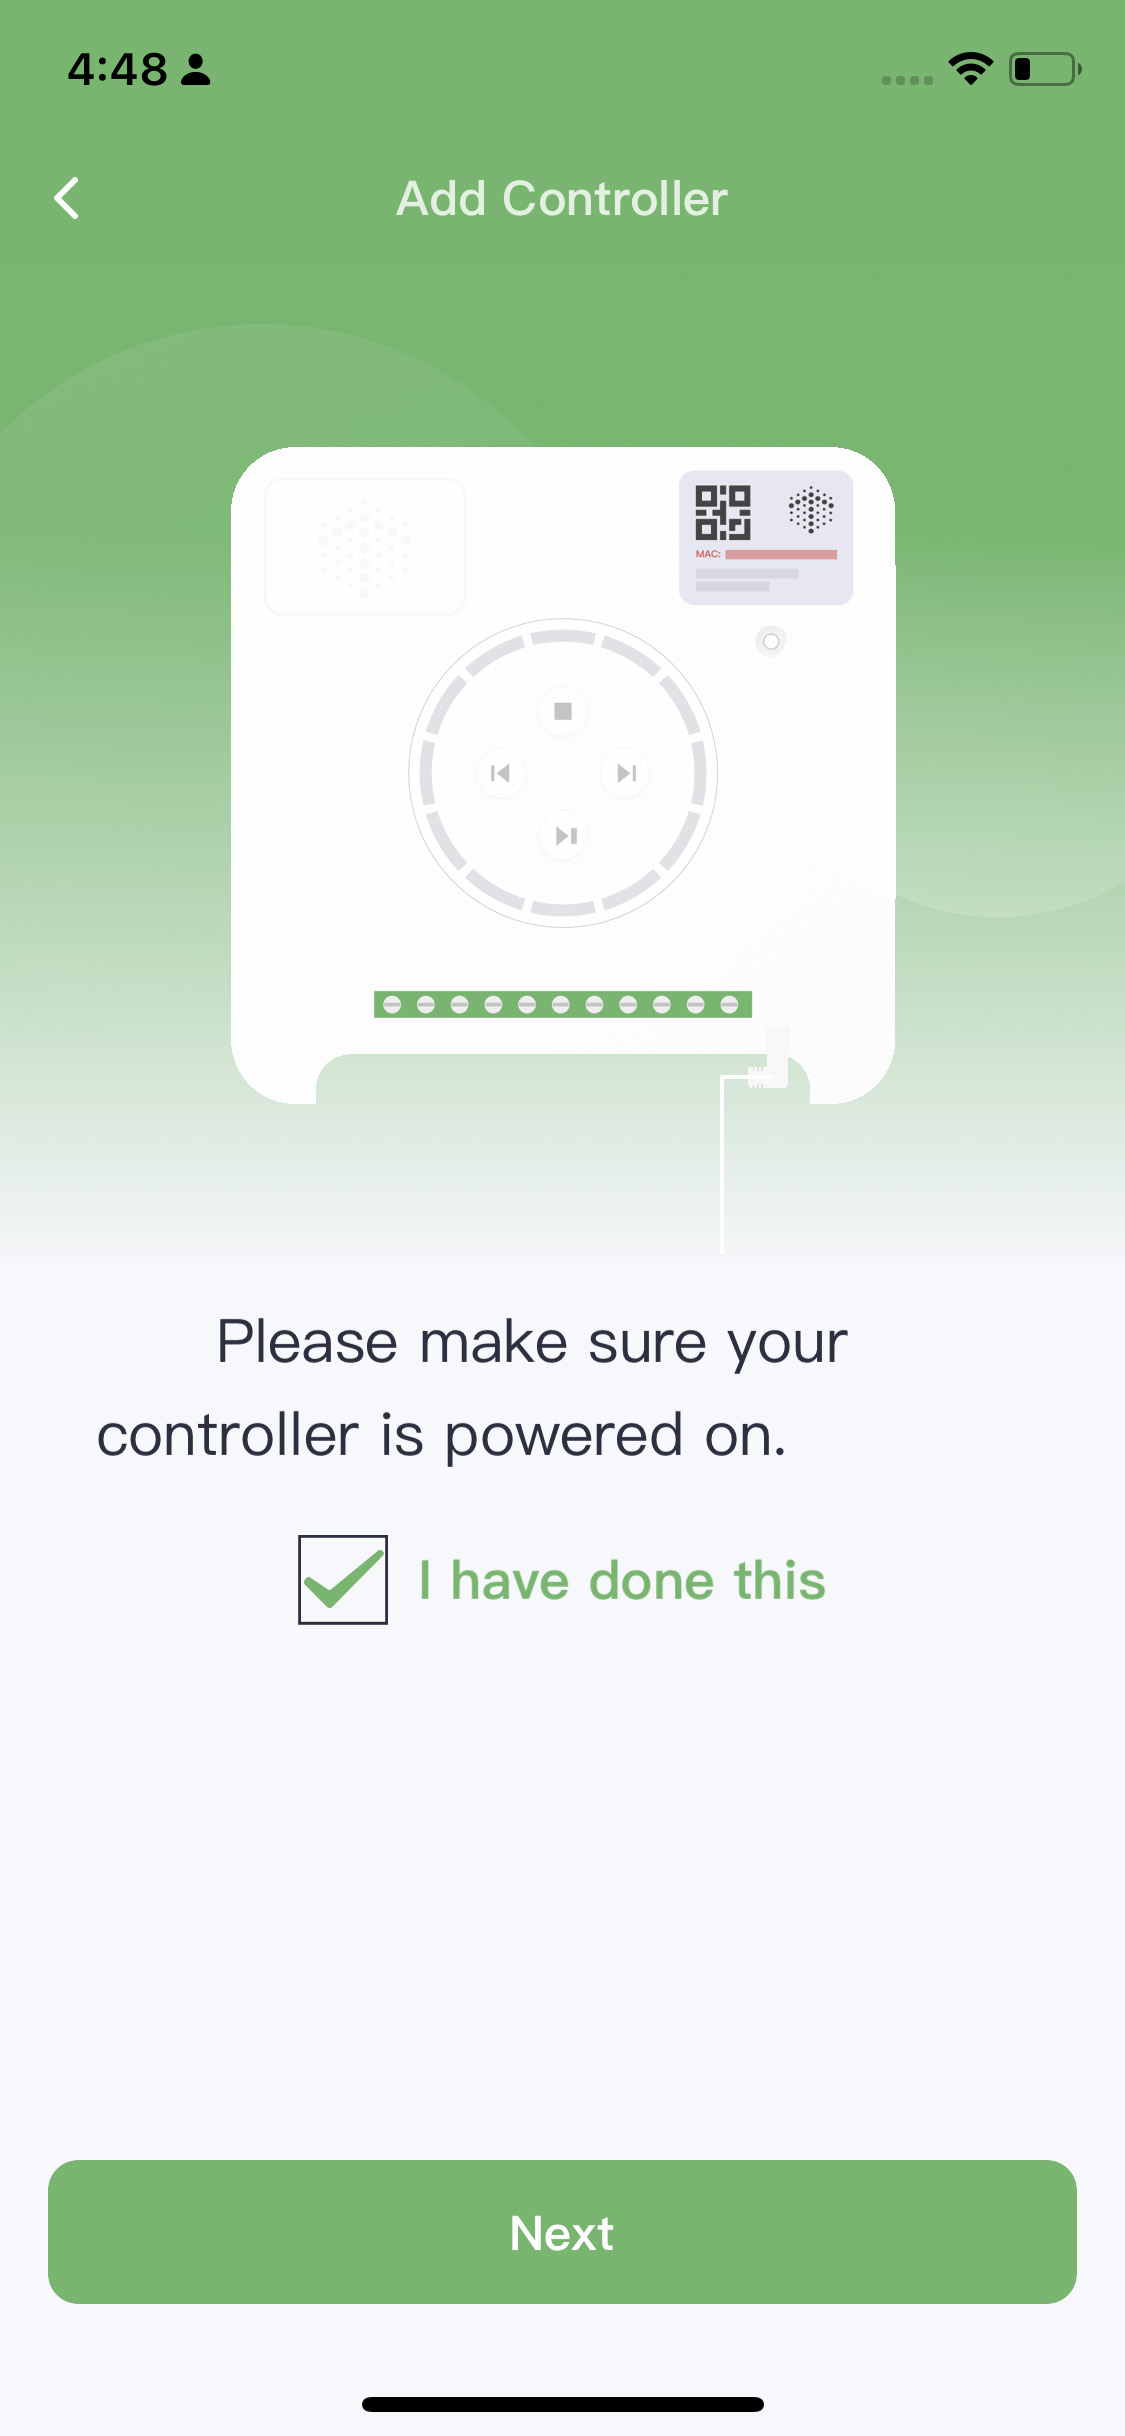
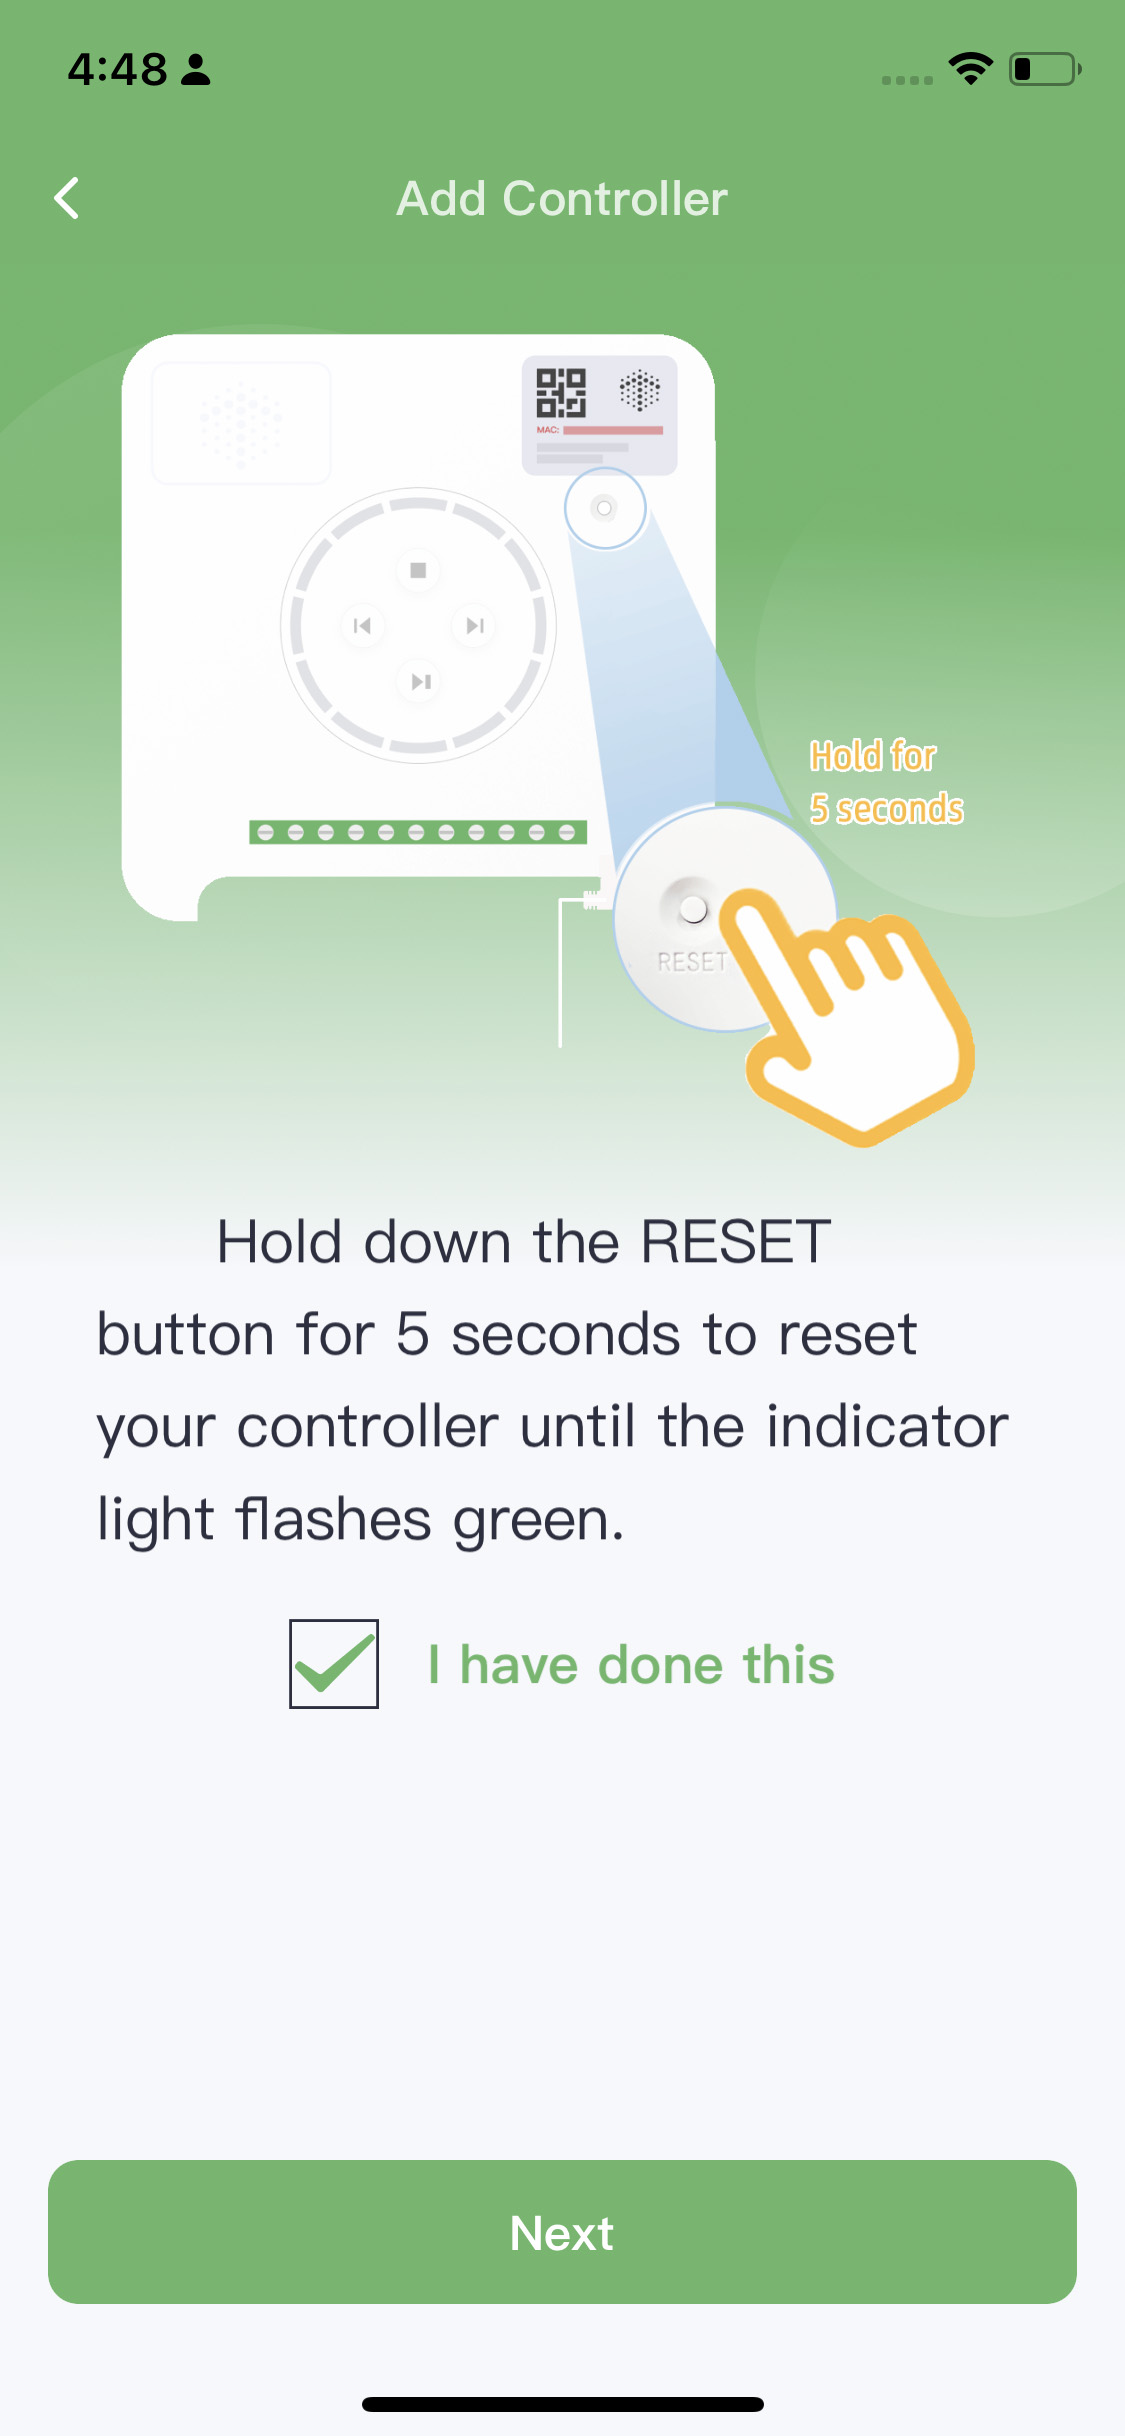
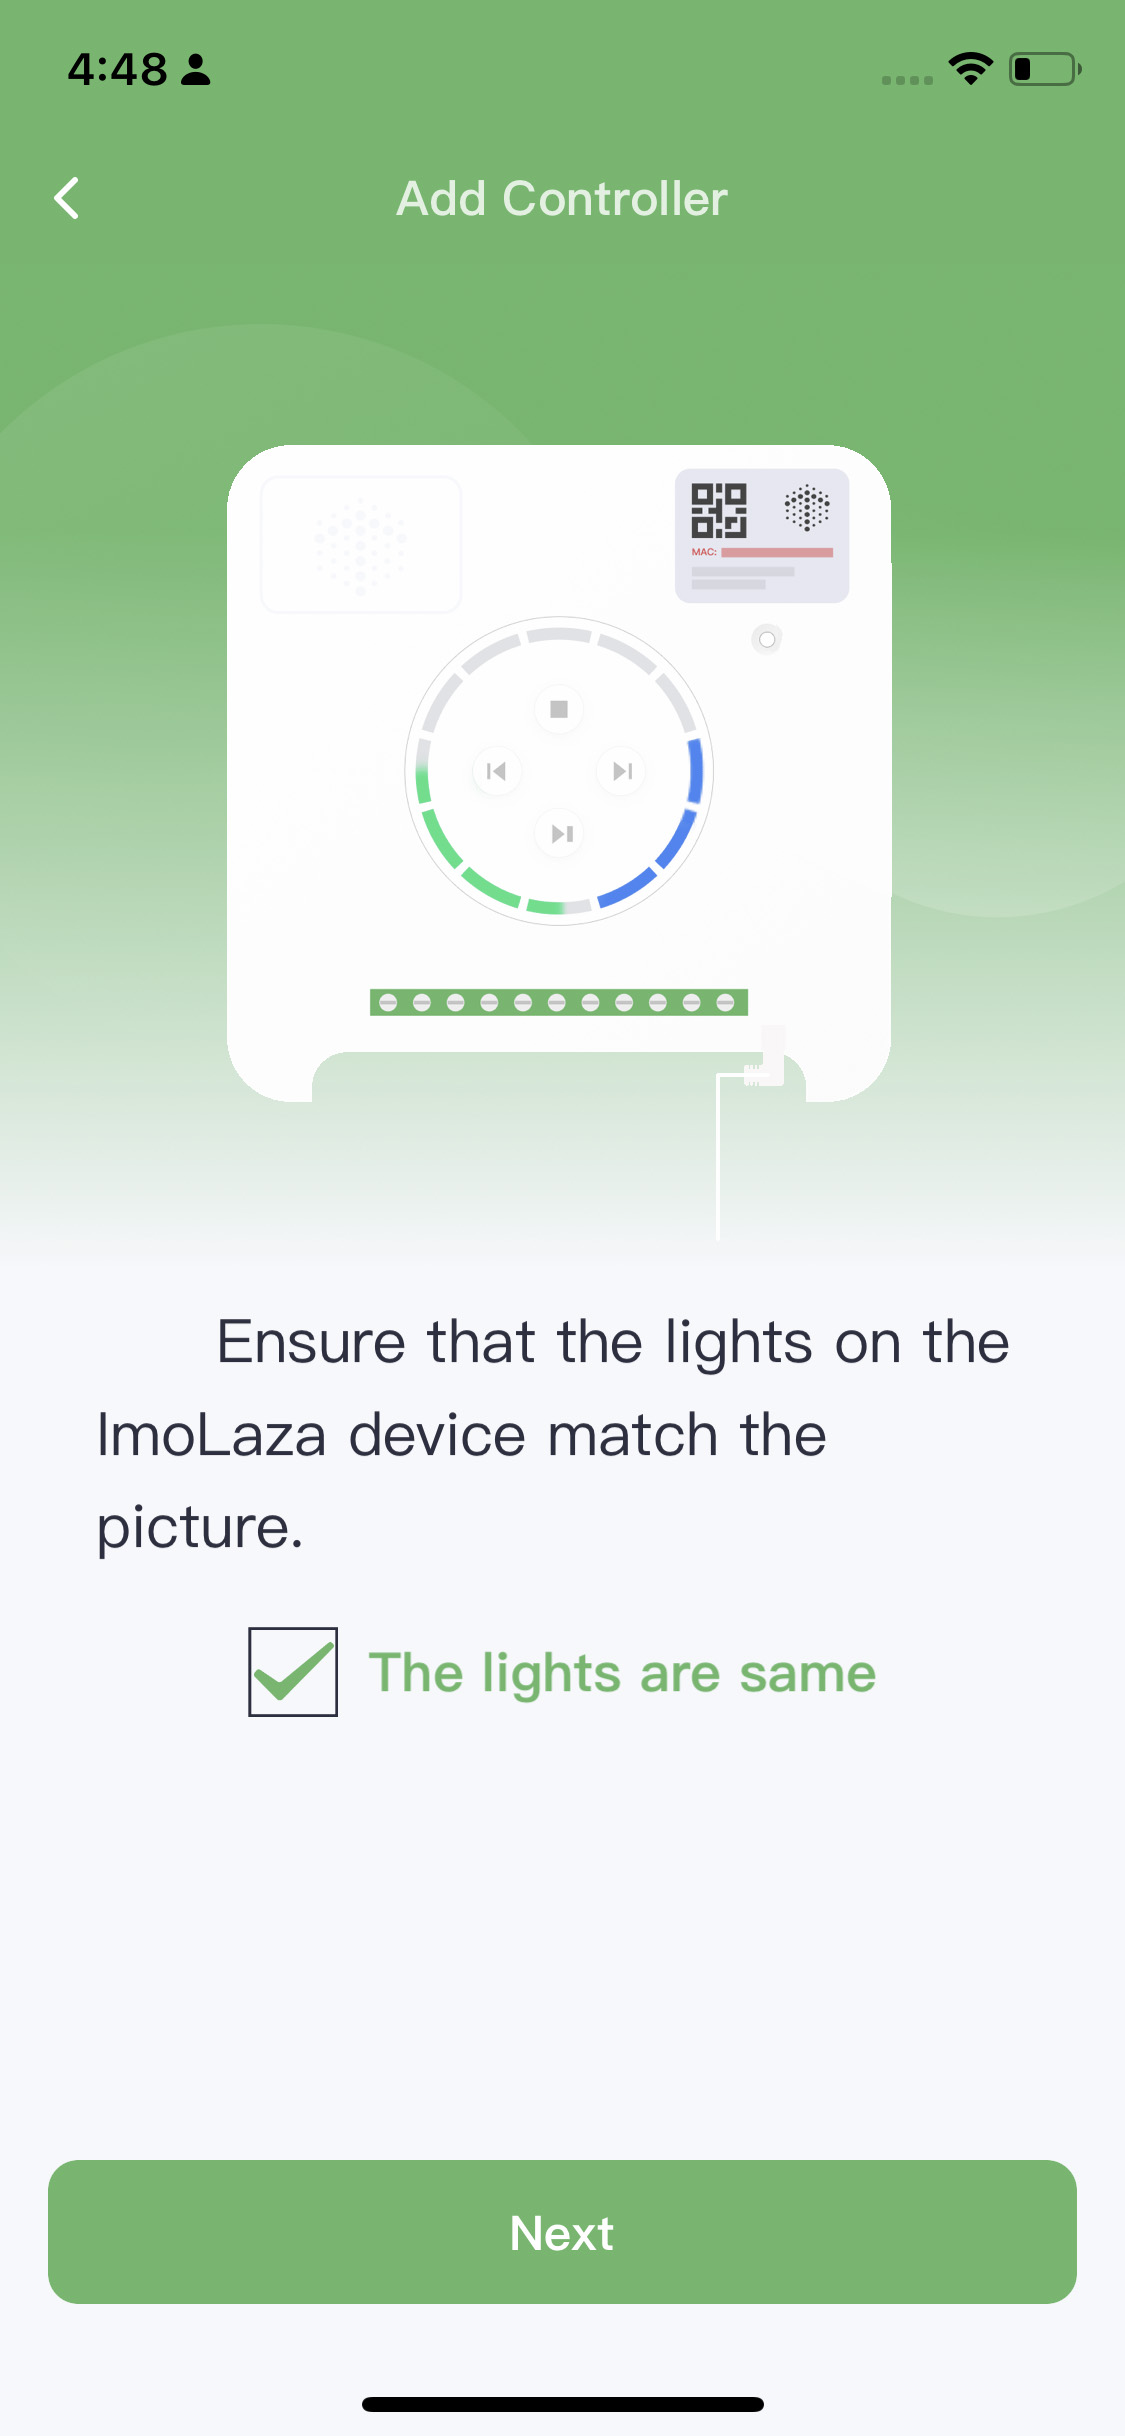
Power On Reset Match
iOS WiFi Connection
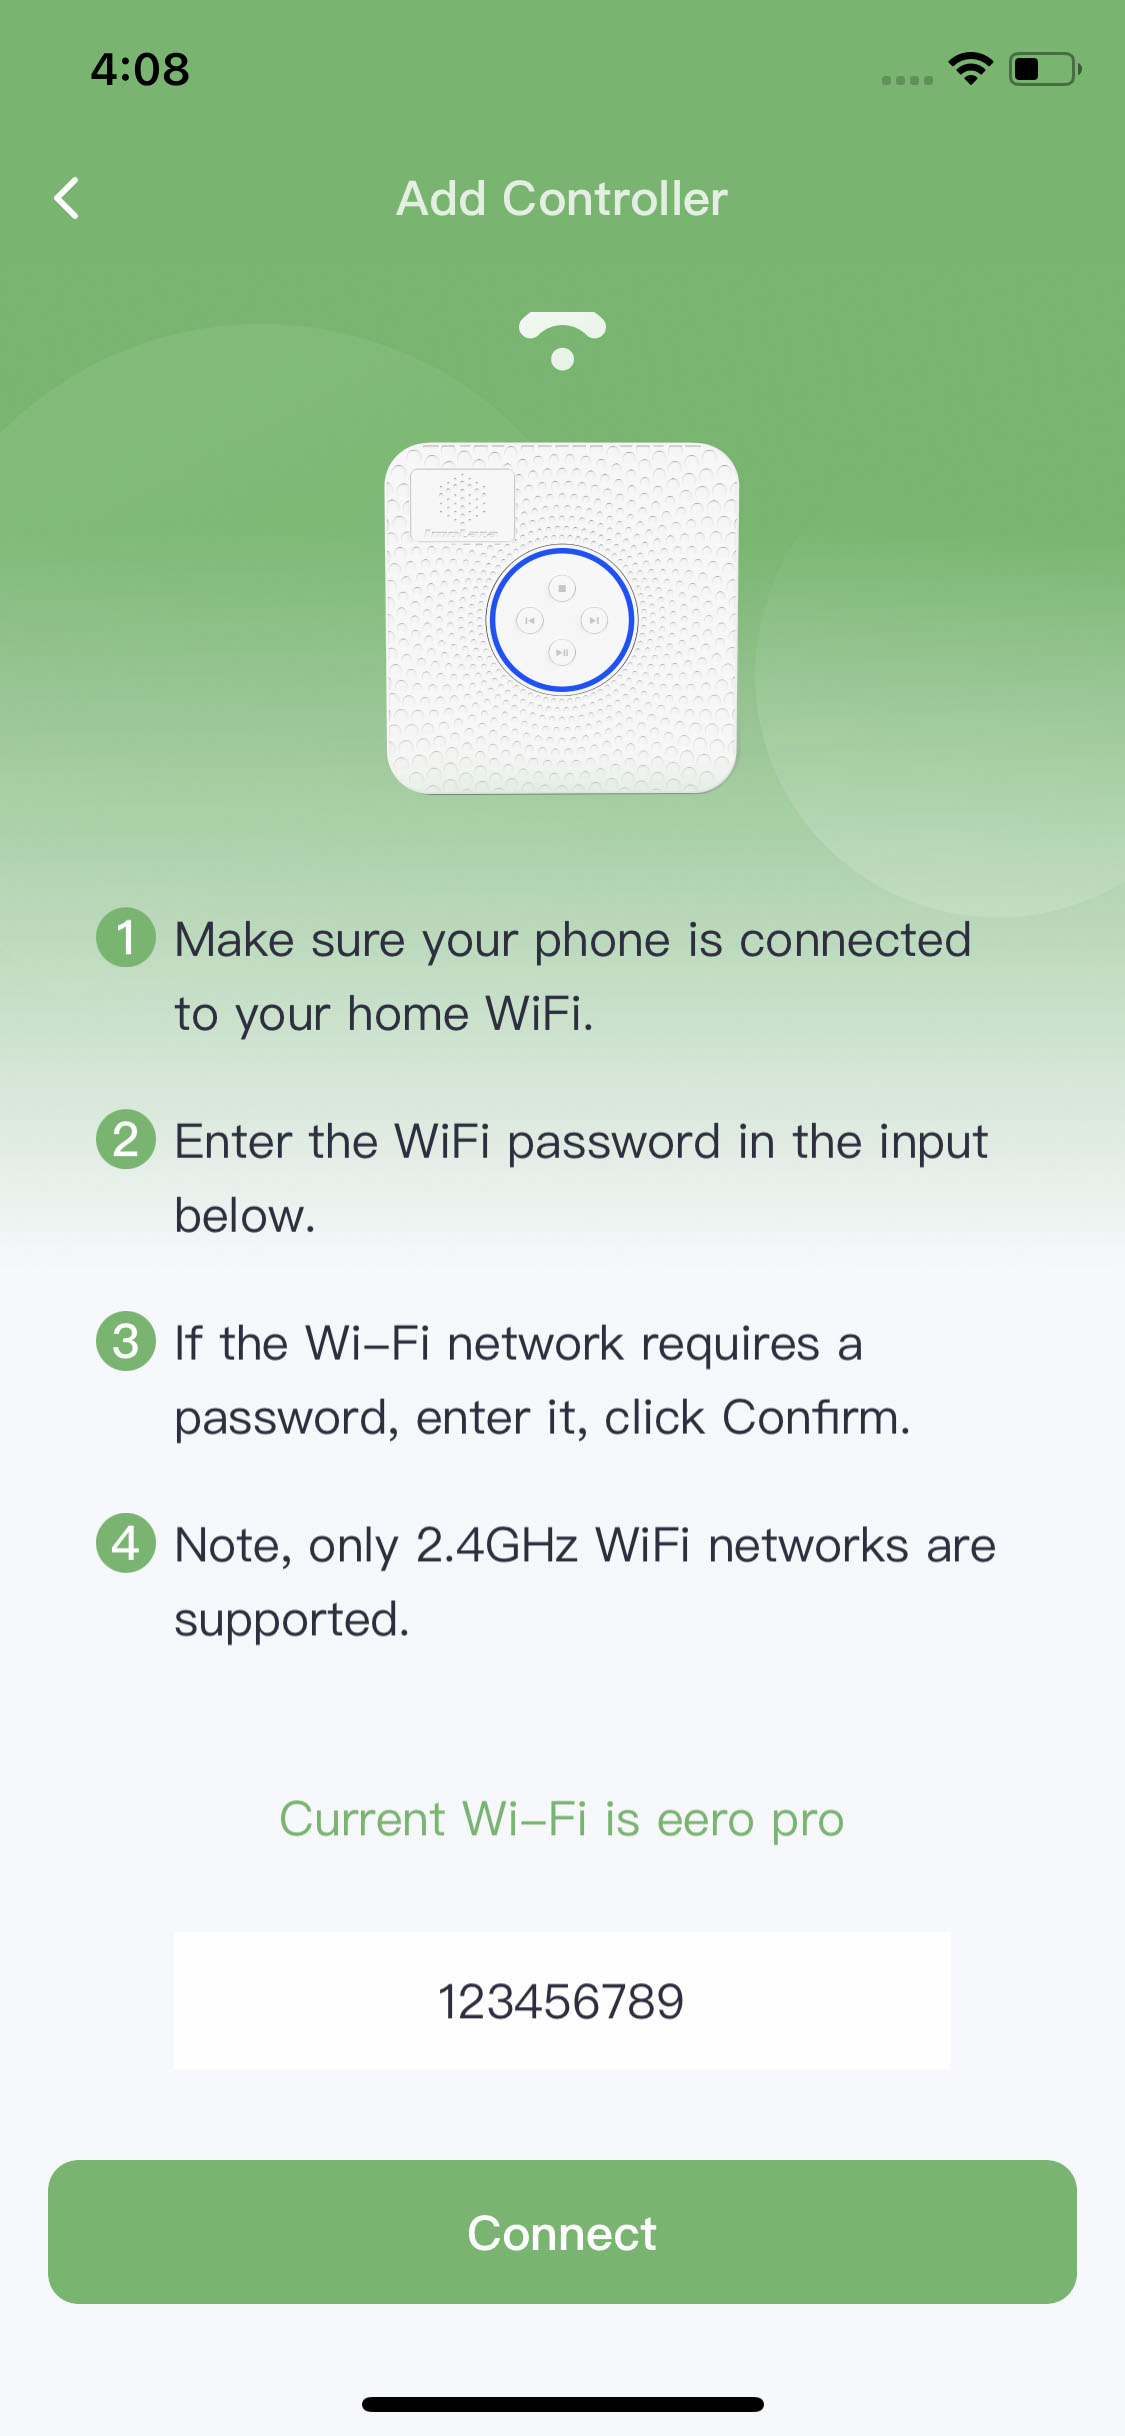
Step2: To connect the device to your home WiFi, please note that it only supports 2.4GHz networks. You can follow these two methods to establish the connection:
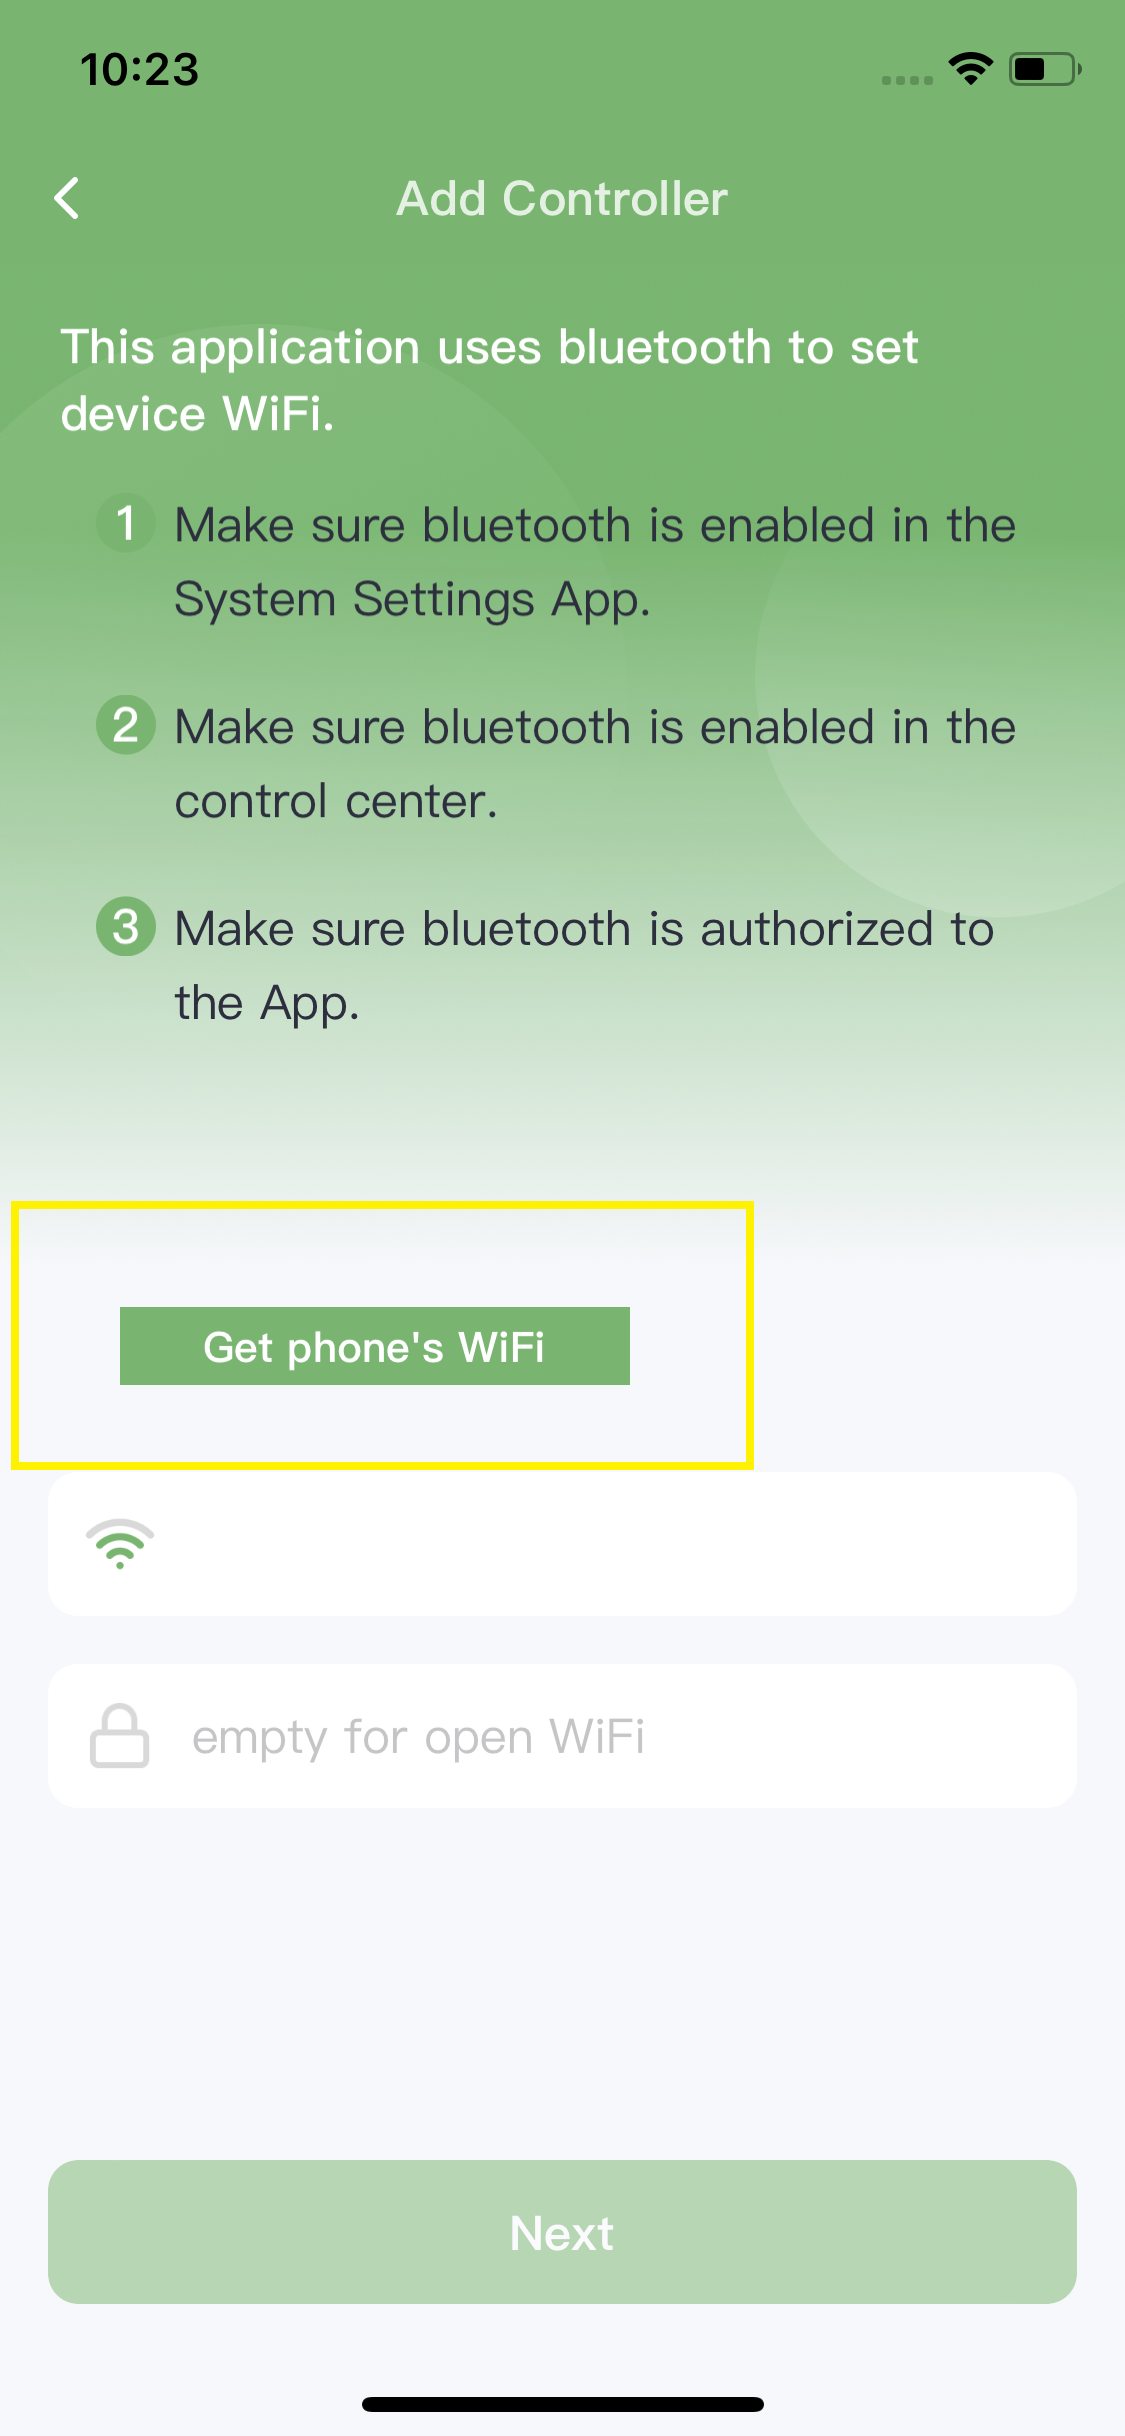
2.1 Enable Bluetooth in your phone settings.

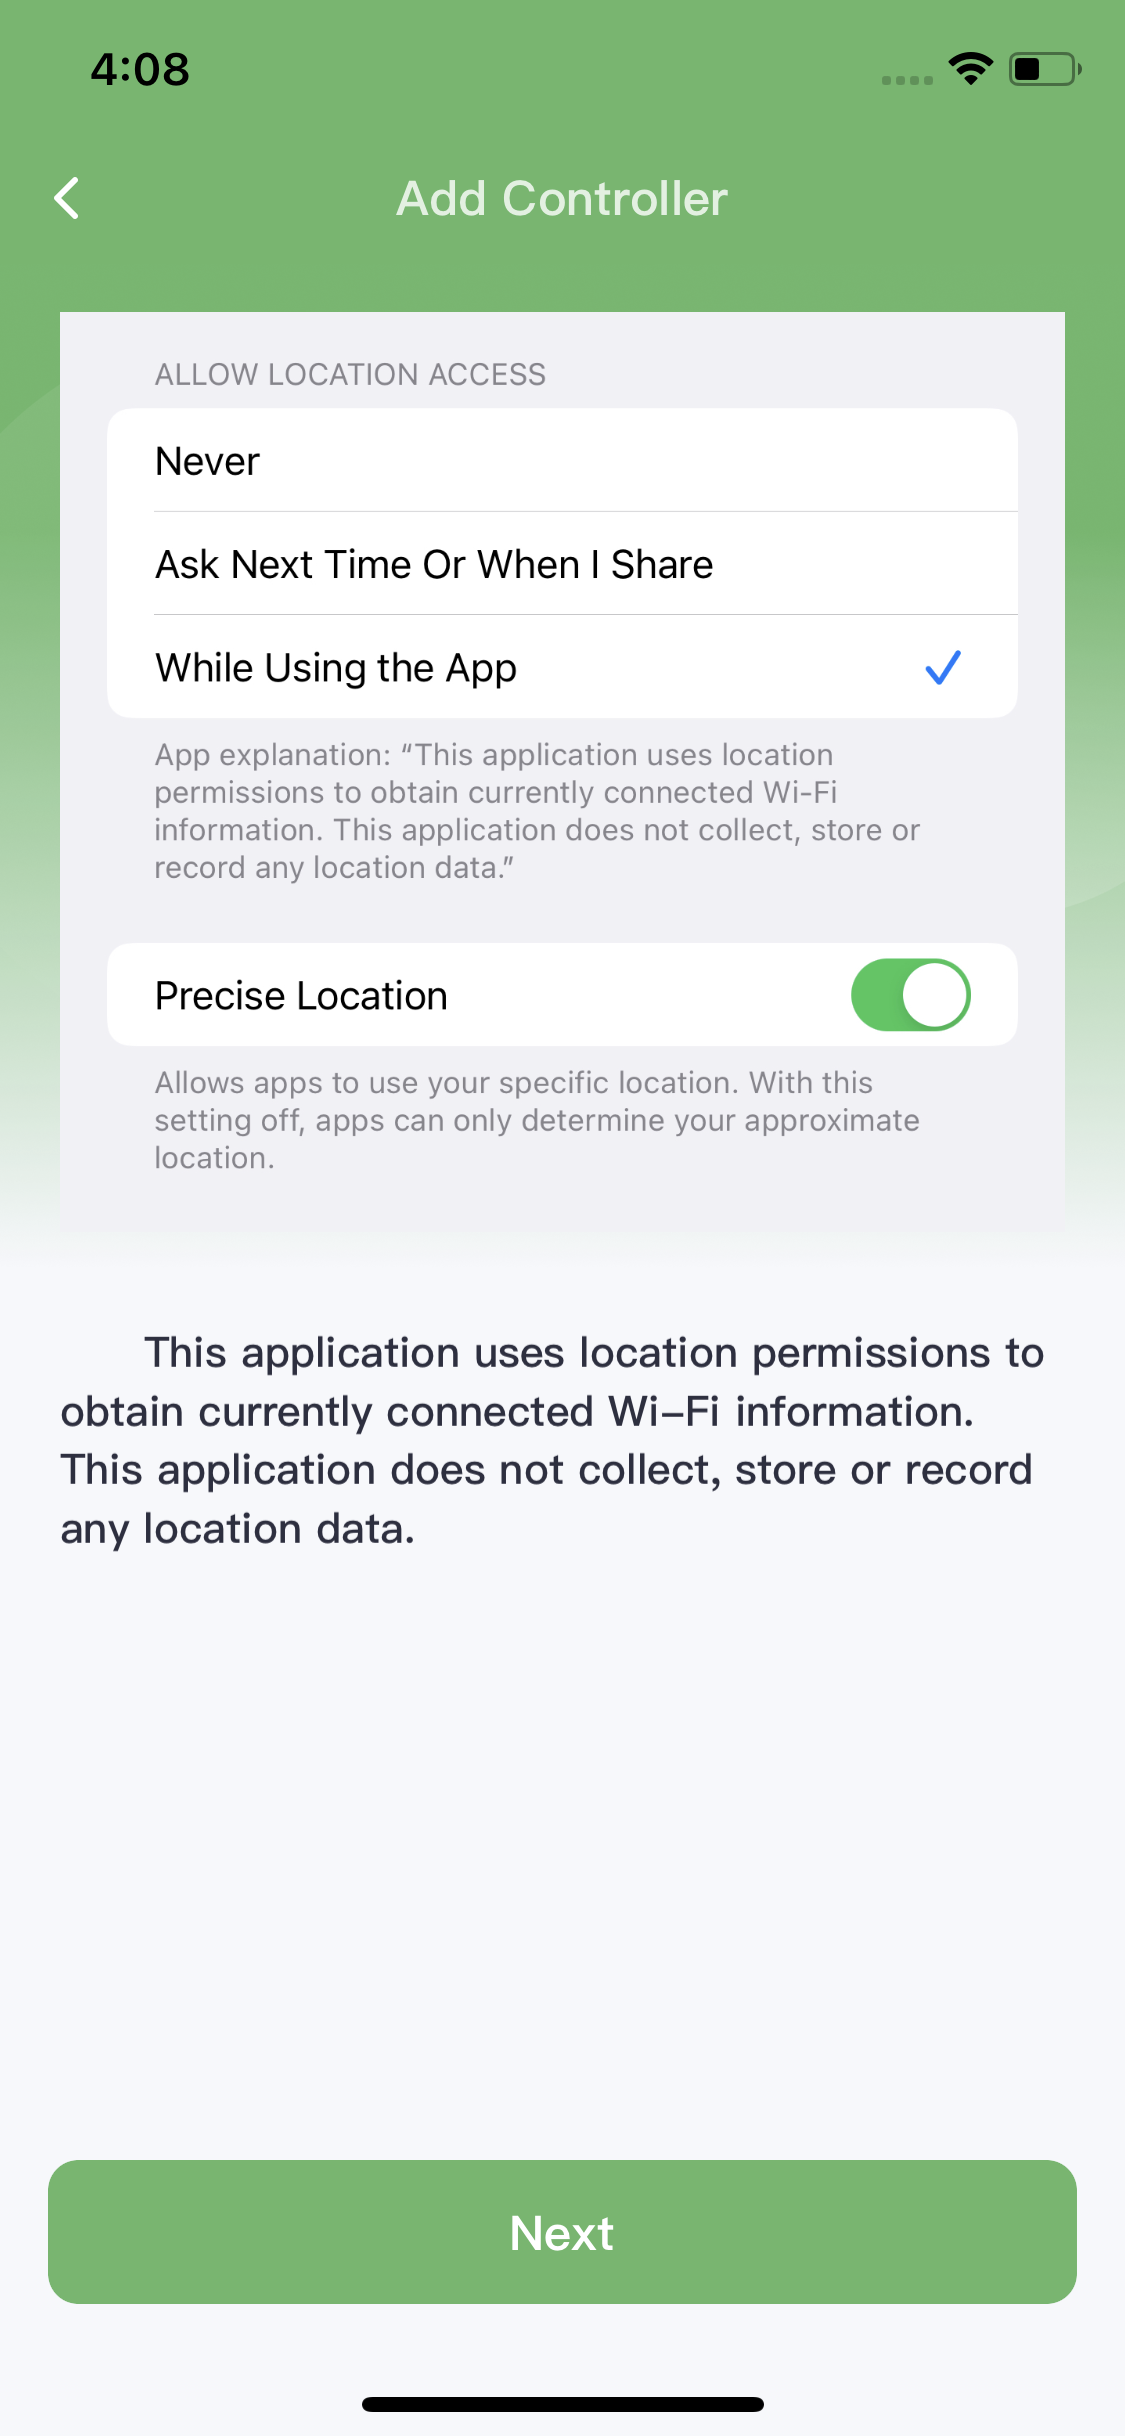
2.2 Enable location services in your phone settings under "Privacy & Security" as the controller needs to detect nearby available WiFi networks.

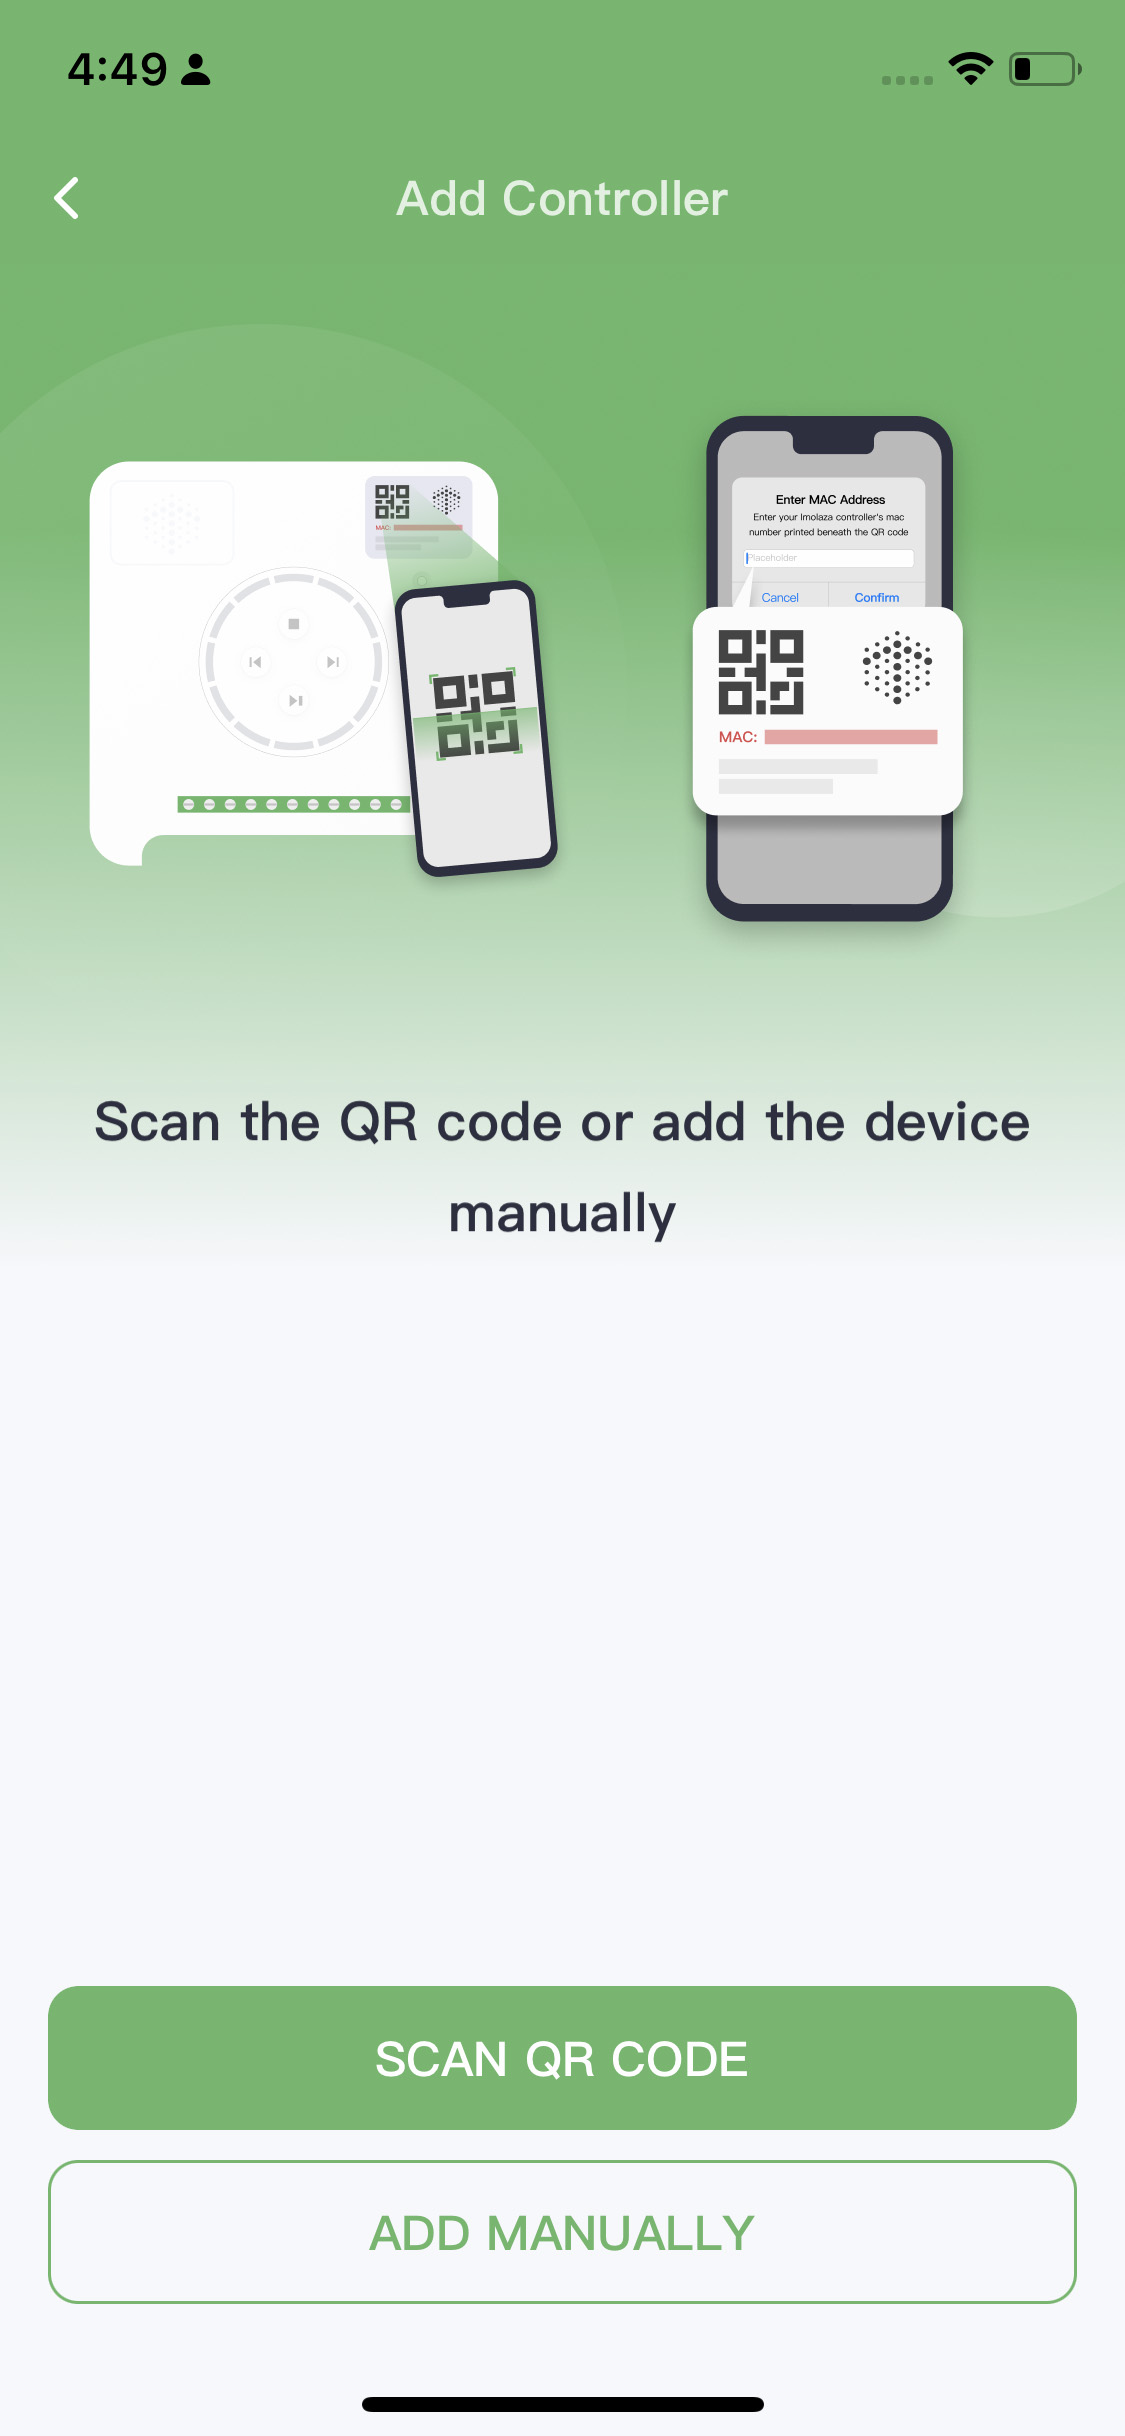
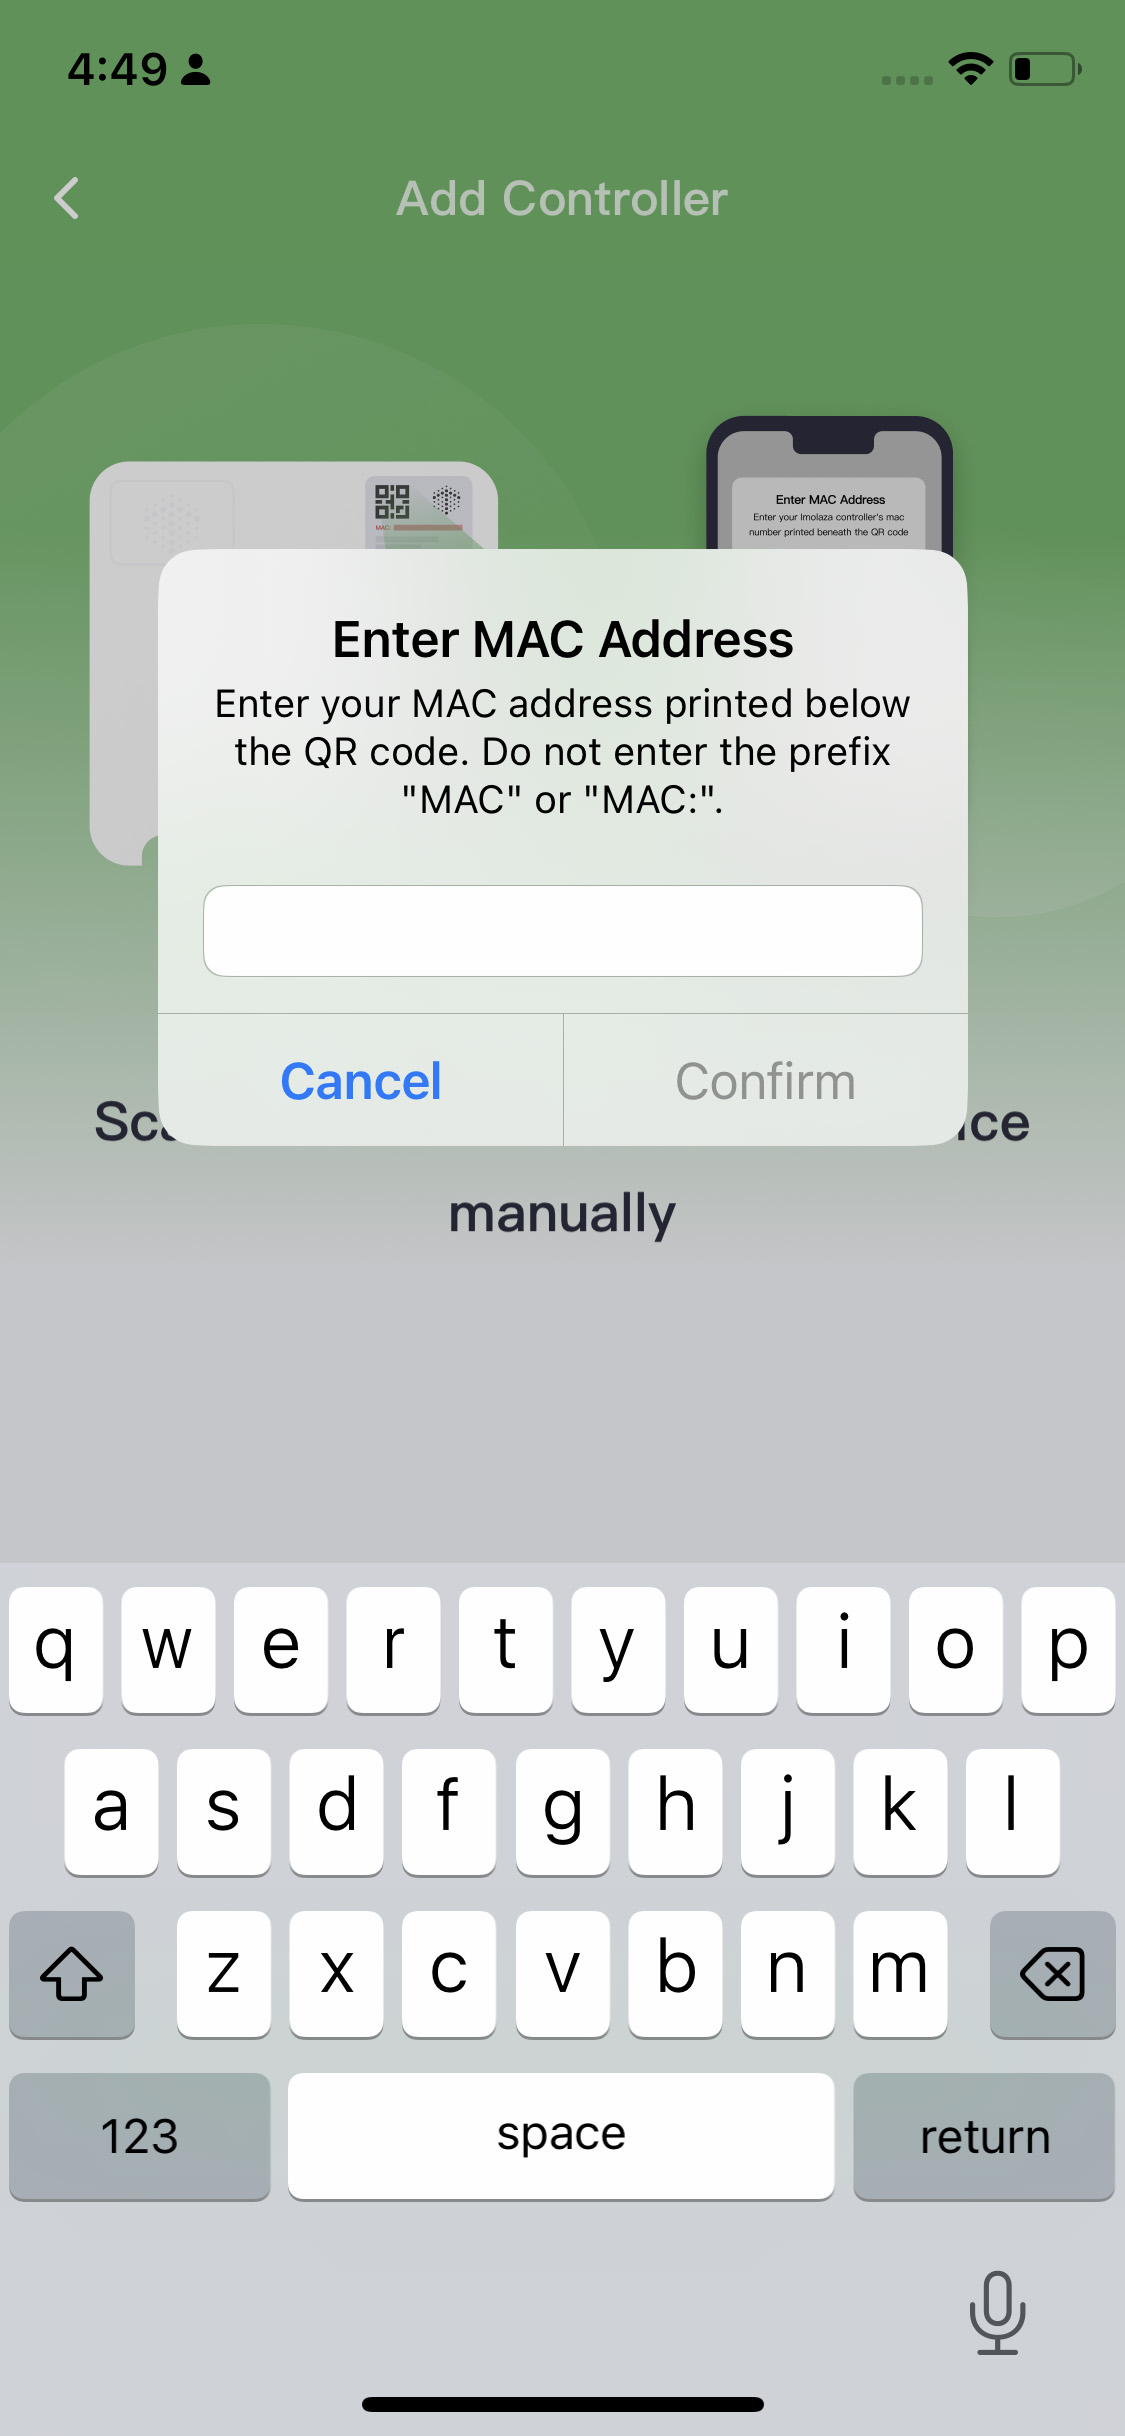
2.3 Scan the QR code or input the MAC address manually.
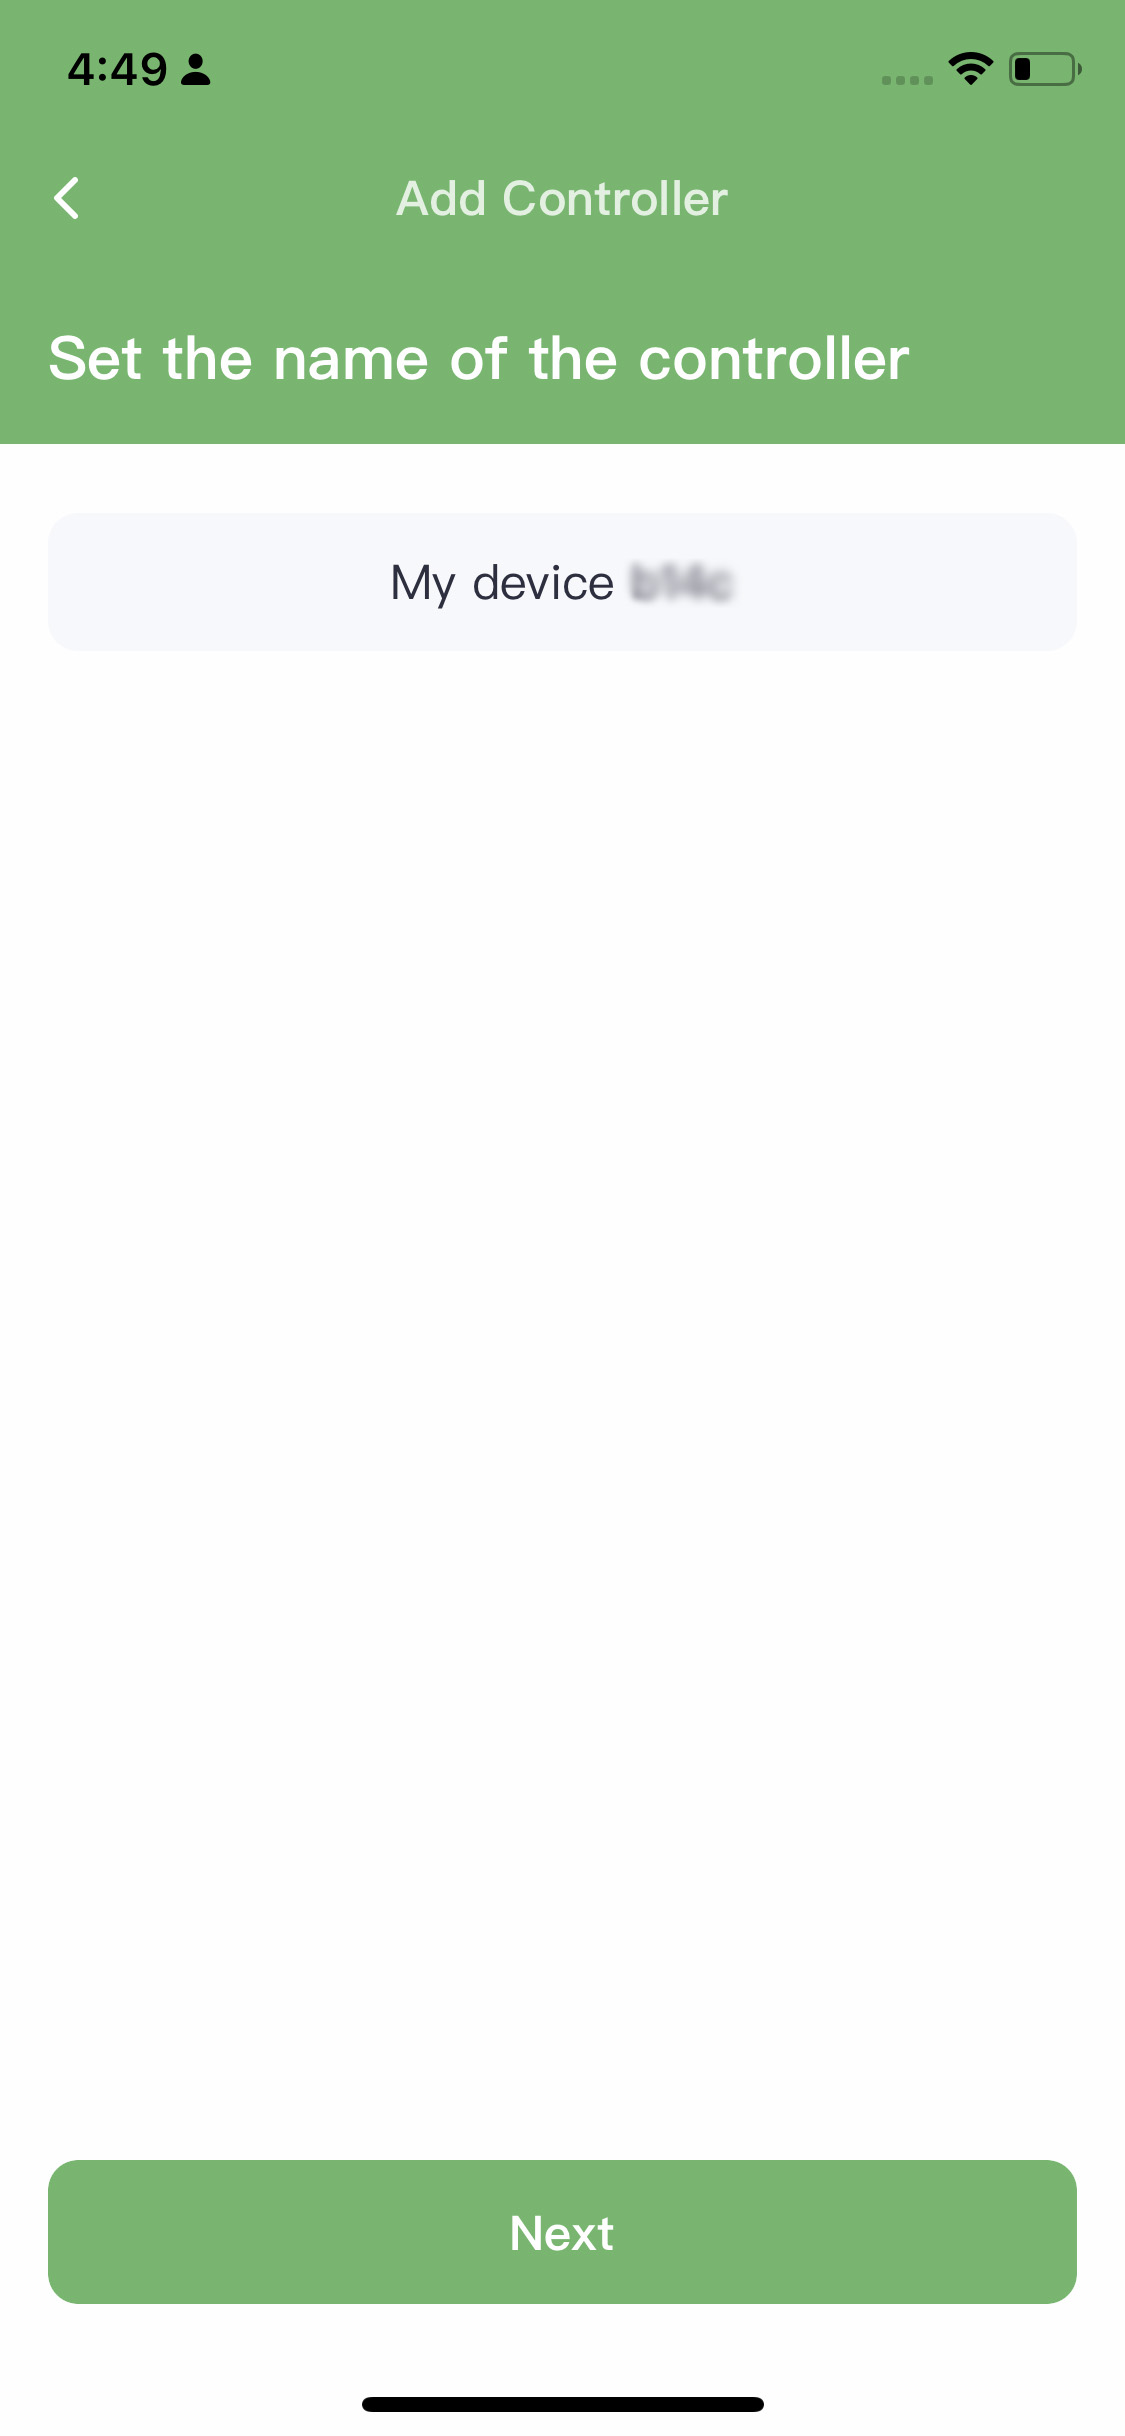
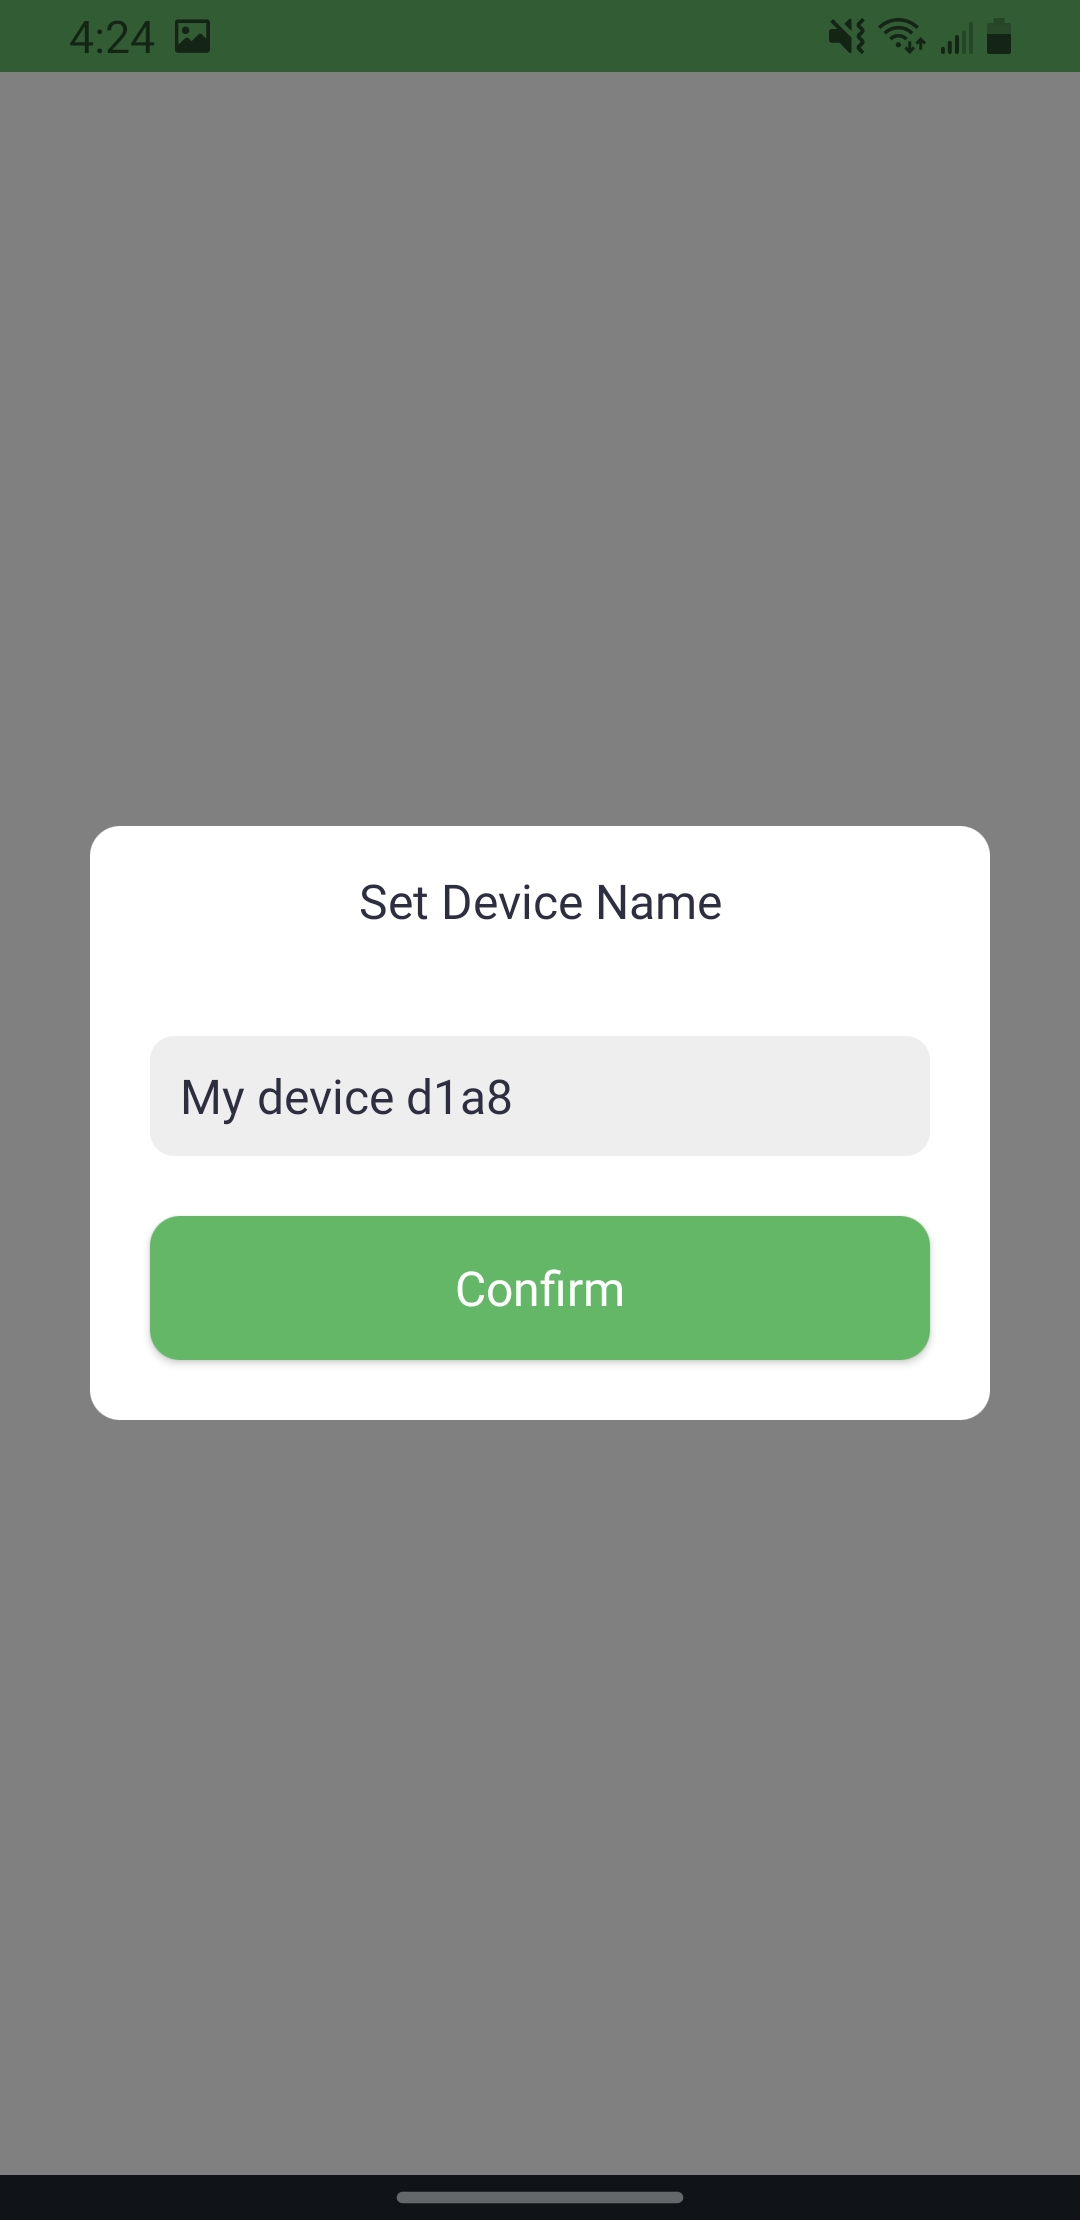
2.4 Name your controller.
2.5 Manually enter your home WiFi name and password, then click "Next" to initiate the connection.
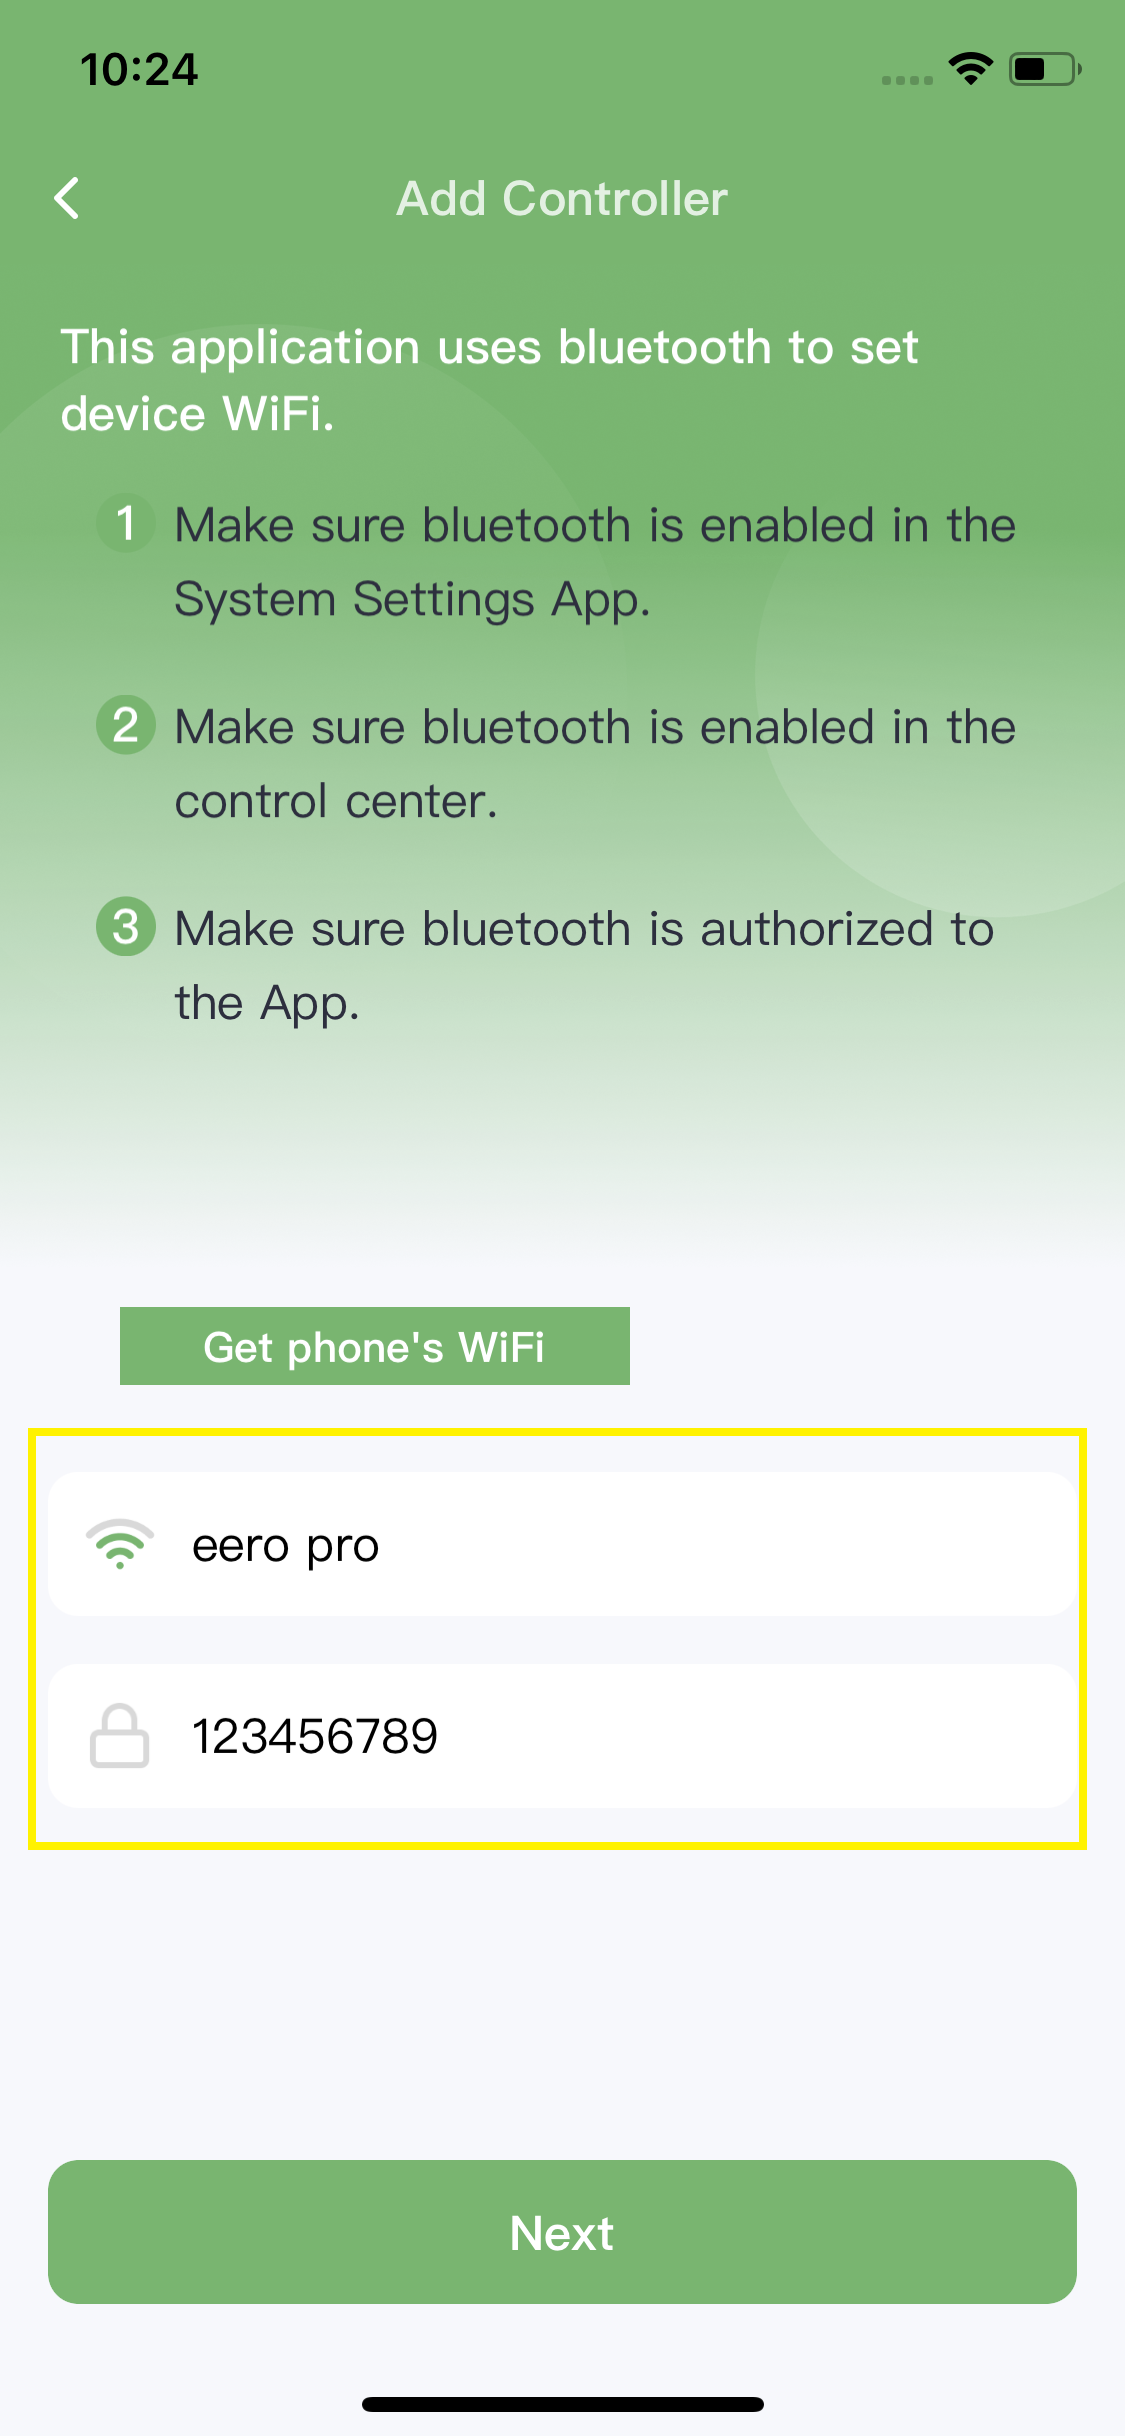
2.6 If your home WiFi name is complex, connect your phone to your home 2.4GHz WiFi first, and then click "Get phone's WiFi" to let the device automatically detect your phone's connection. Enter your home WiFi password, then click "Next" to start the connection.
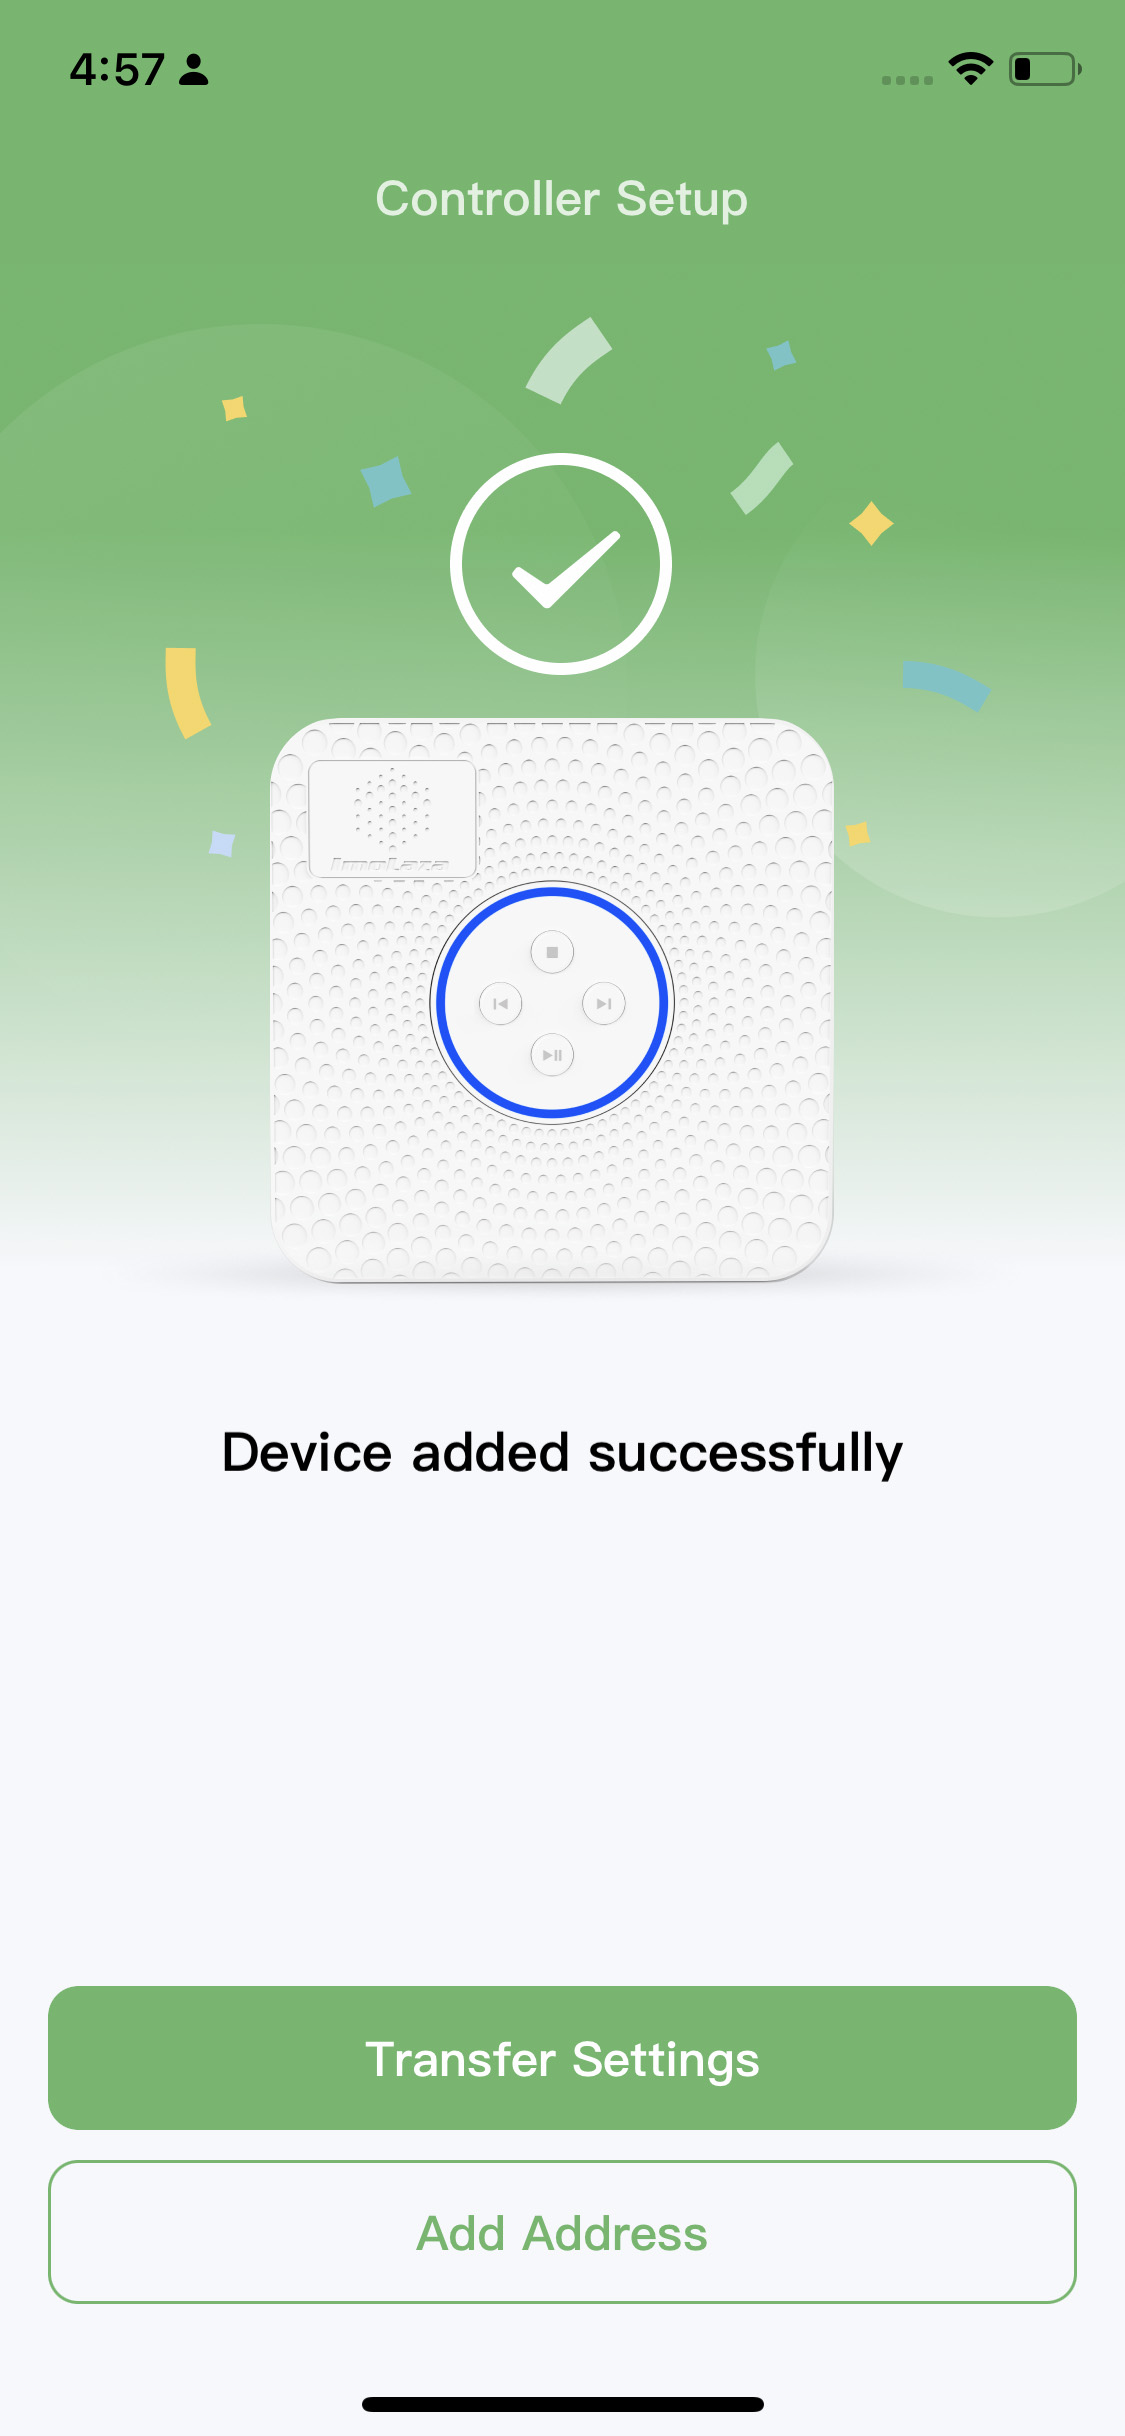
Step3: If you get this screen, it means that you have already added the controller to your account.
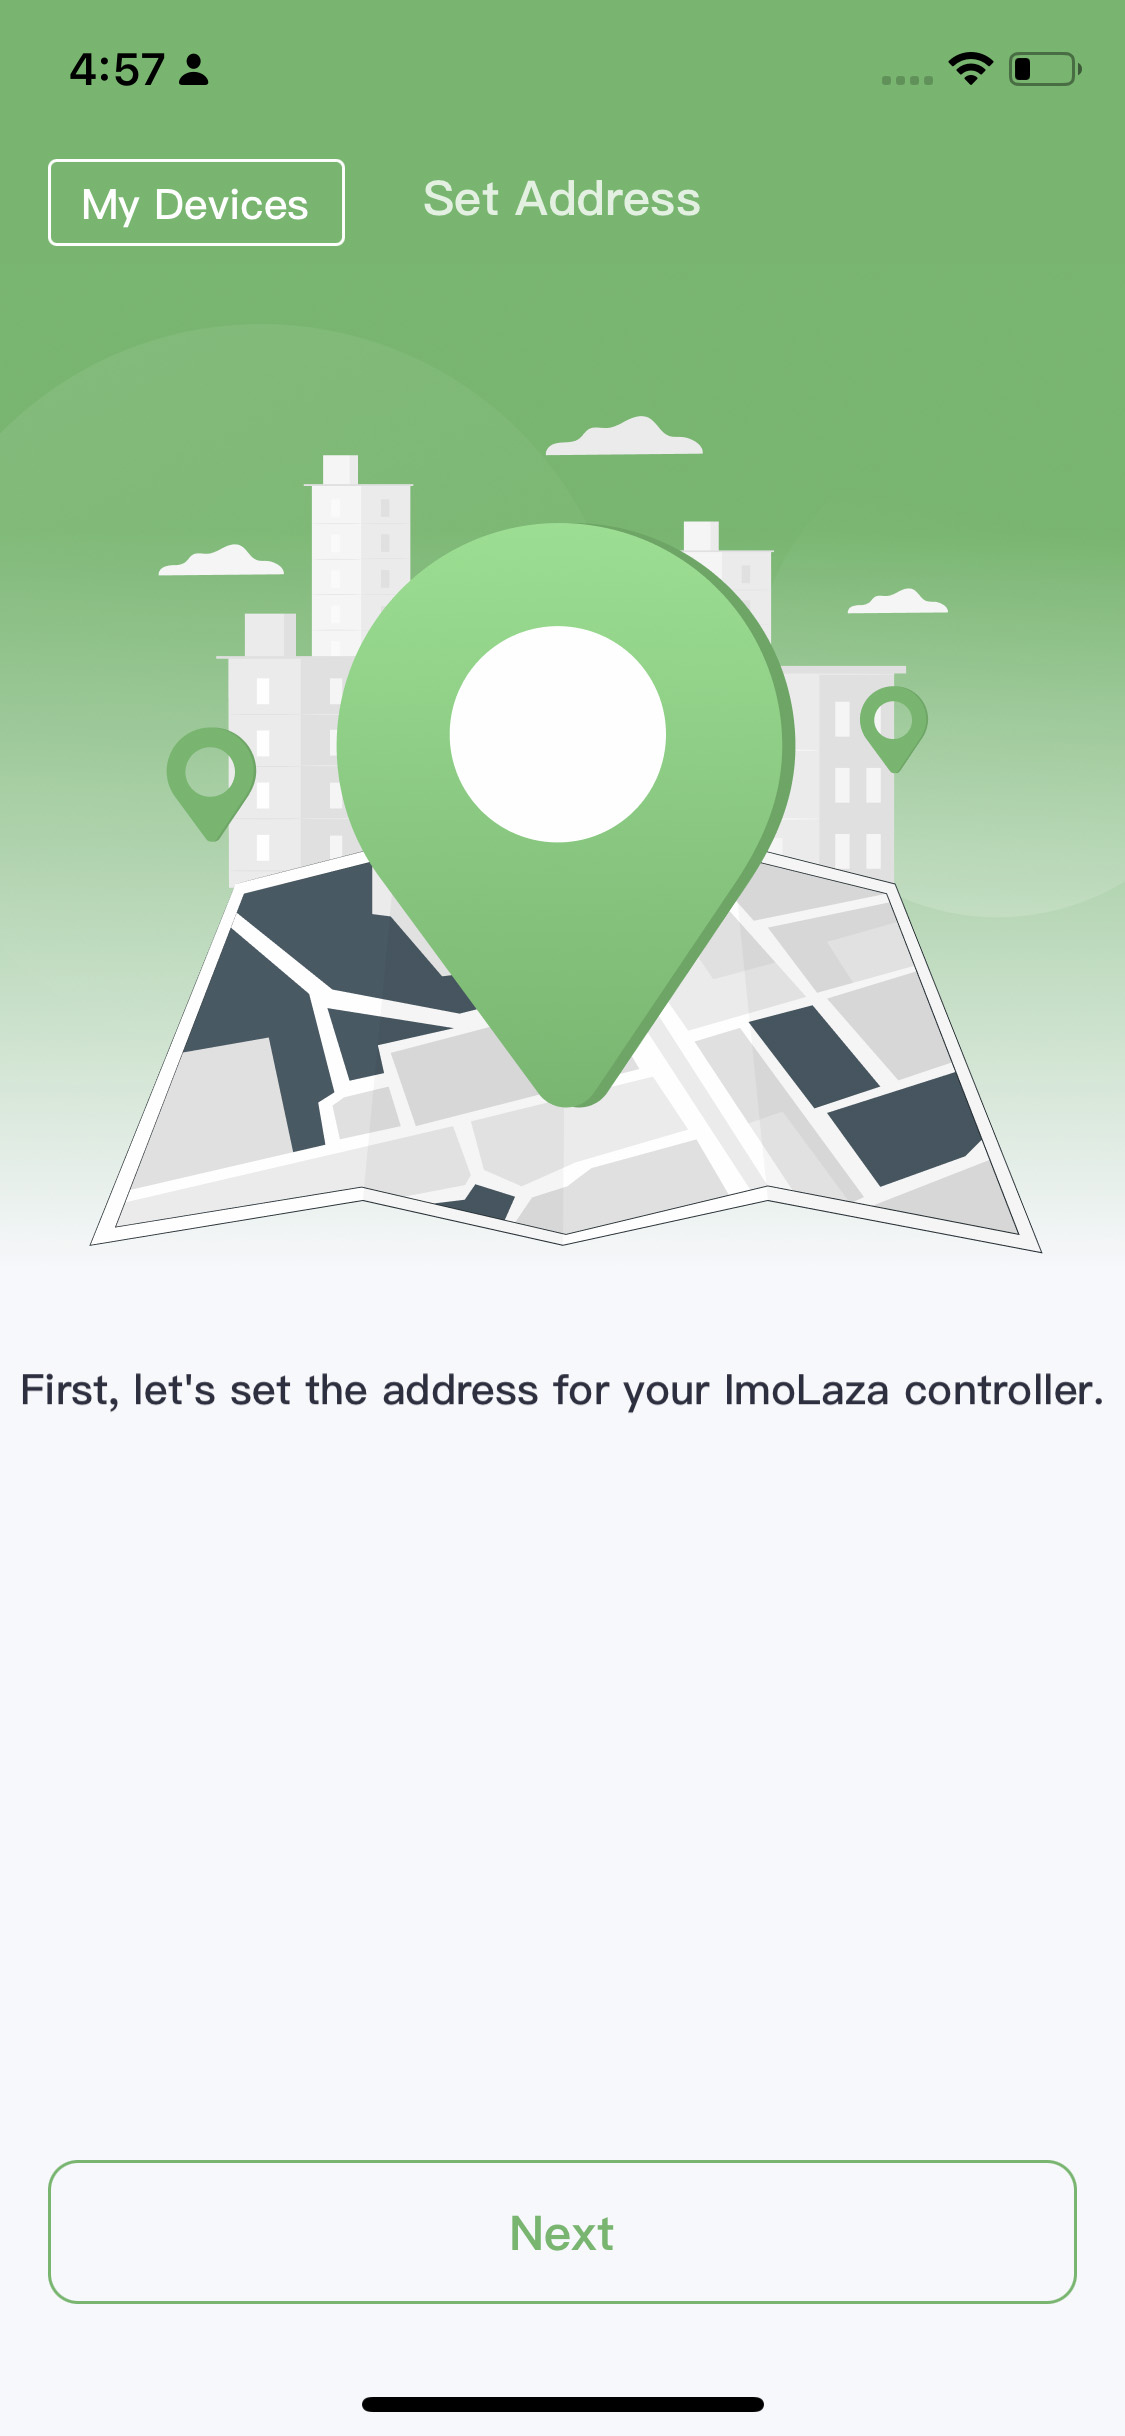
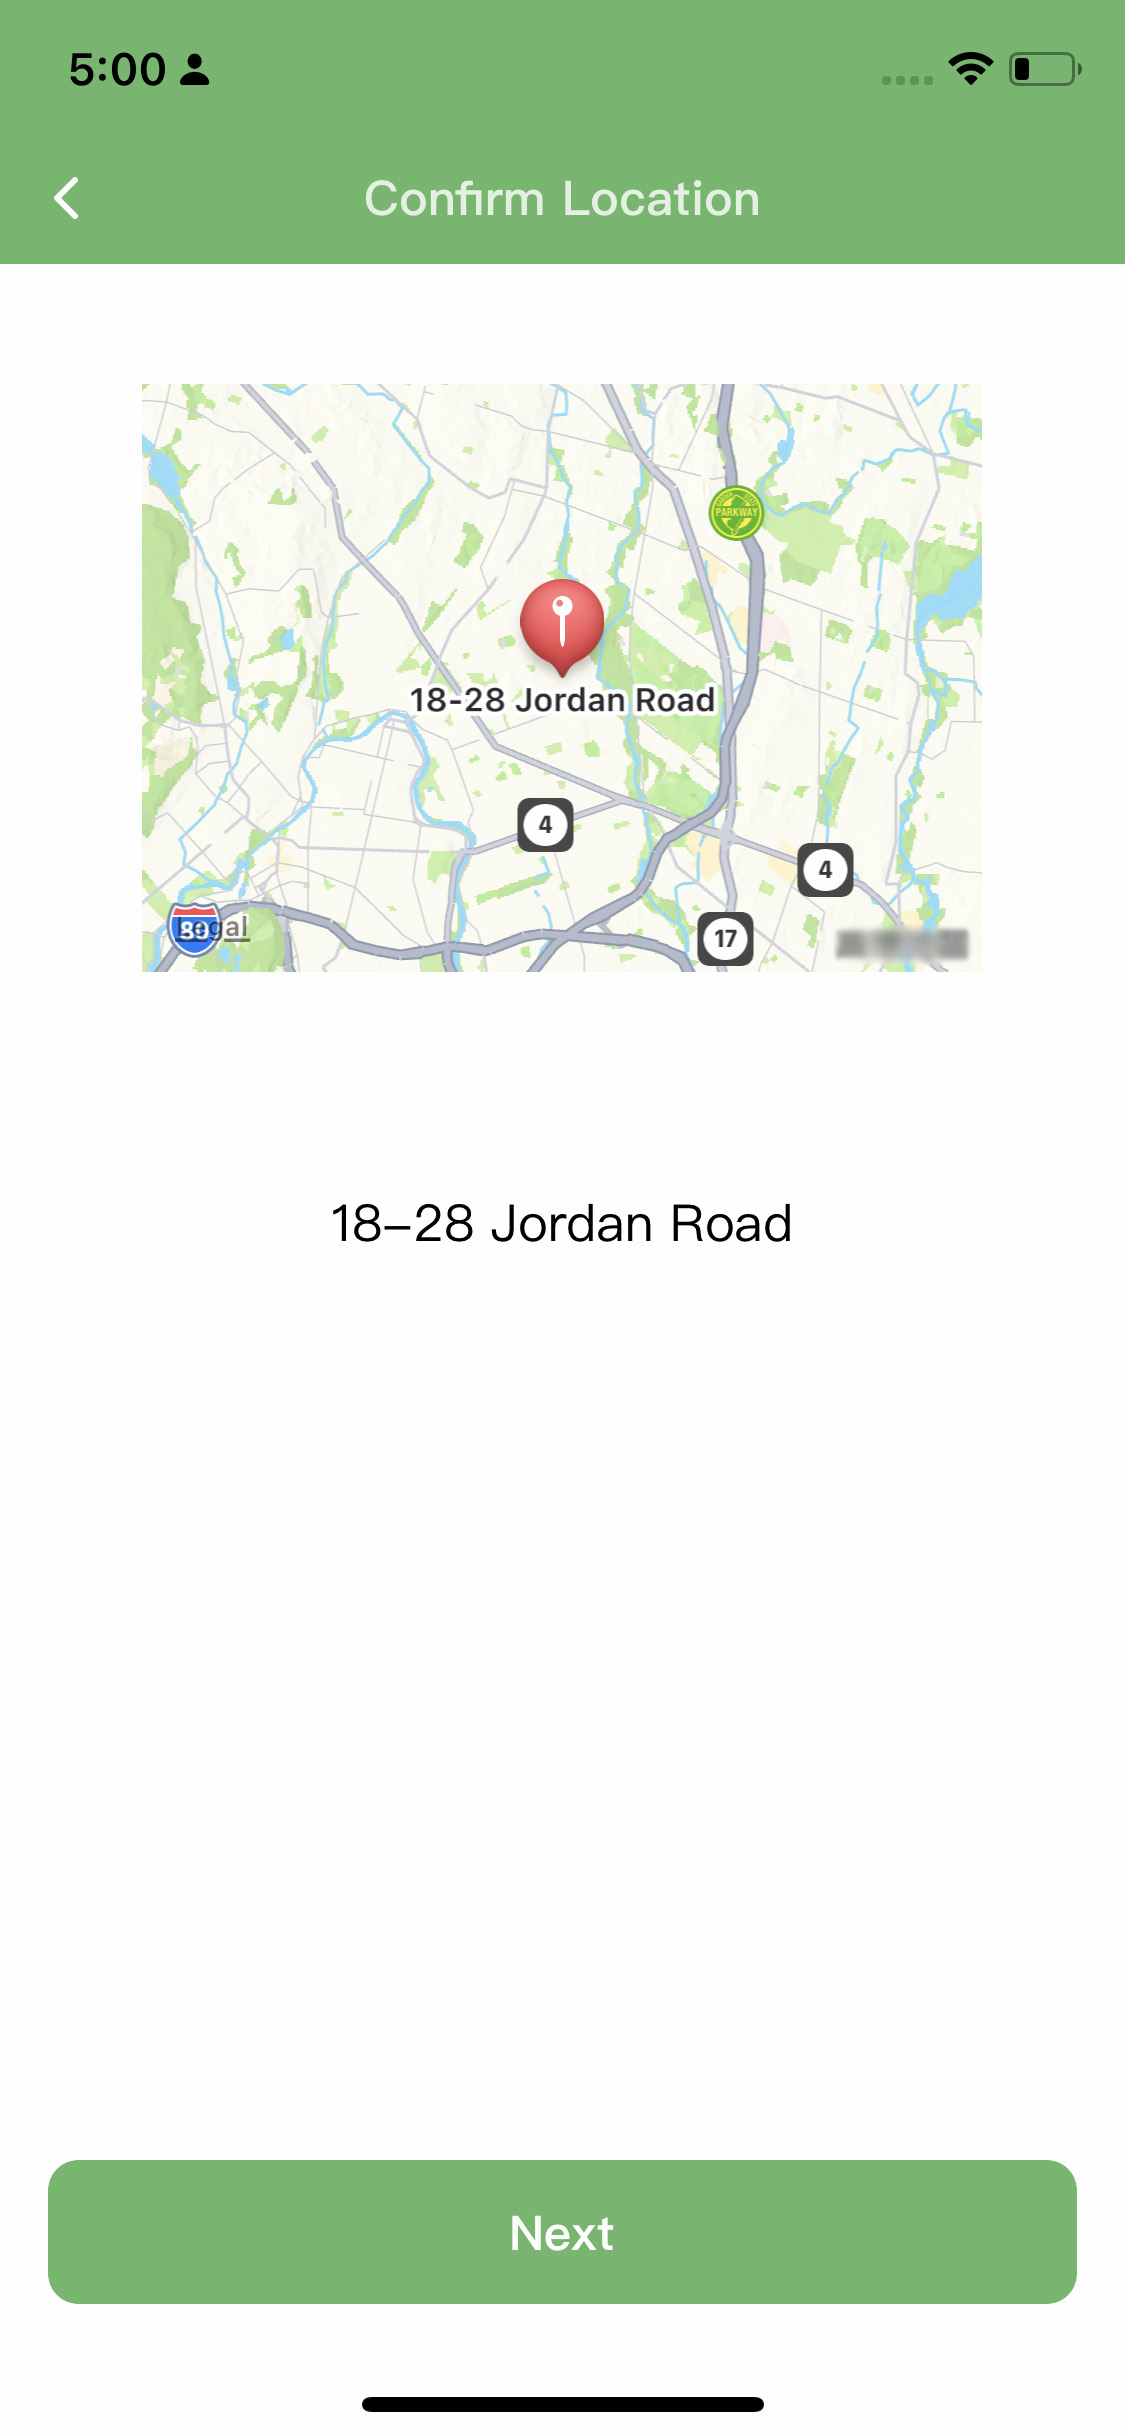
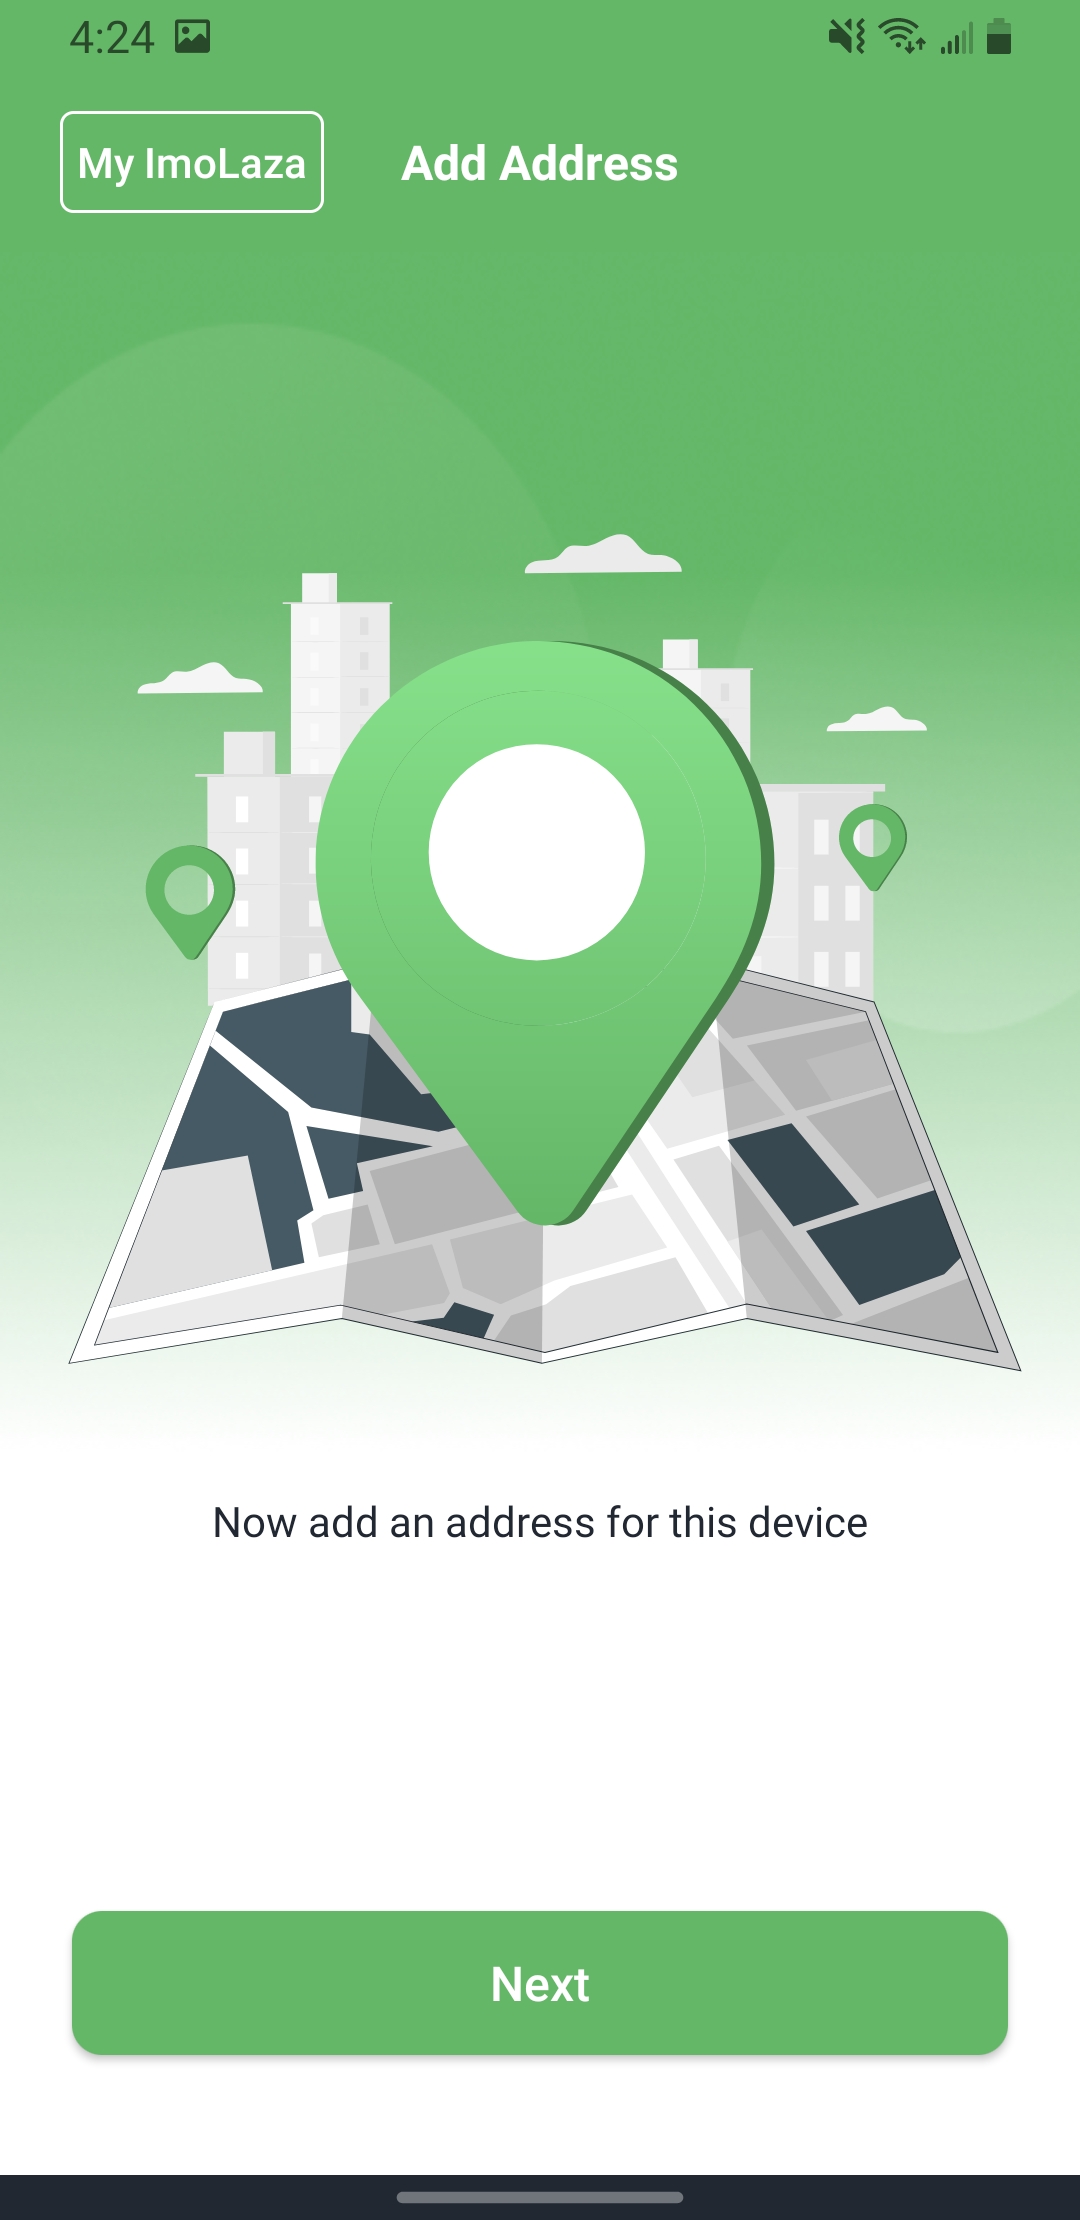
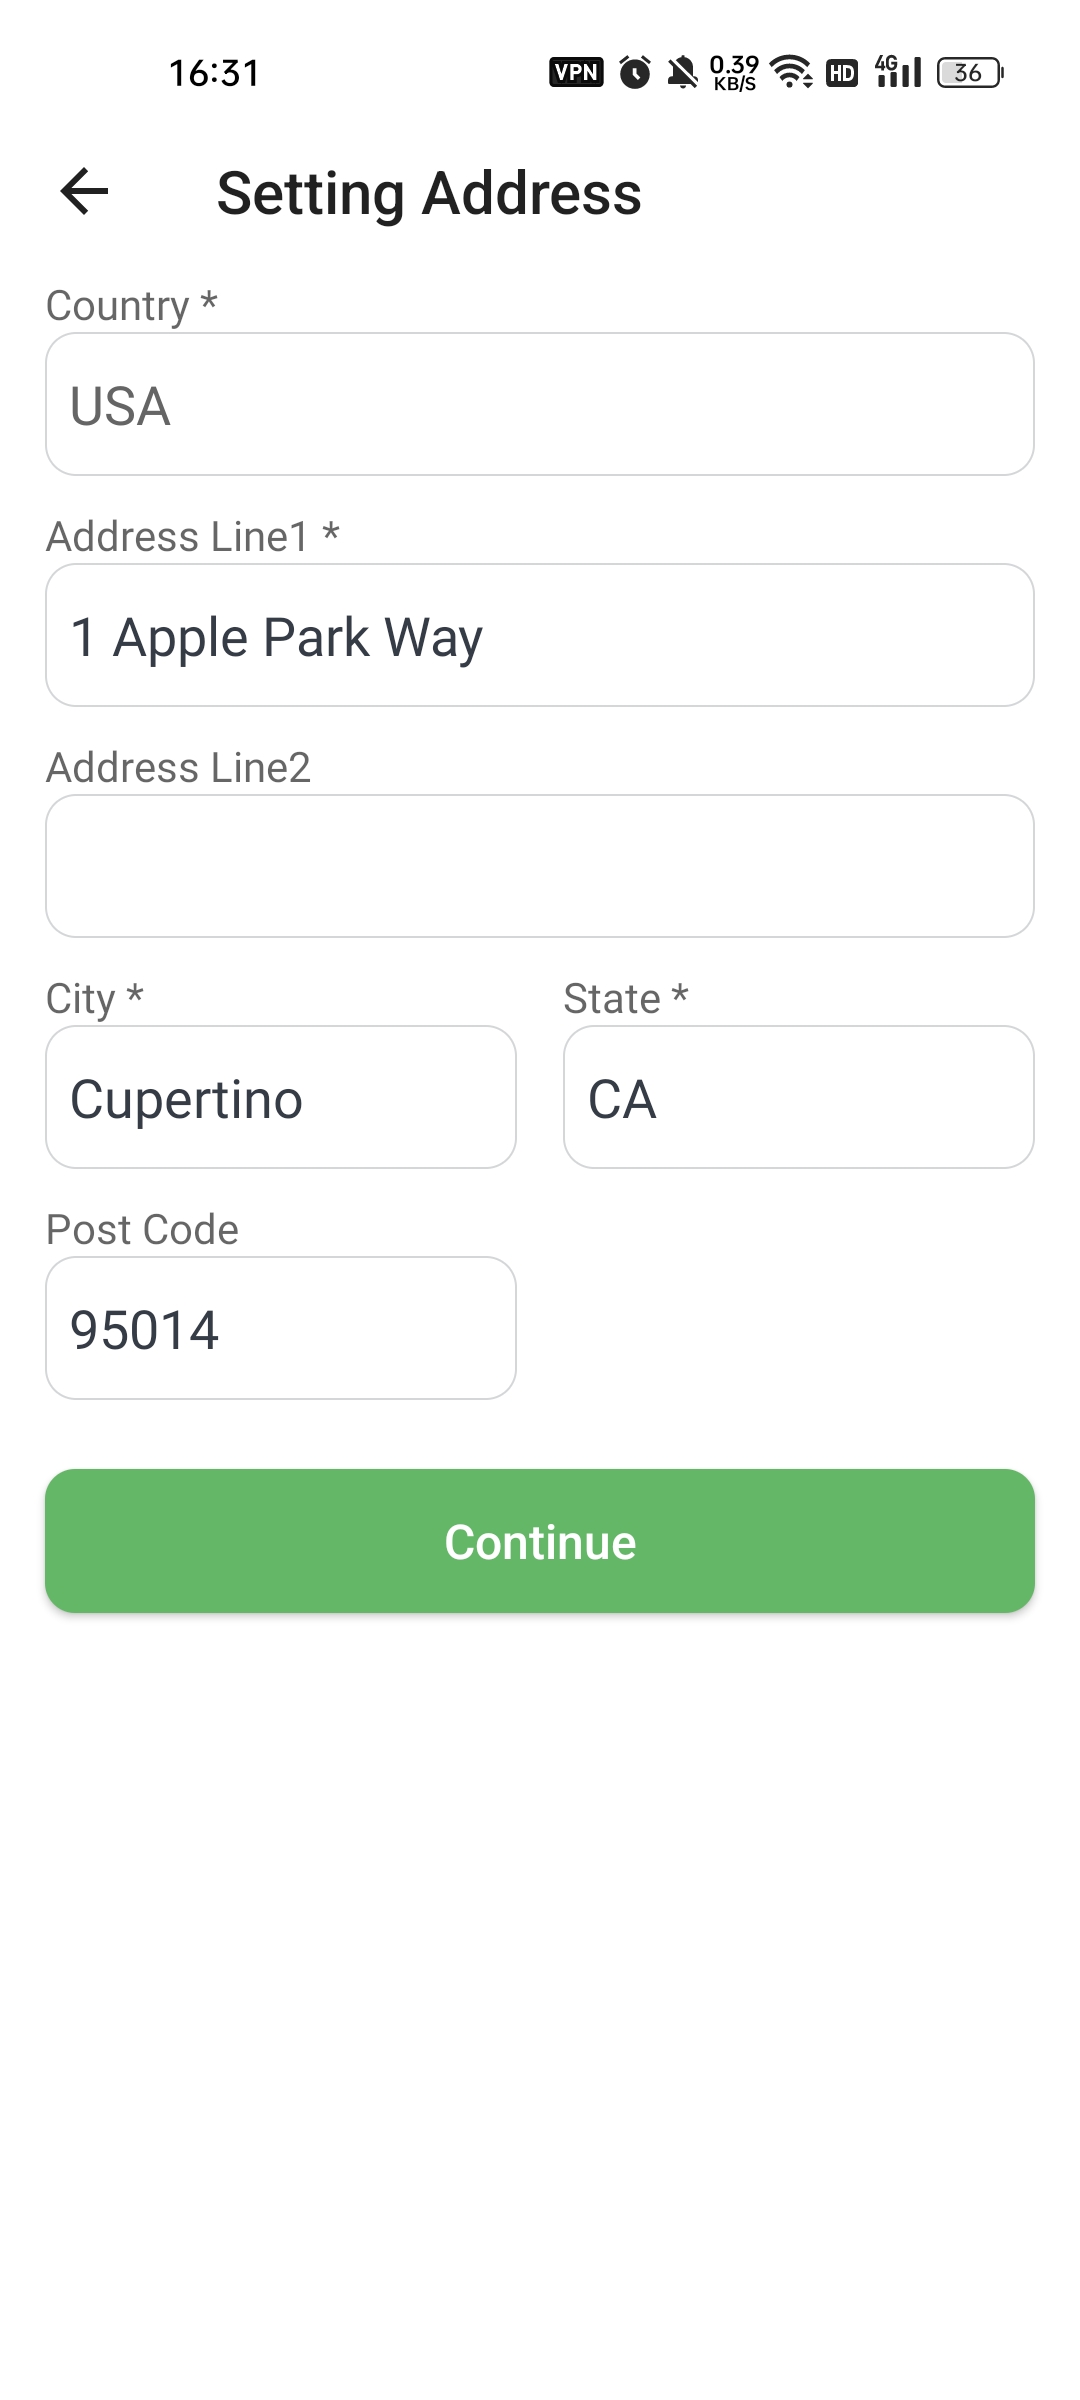
Step4: Set the address, the more accurate, the better.

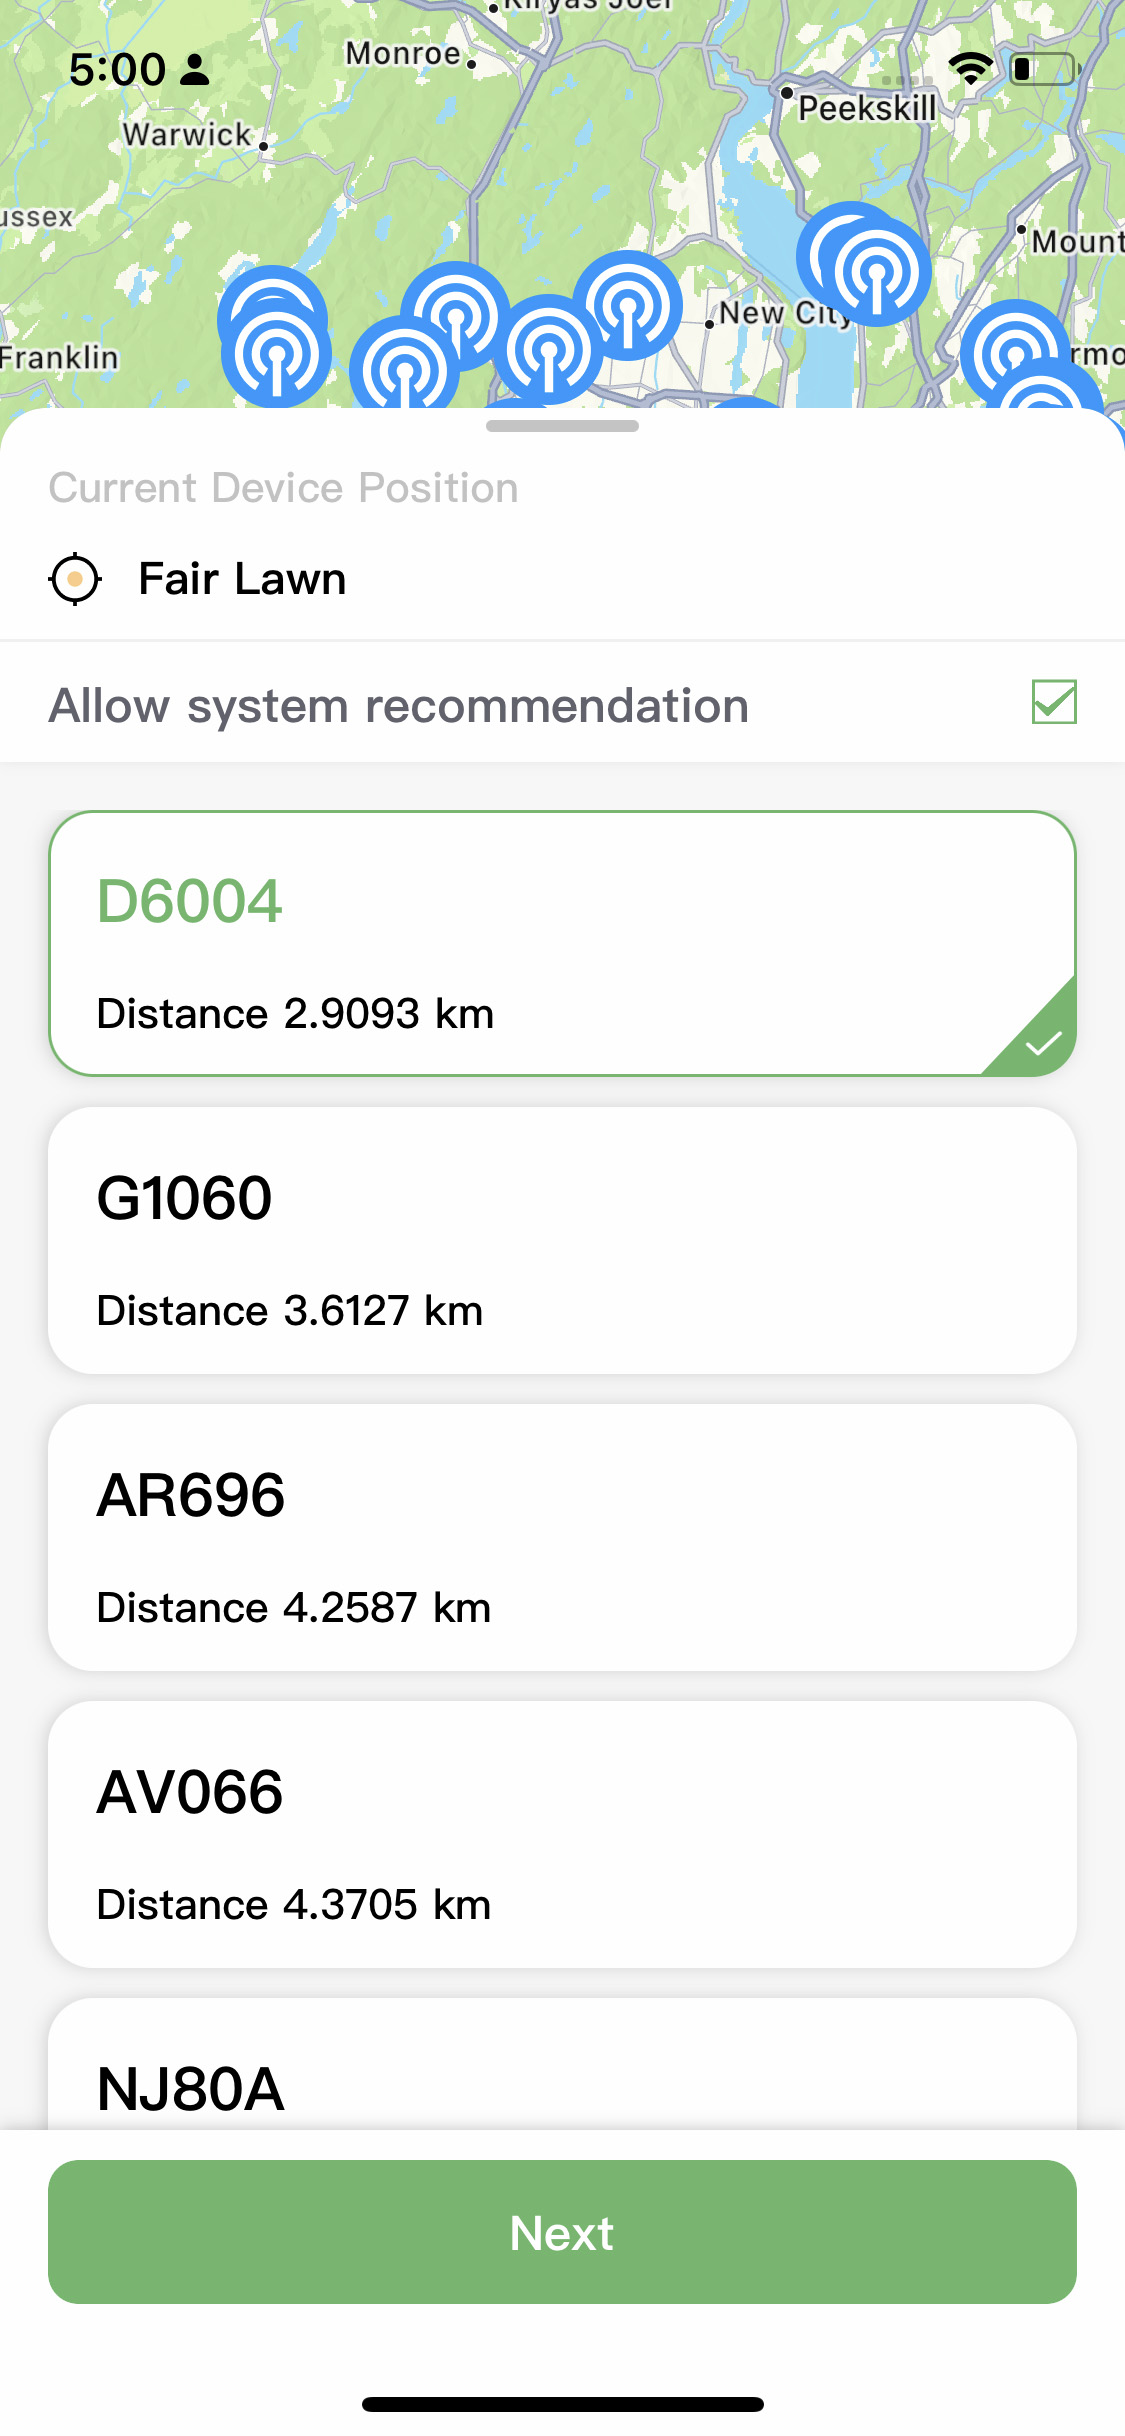
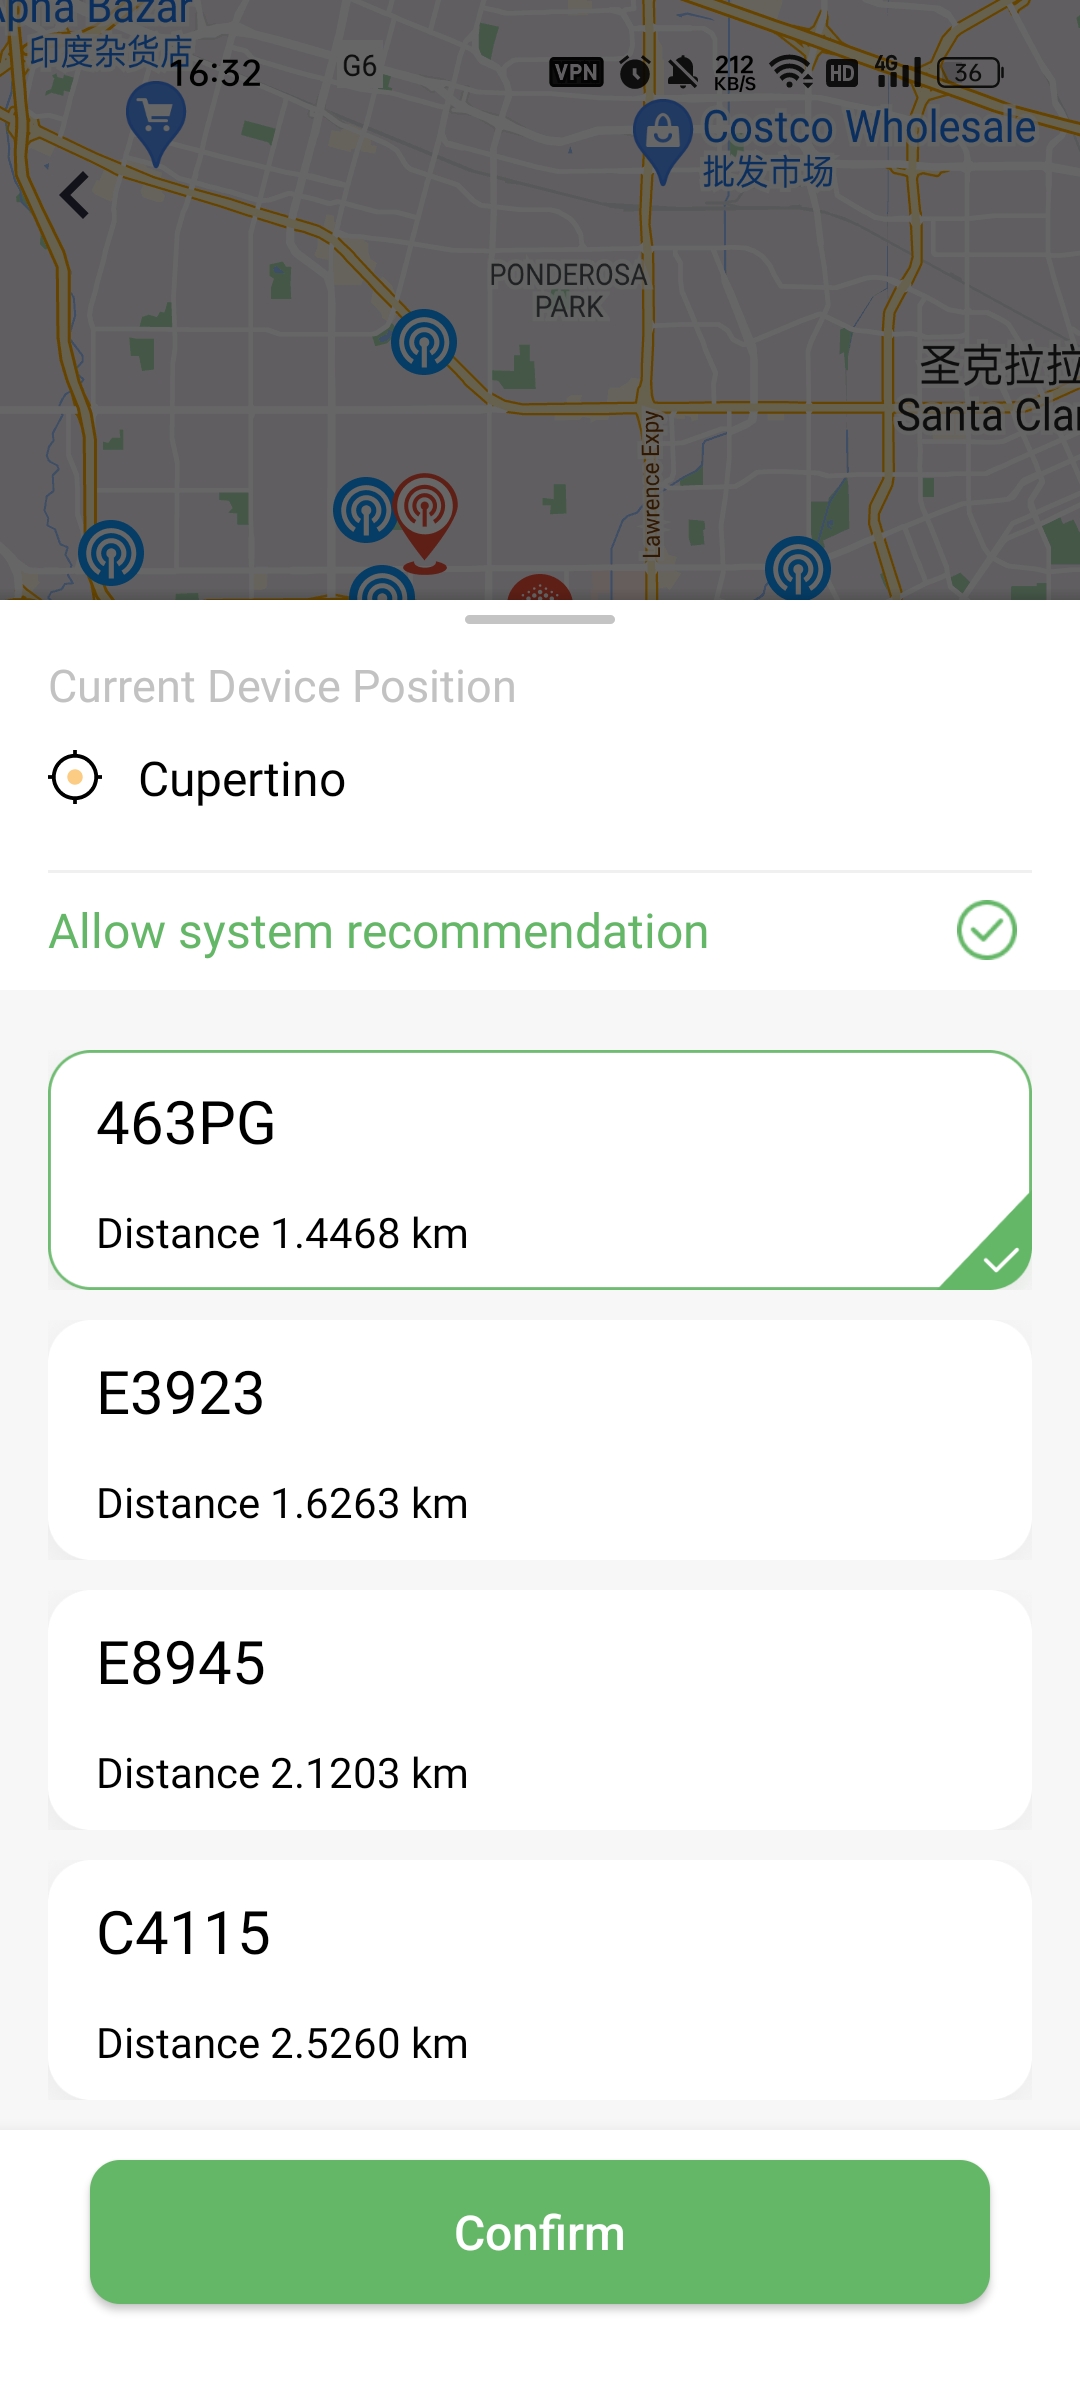
Step5: Please select a weather station. You don't need to actually purchase a personal weather station because we have taken care of that part for you. Simply choose the weather station closest to your location, as its data will guide the execution of the schedule. Additionally, we recommend selecting the option "Allow system recommendation" so that we can automatically switch to other weather stations in case of any malfunction with the chosen station.
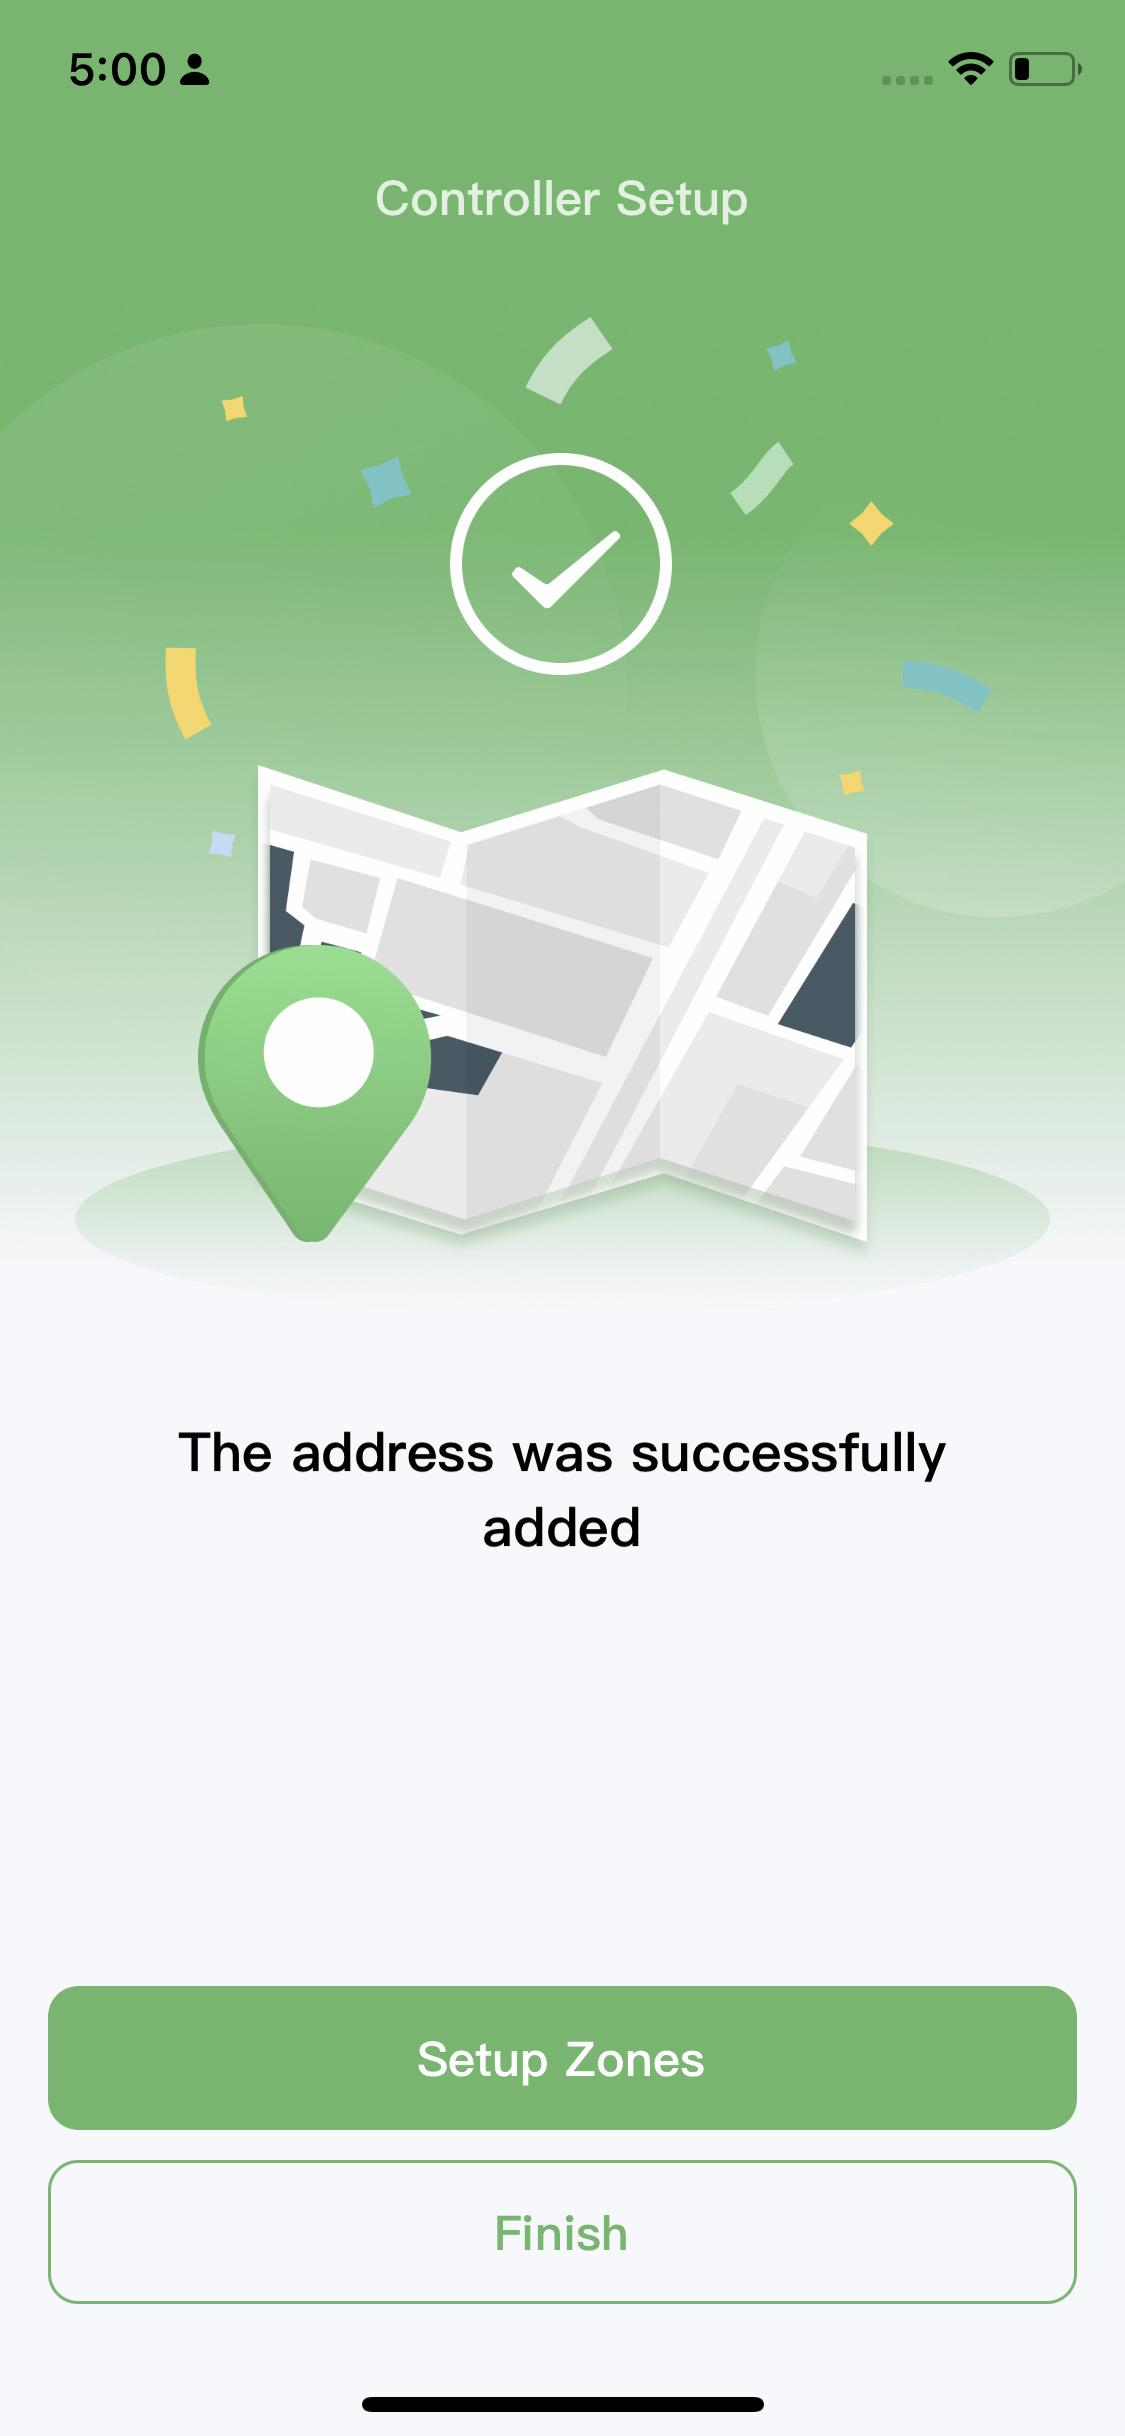
Step6: Job finished.
Android WiFi Connection
Step1: Enable Bluetooth and location service in your phone settings.

Step2: Scan the QR code or input the MAC address manually.
Step3: Connecting wifi. If you see the first interface, it means that your phone is currently connected to a 2.4GHz WiFi network. You can directly connect the controller to this WiFi network. If you see the second interface, it means that your phone is connected to a 5GHz WiFi network, which is not compatible with the controller. Please click on "Switch WiFi" and choose another WiFi network from the list. All the networks listed there are 2.4GHz WiFi networks.
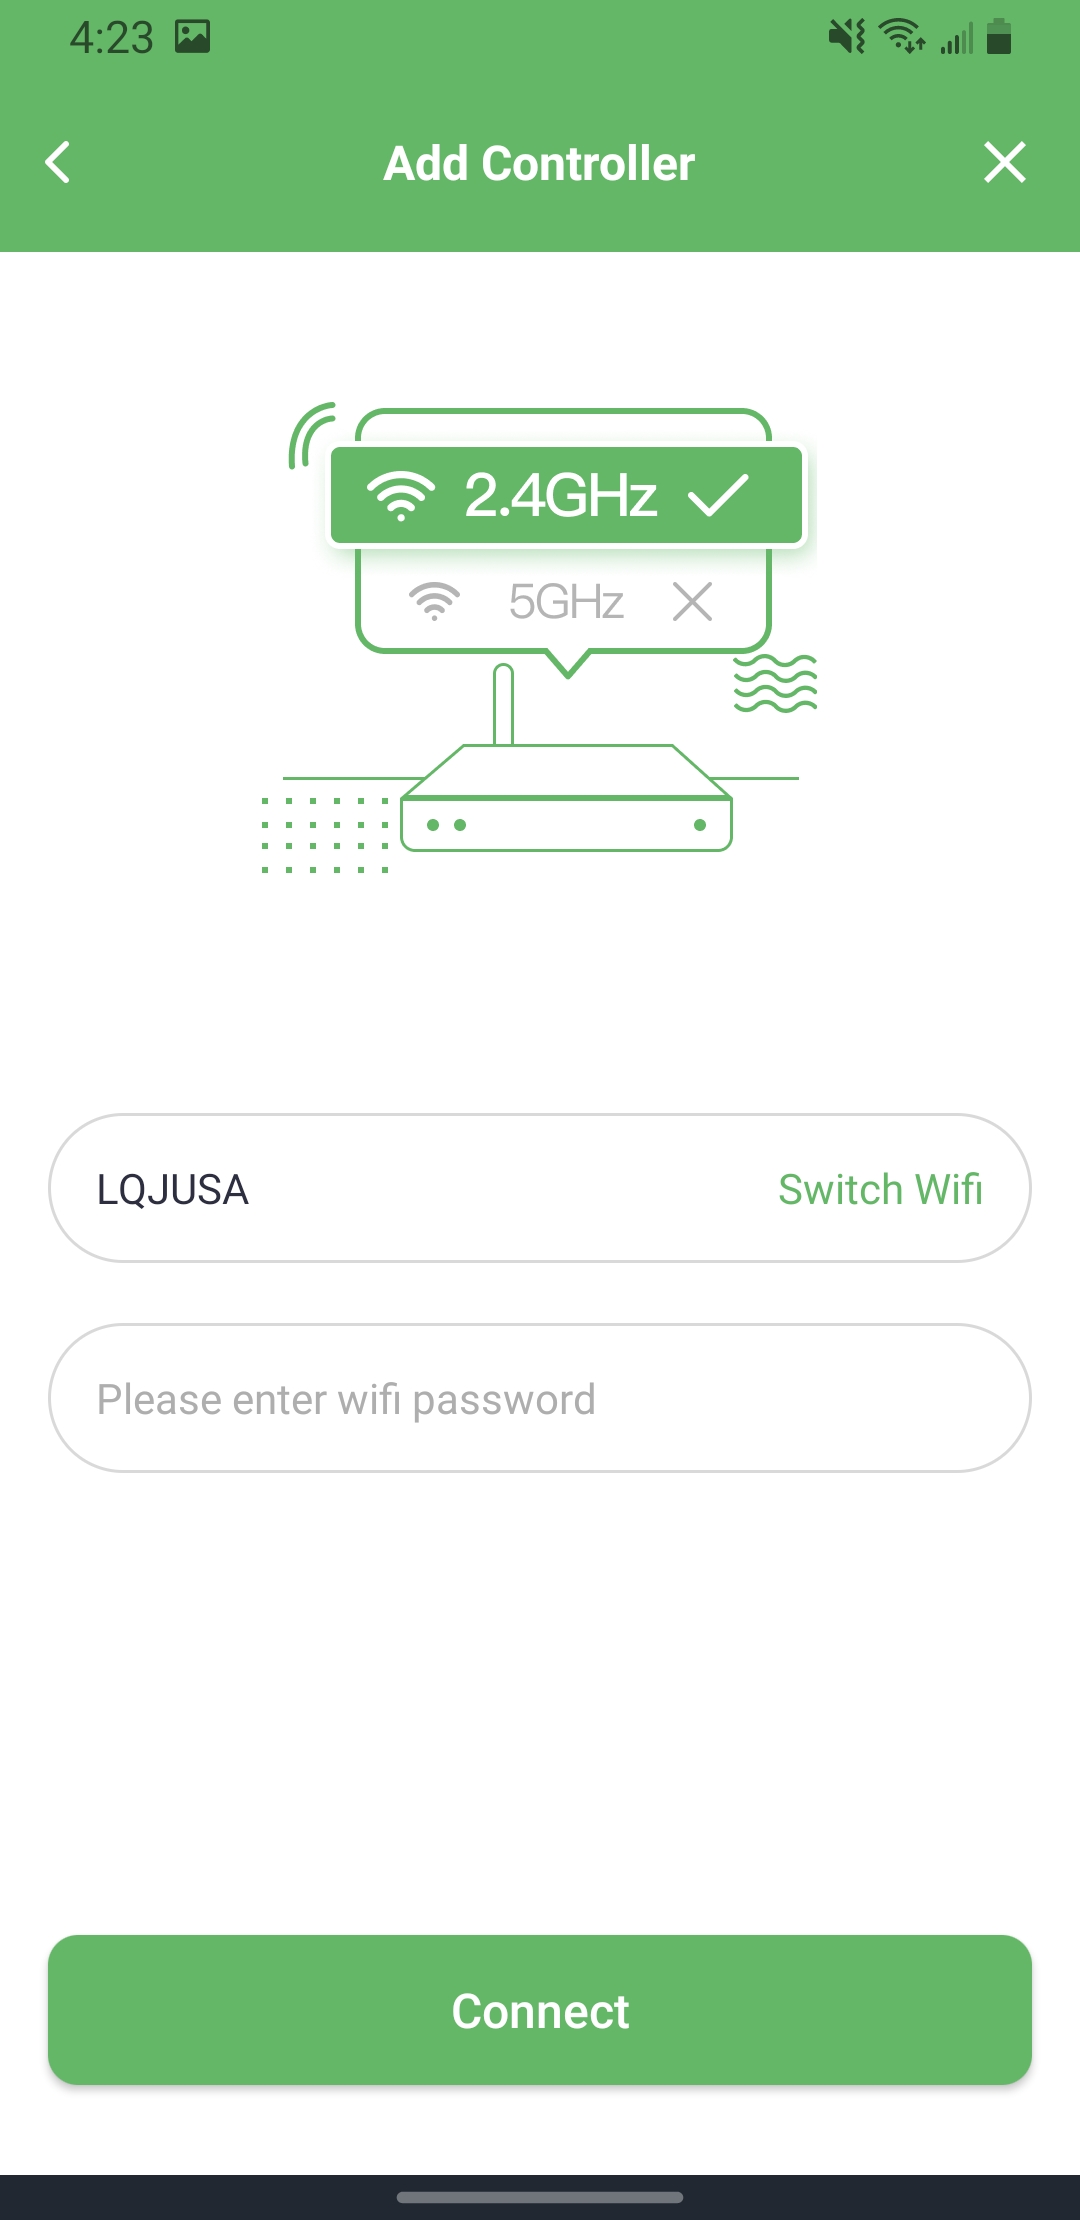
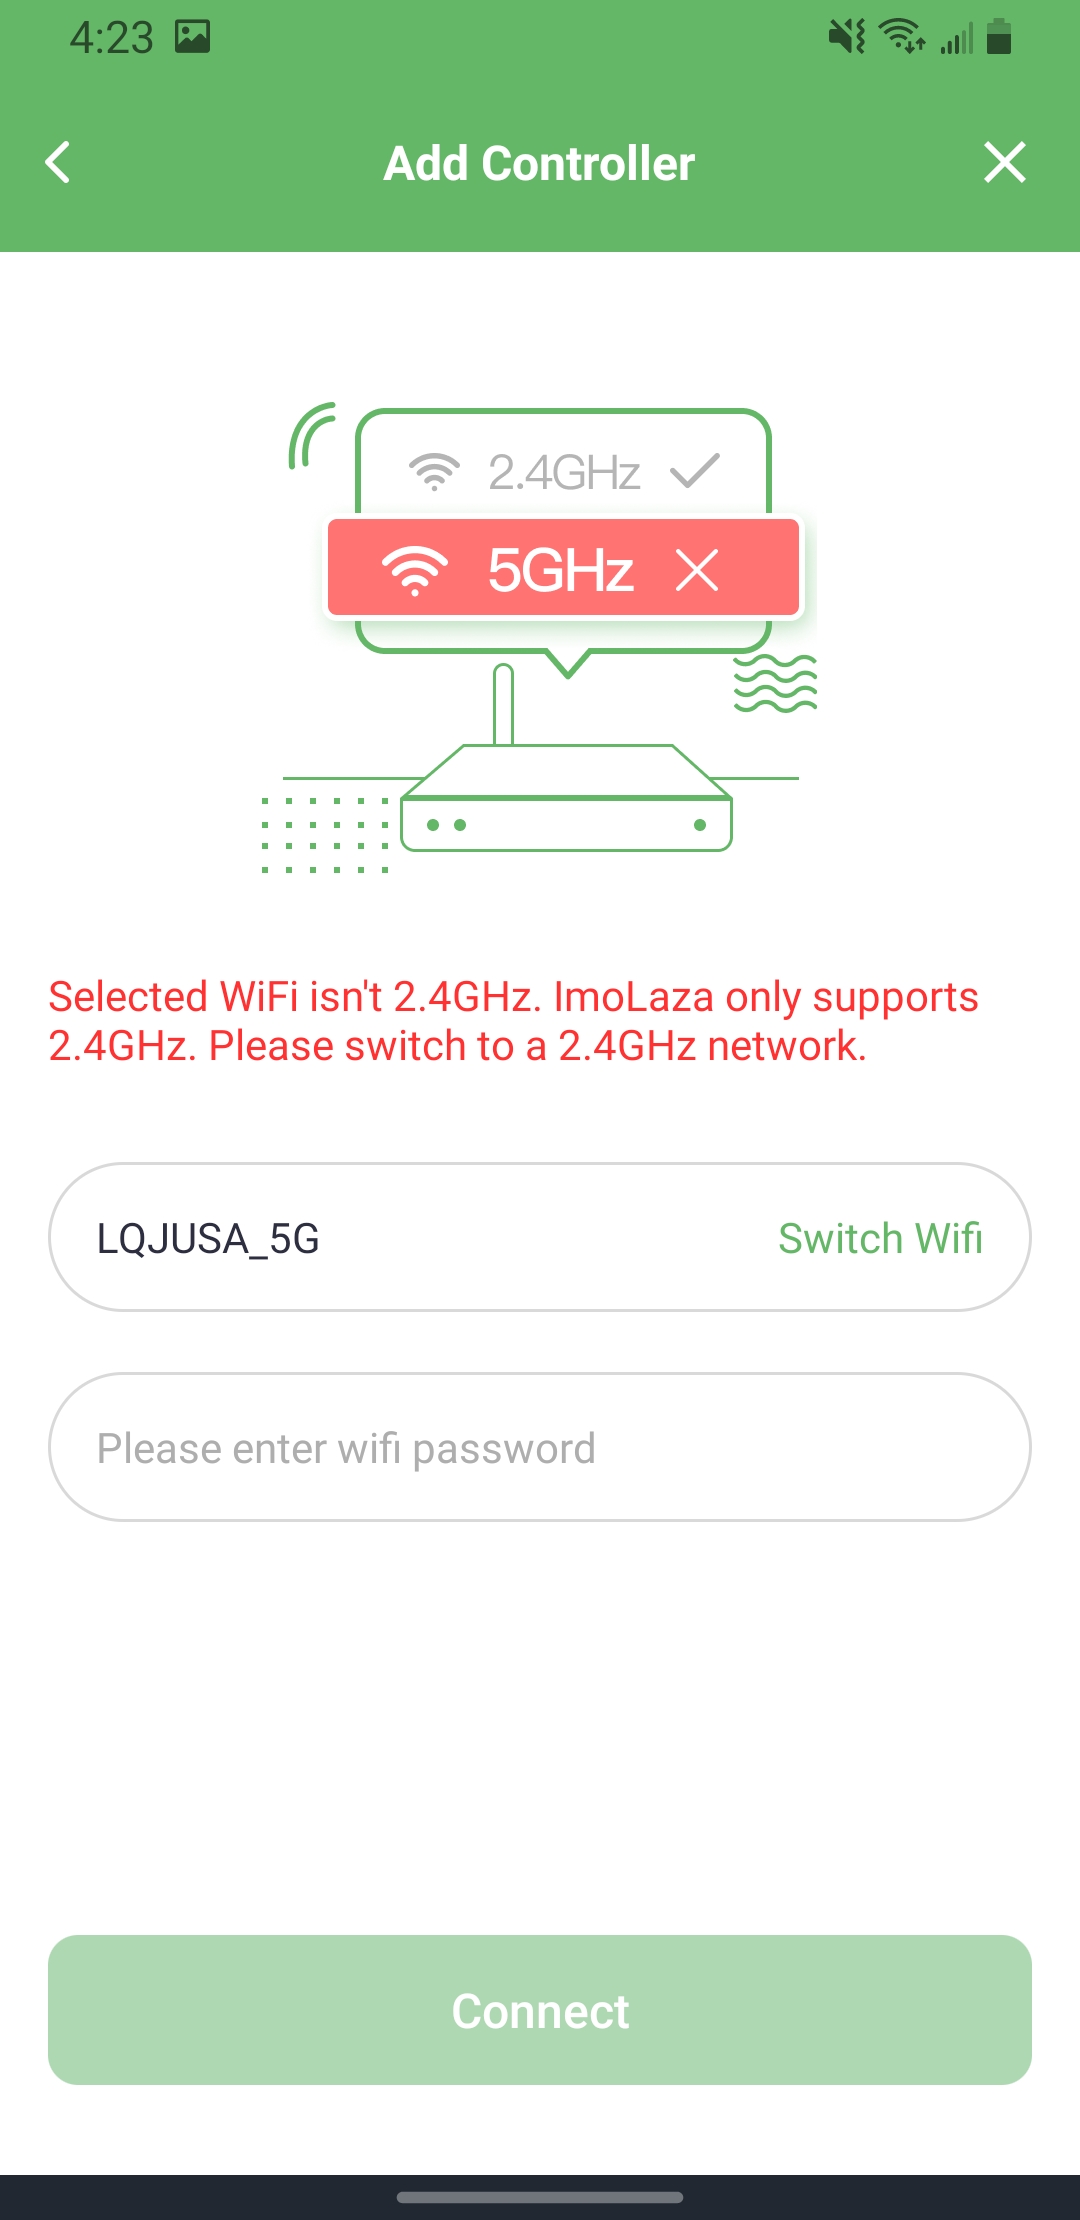
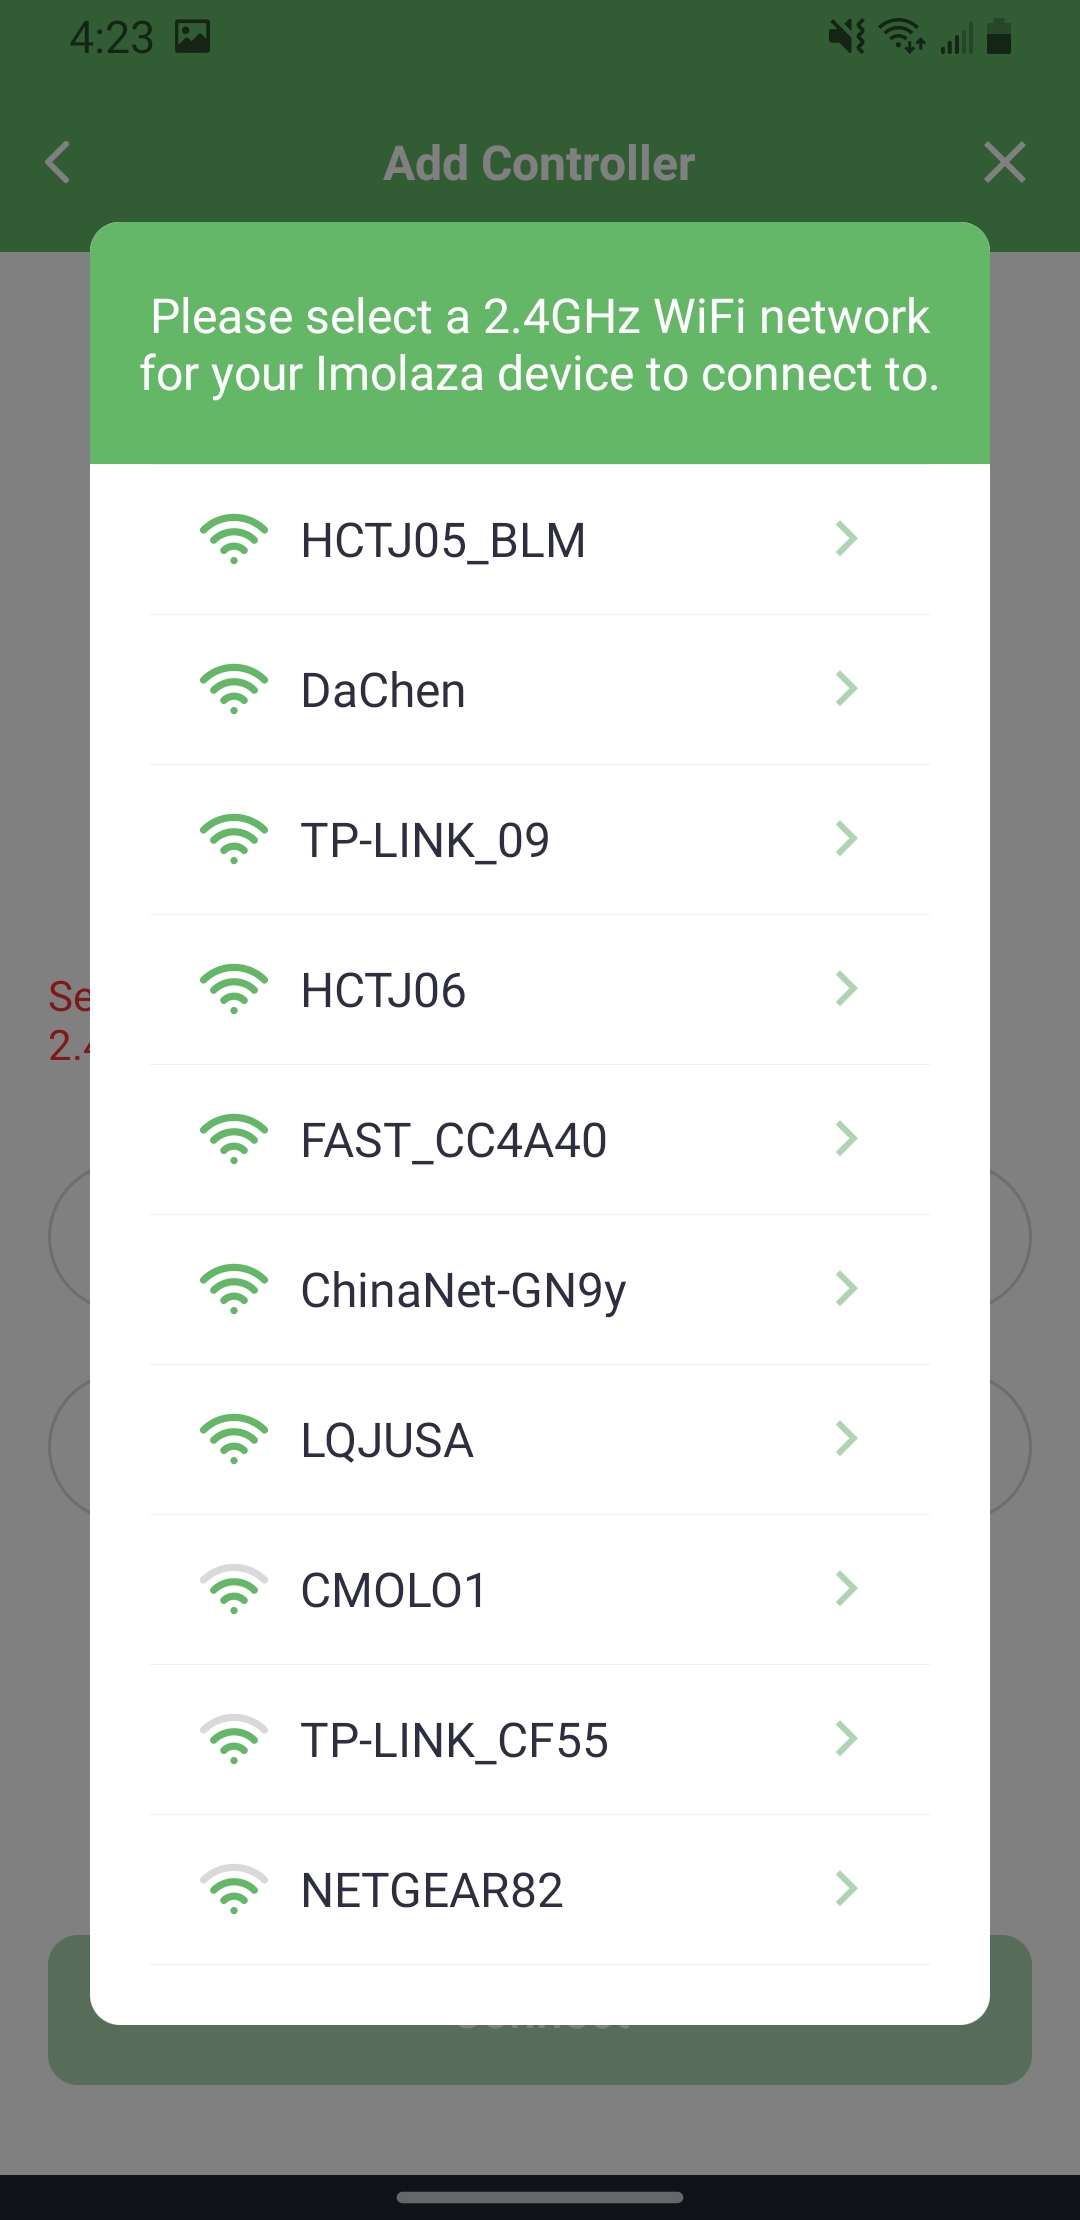
2.4GHz 5GHz Switch WiFi
Step4: Name your controller.
Step5: Set the address and choose a weather station.
Step6: Job finished.

Still need help?
In case the above method doesn’t work for you, please contact our technical support team directly using the contact information below. We will respond to you by email within 12h after your message reaches us.
Email: Support@imolaza.com