Now you have downloaded the ImoLaza App yet(If not, download the Imolaza app from the App Store or Google Play), you will need to create an account and add controllers. The following article will help you with that.
Create an ImoLaza Account
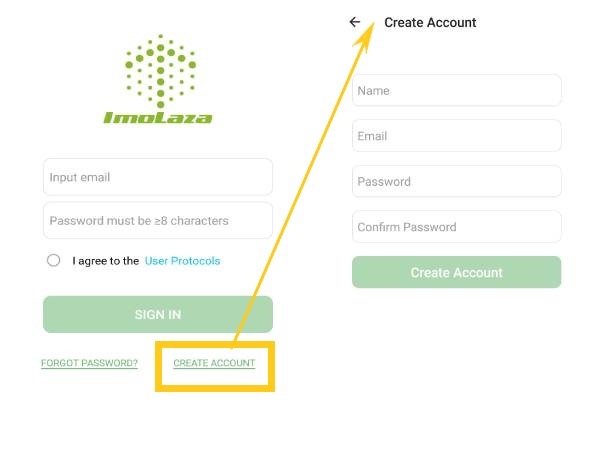
Step1: Click "CREATE ACCOUNT" on the sign-in page. Follow the prompts to fill in the username, email address, password and confirm the password as required, and then click "Create Account".
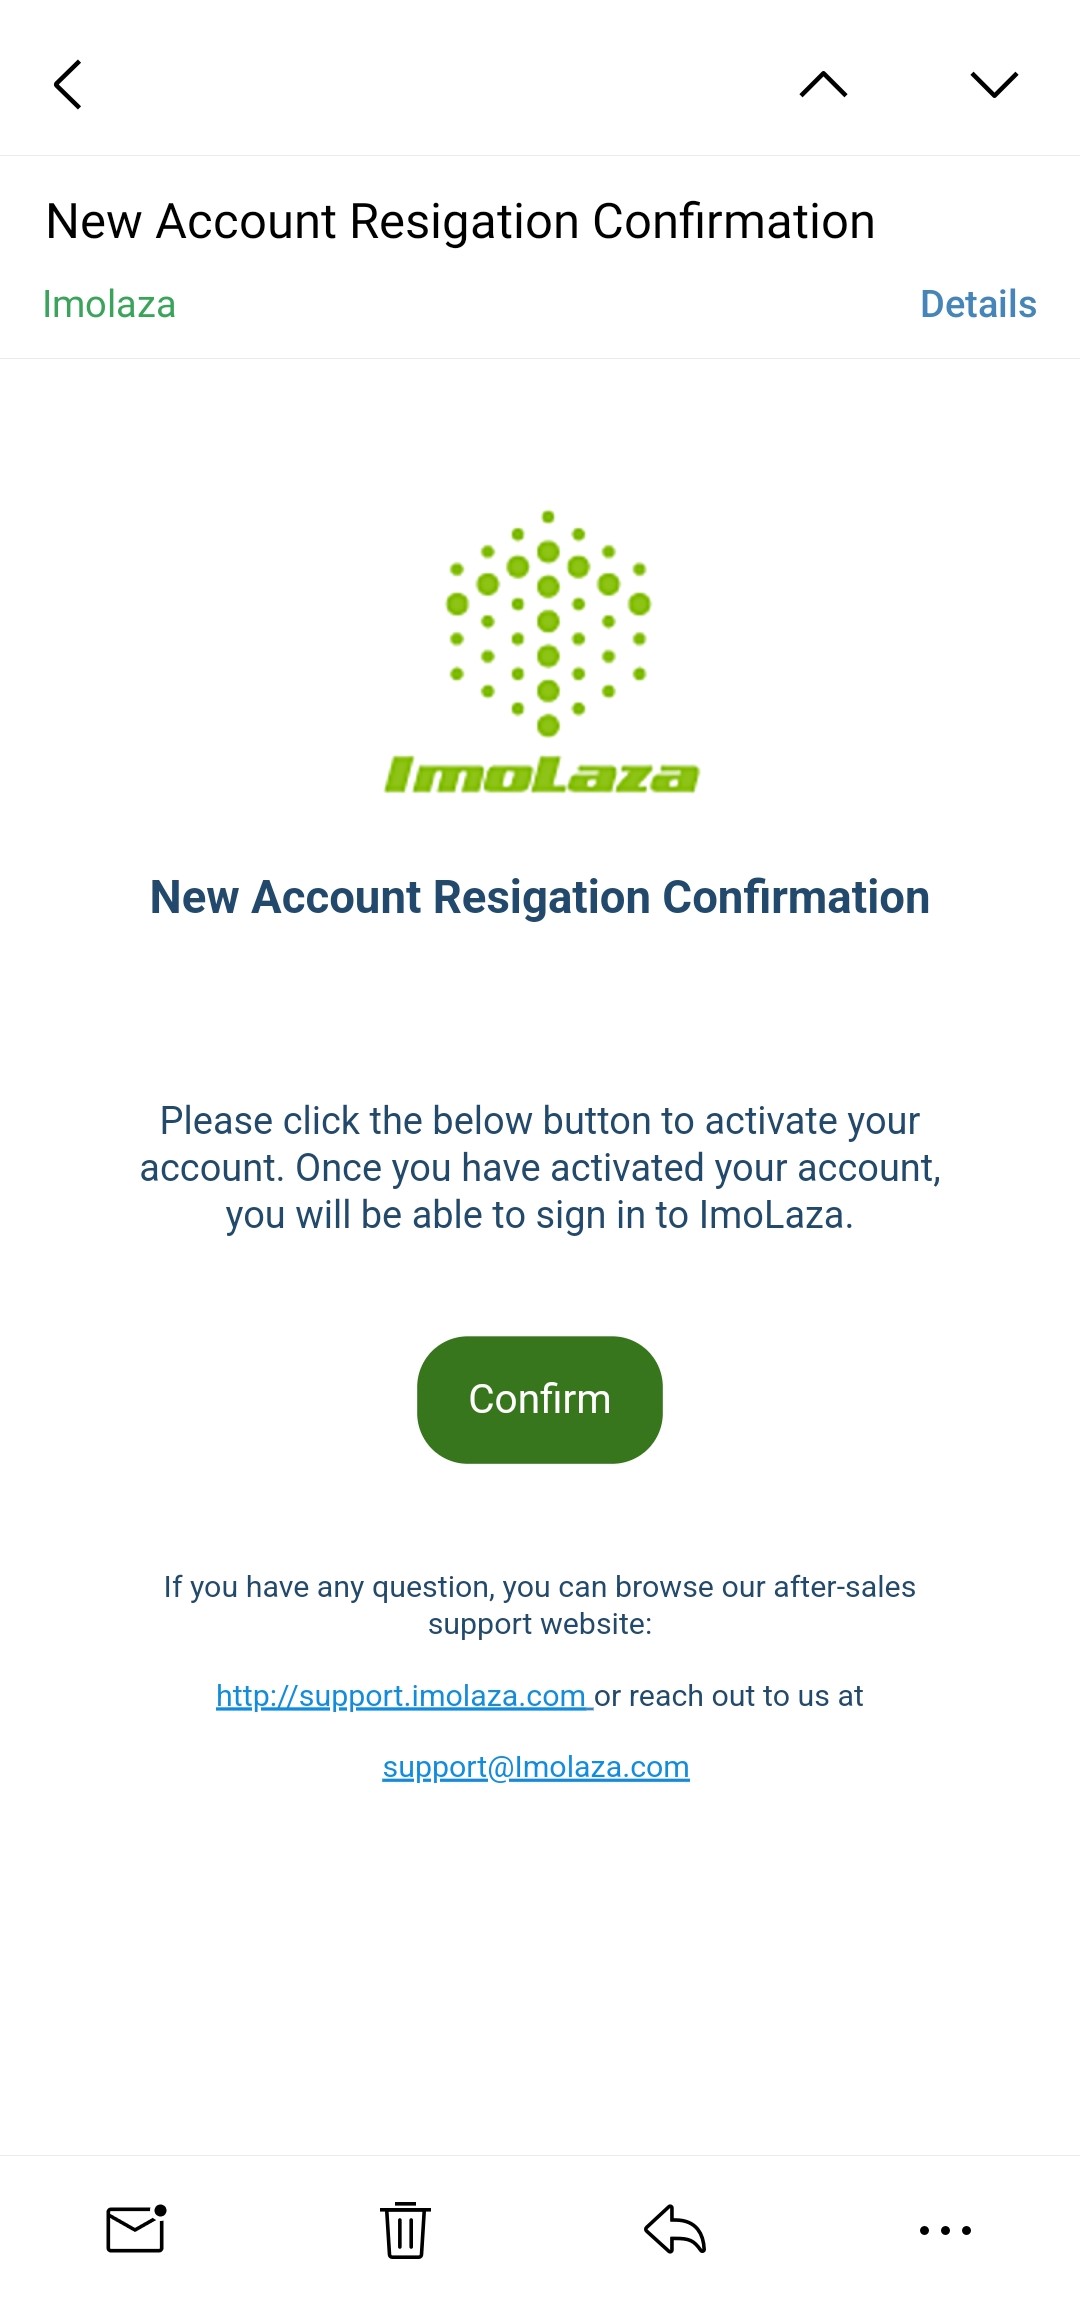
Step2: Check the email for the message from ImoLaza, and click "Confirm" to finish the registration.
Now you have an ImoLaza account, log in and start your ImoLaza trip.
Log In
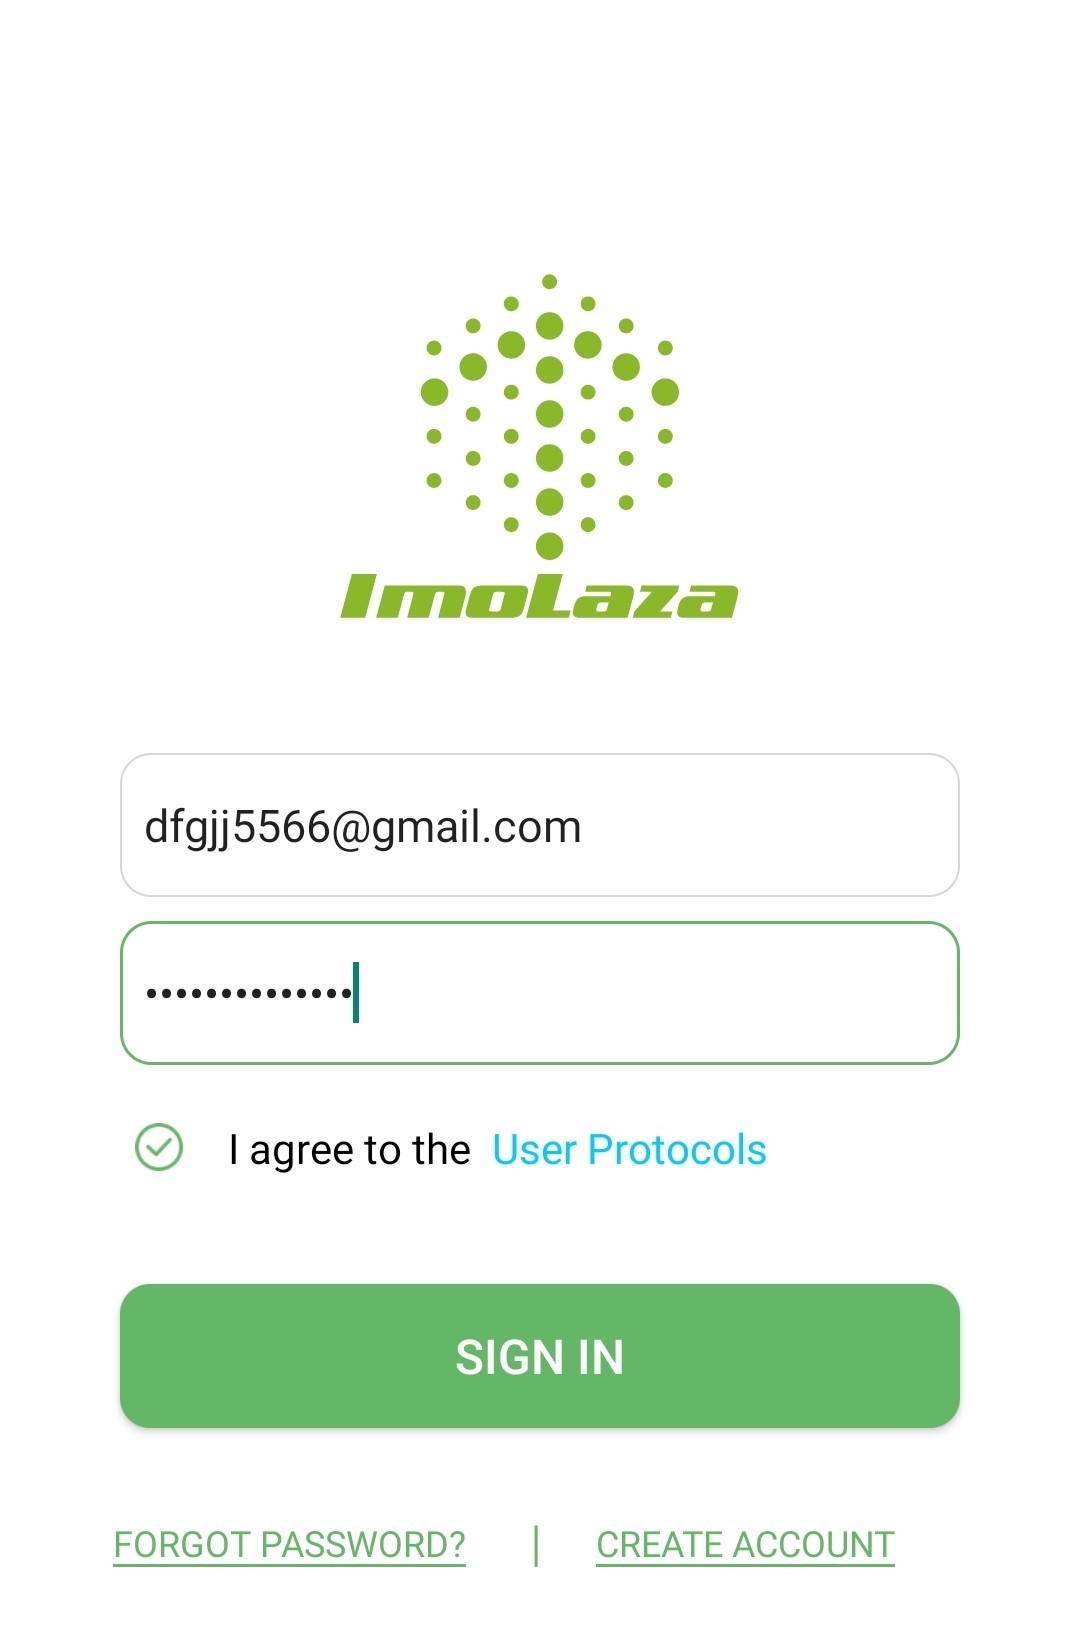
Enter your email address and password, select User Protocols, and then click "SIGN IN" to log in.
Add a Controller
Following the step-by-step process to add and set up your device, the ImoLaza App would guide you to connect to the device.
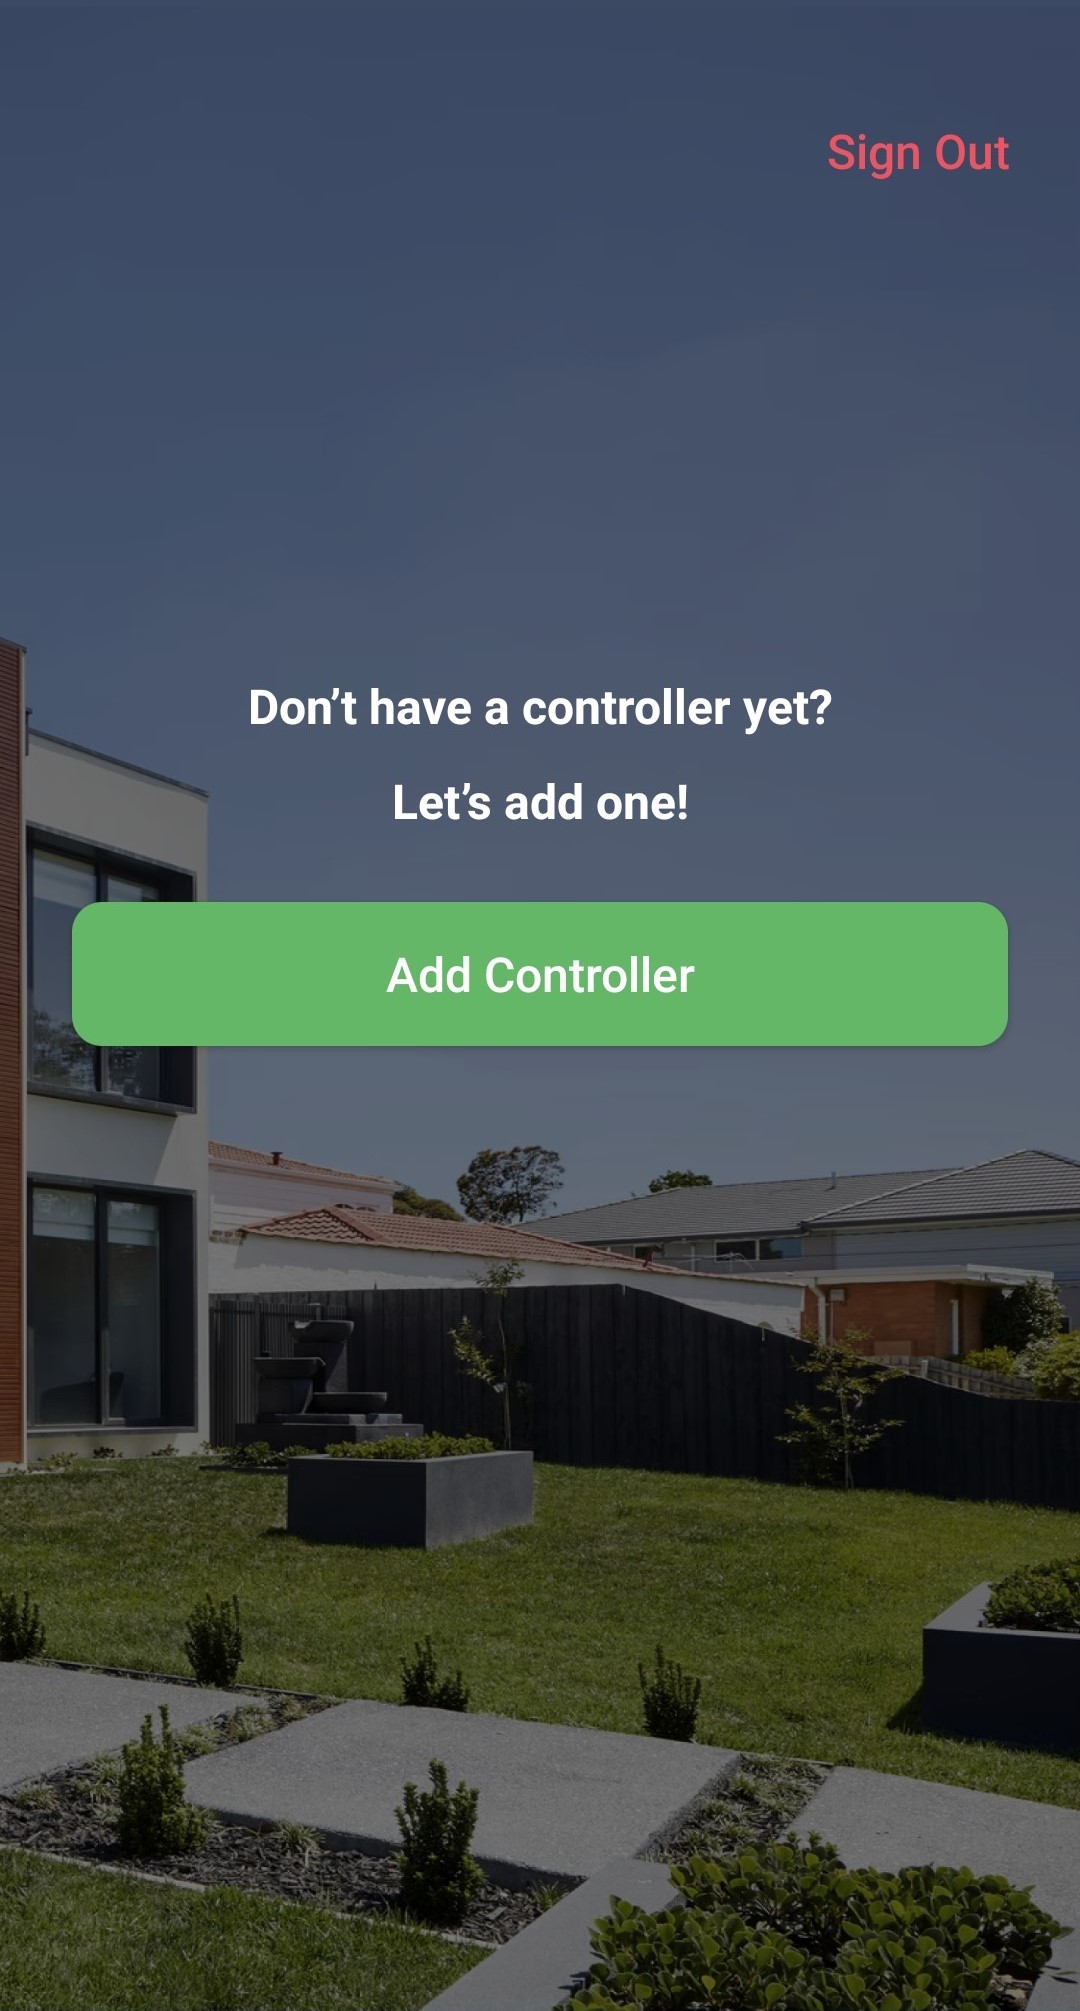
Step1: Hit "Add a new device" to start adding controllers.
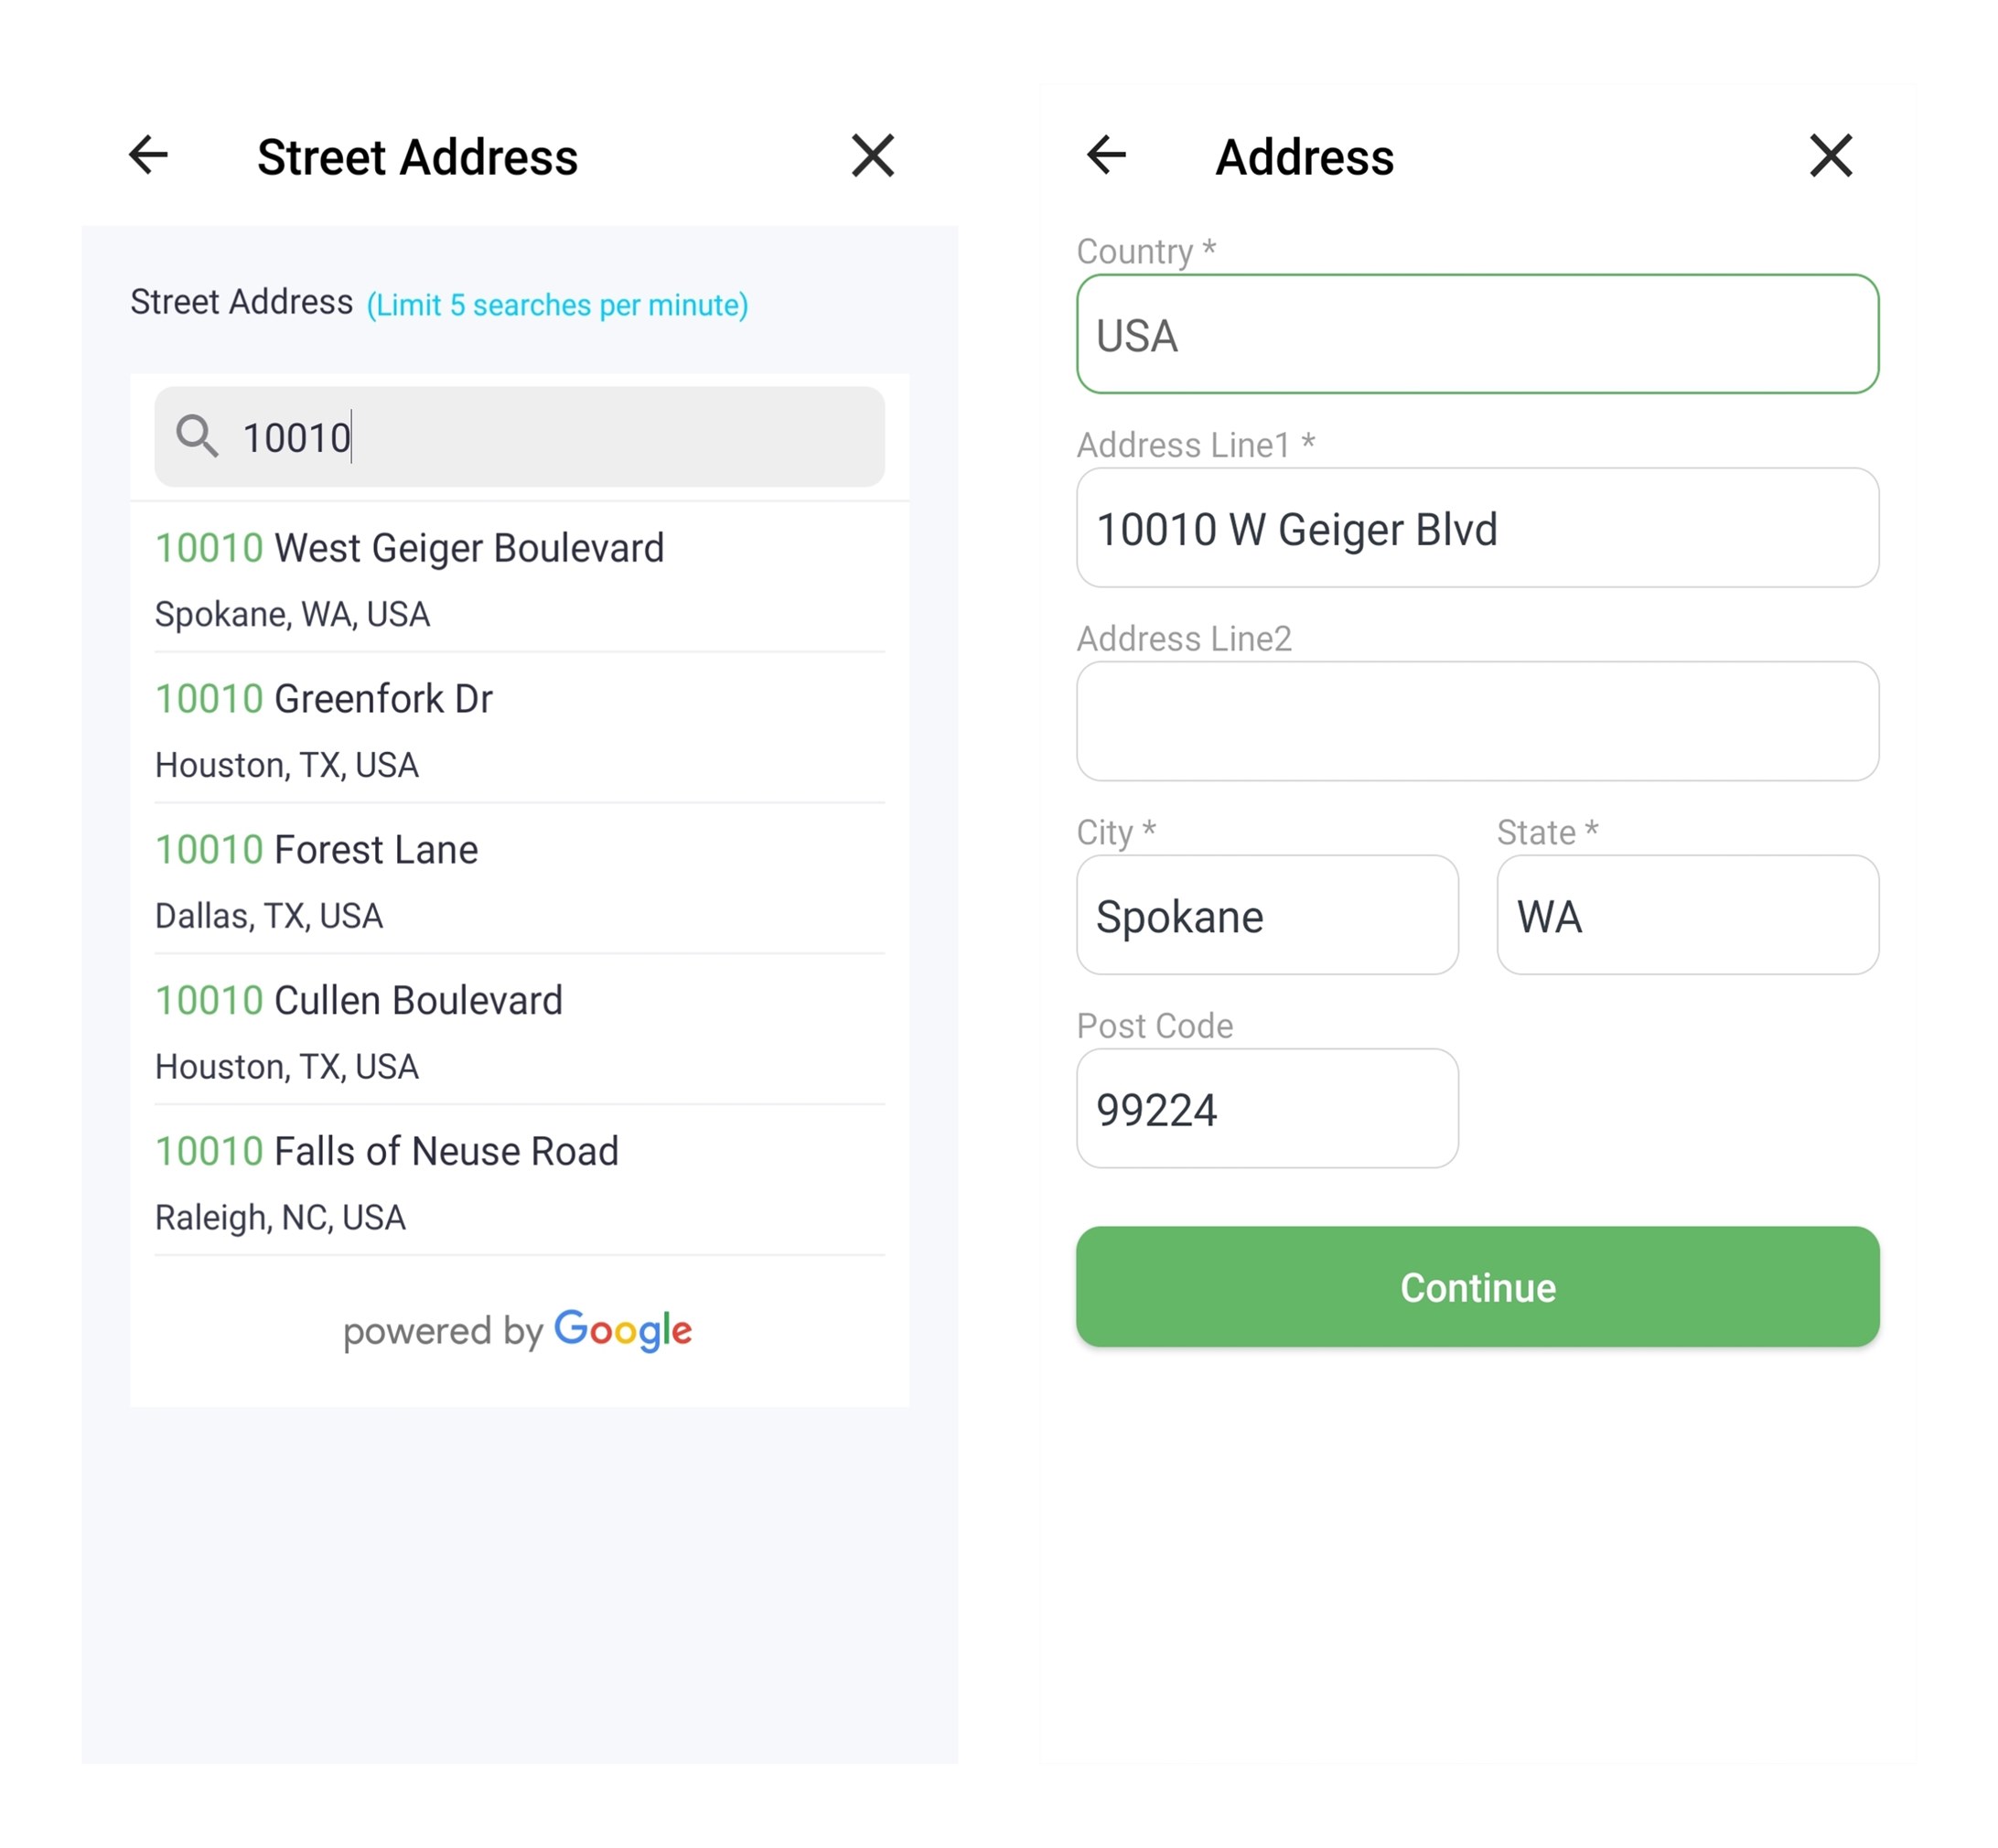
Step2: Add an address or a zipcode, then confirm your location. This step ensures your controller gets the accurate weather forecast for your watering schedules.
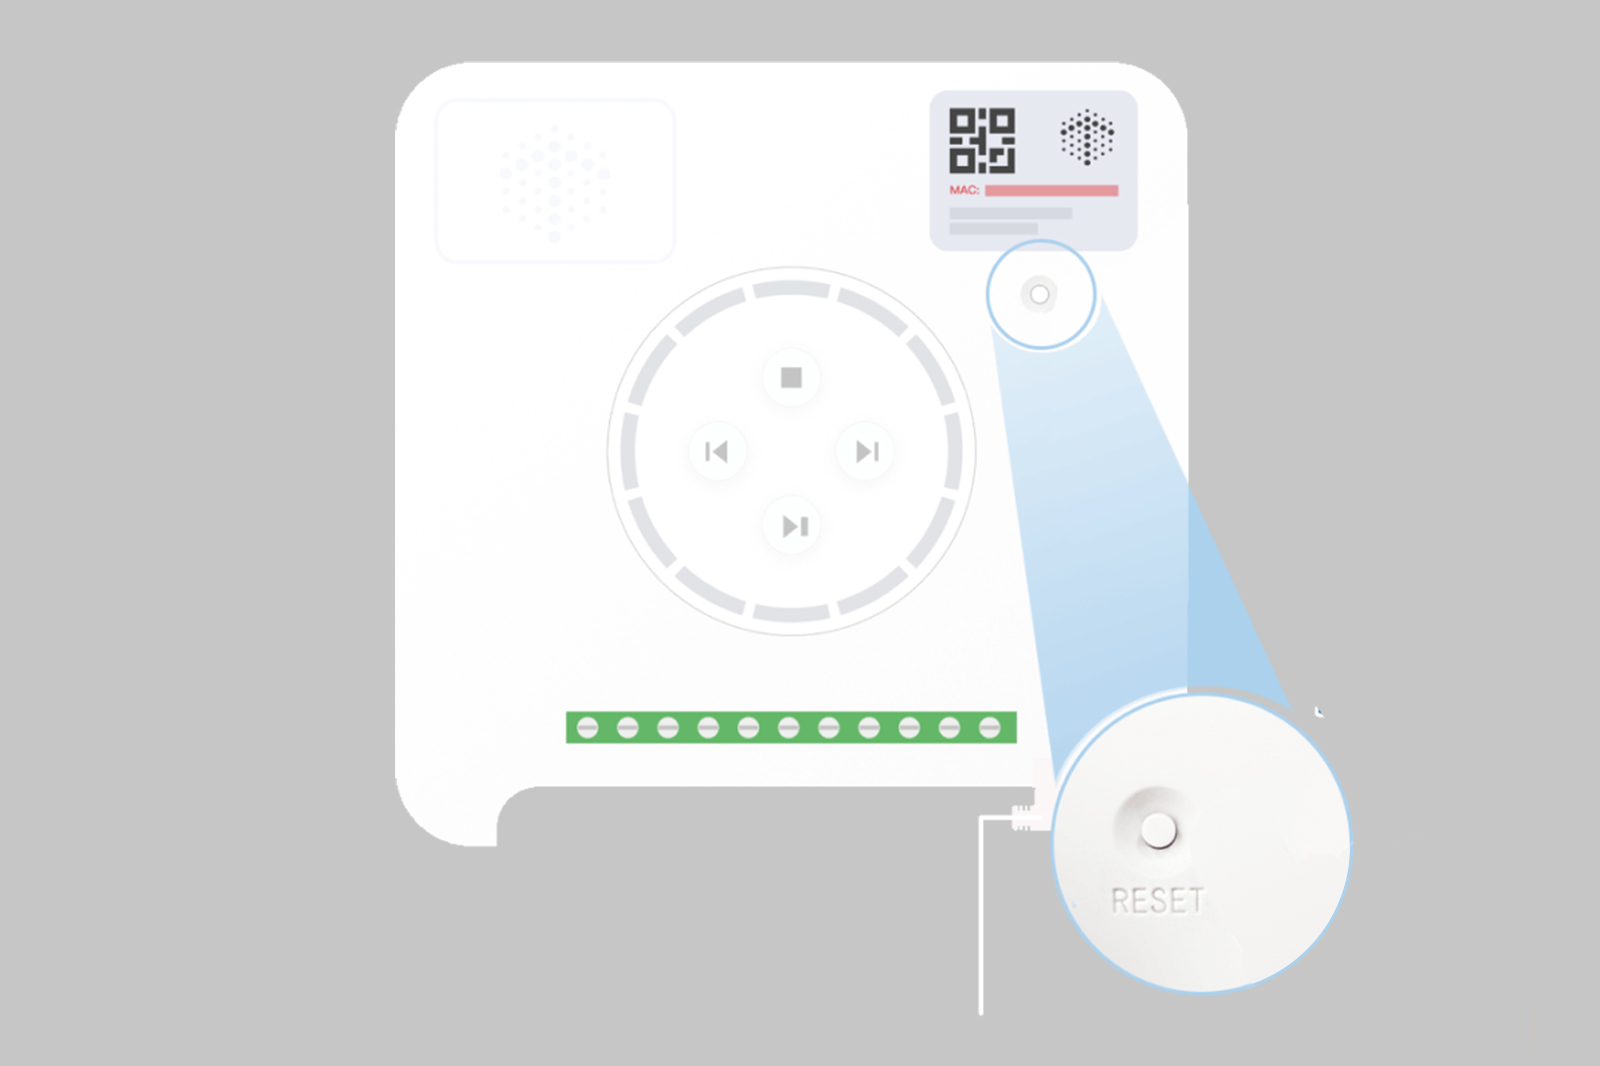
Step3: Remove the faceplate, press and hold the reset button for five seconds and wait for the indicator light to flash blue and green.
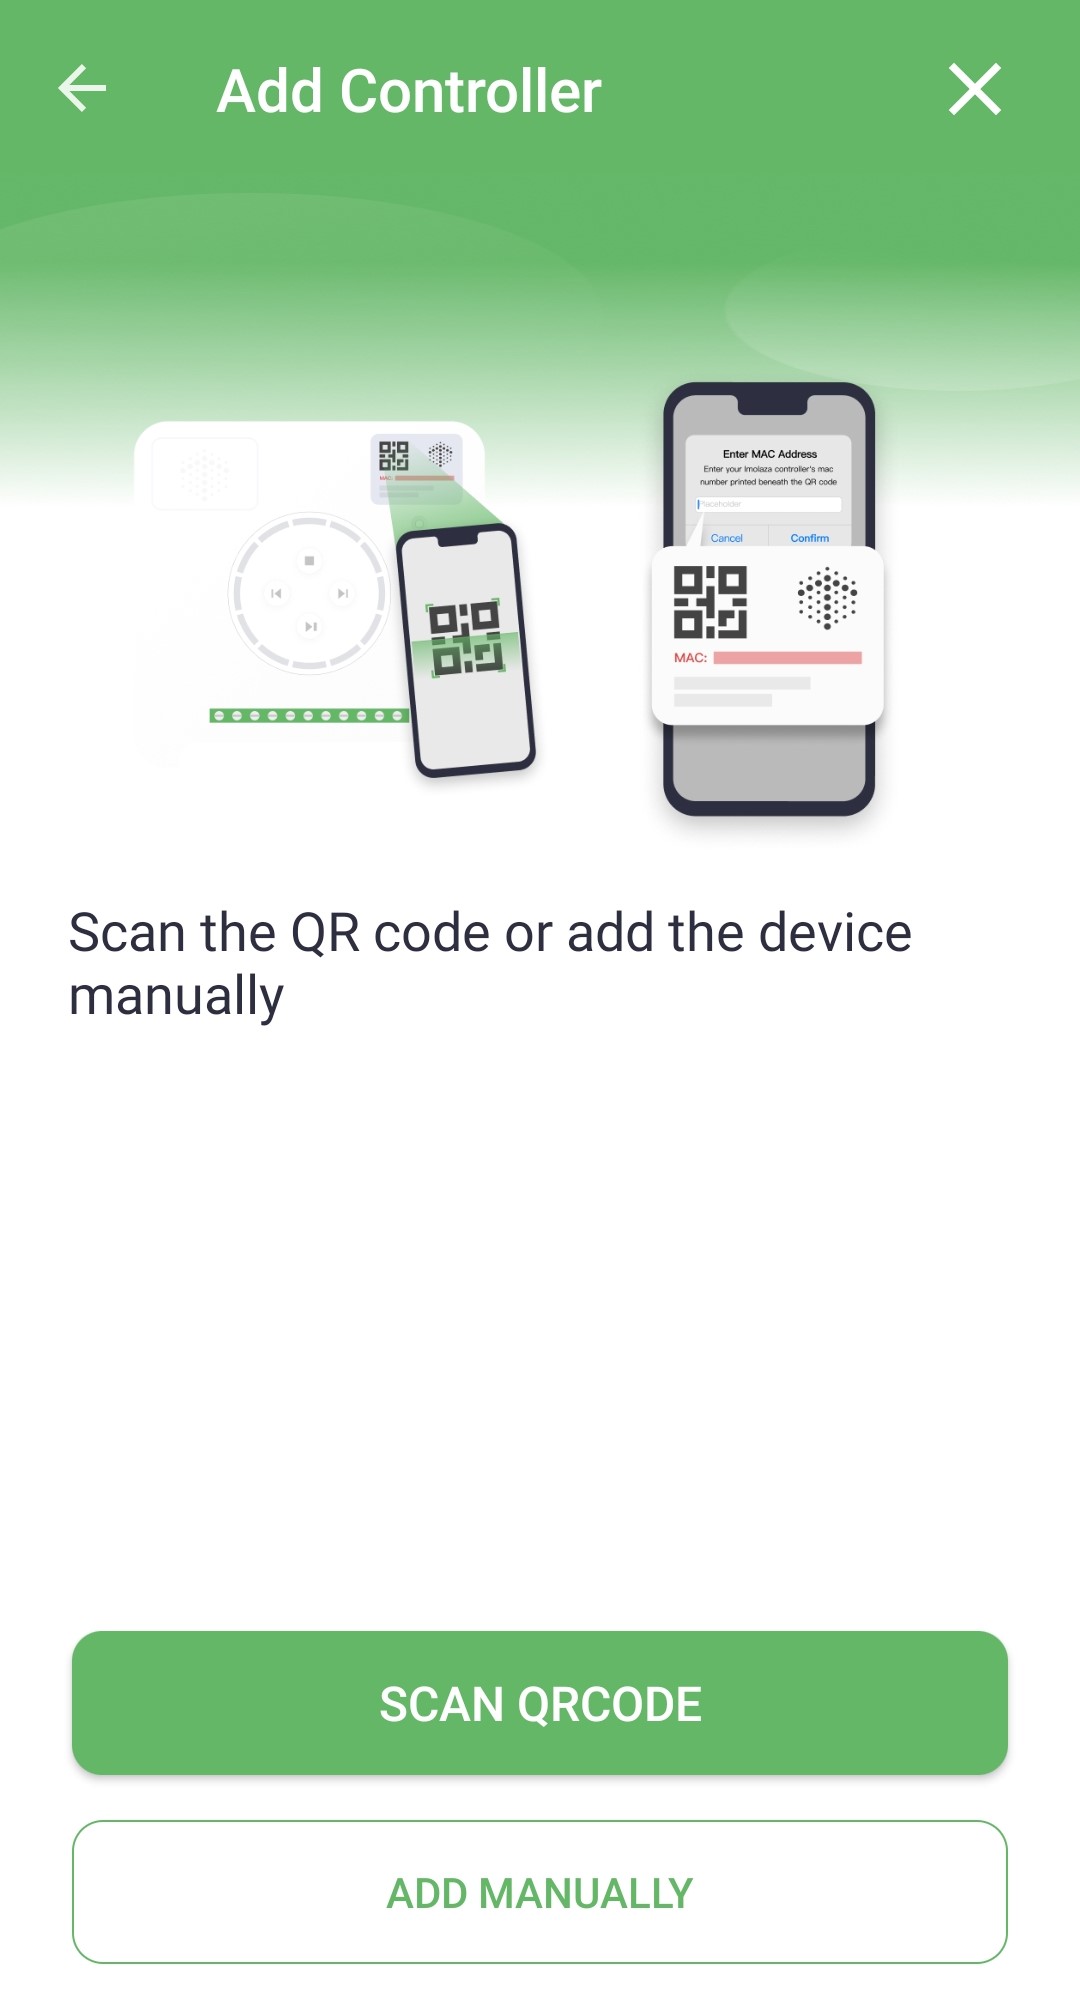
Step4: Scan the QR code on the controller or enter the device's Mac address manually. You can find the QR code or the MAC address in the top right corner of your controller.
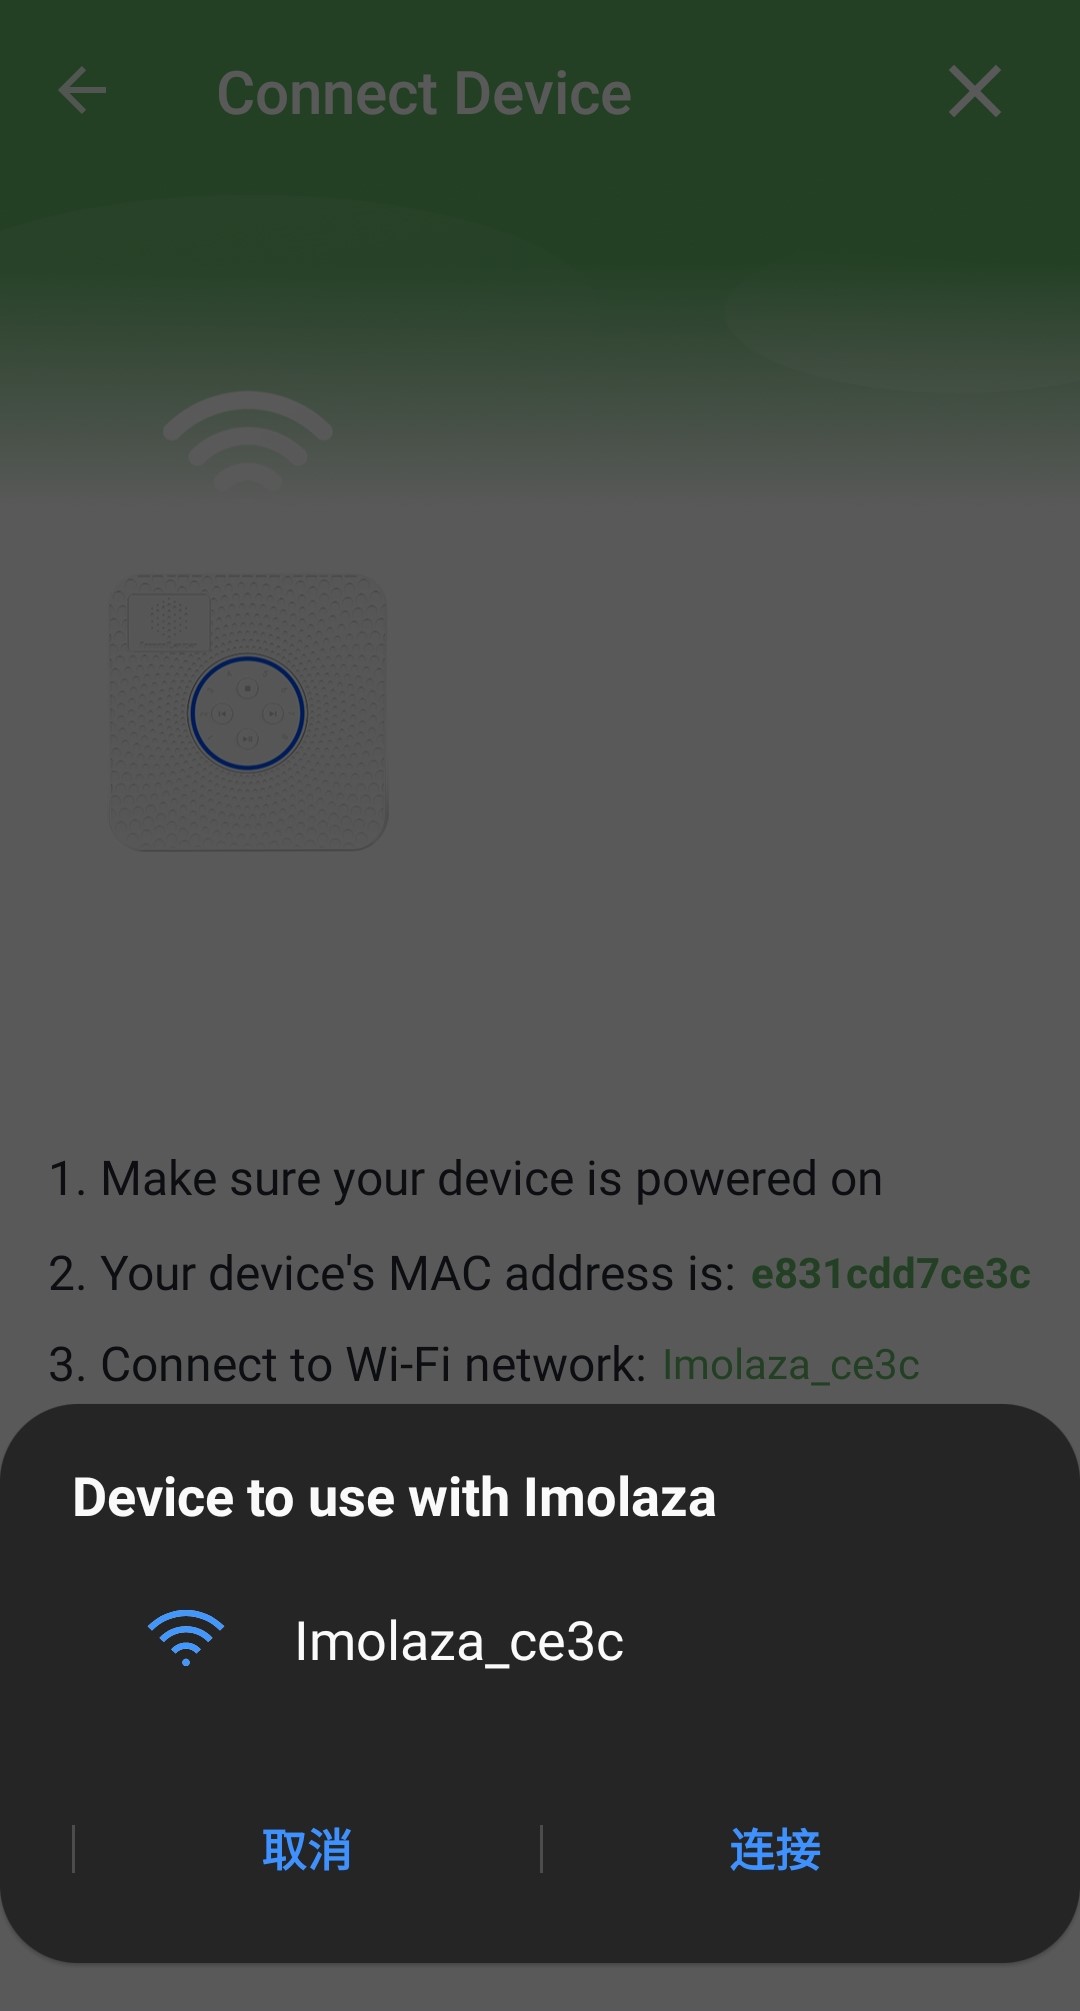
Android Wi-Fi Connection
Step1: Tap the Wi-Fi network named "ImoLaza_XXXX" to connect. You can also add your device manually by entering the Mac address when prompted.
Step2: Then get a list of available networks, tap your Wi-Fi router SSID and enter the password to complete the configuration.
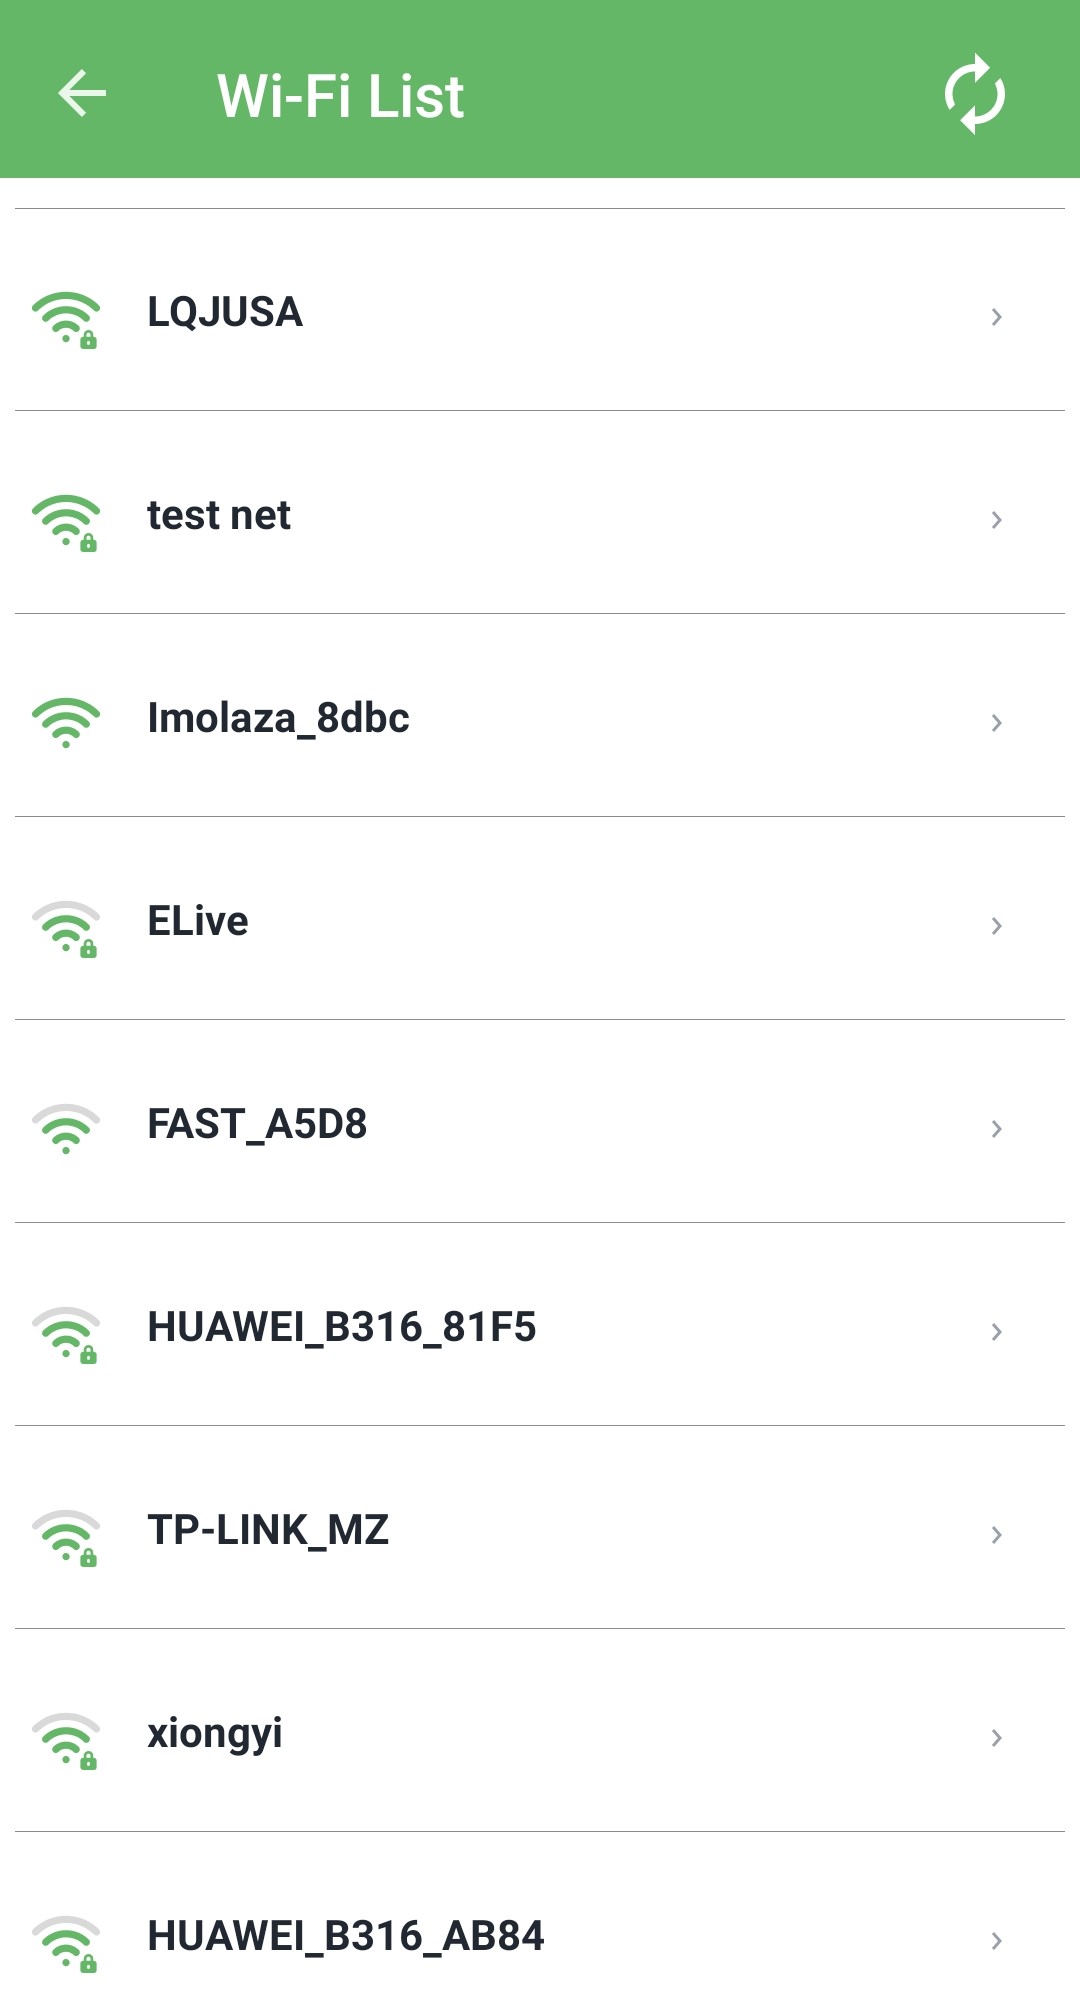
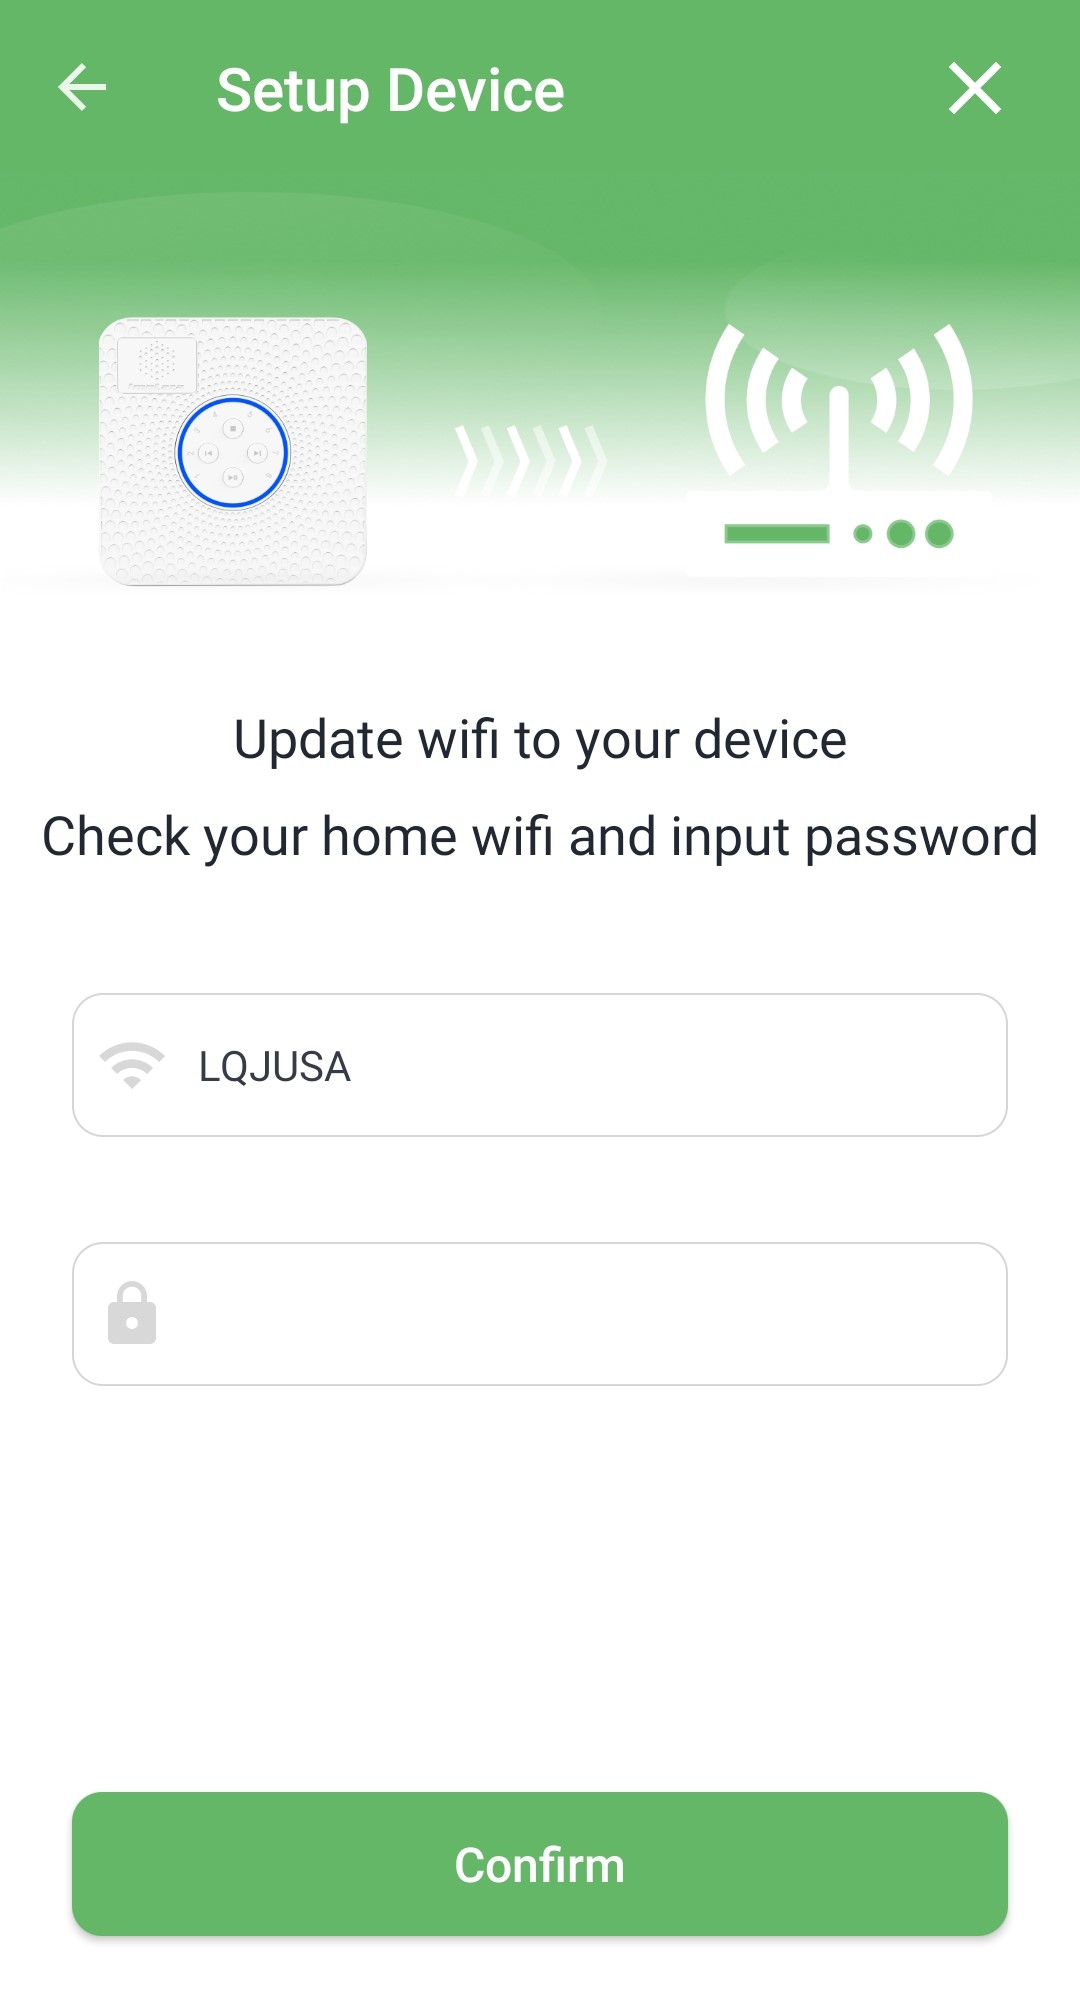
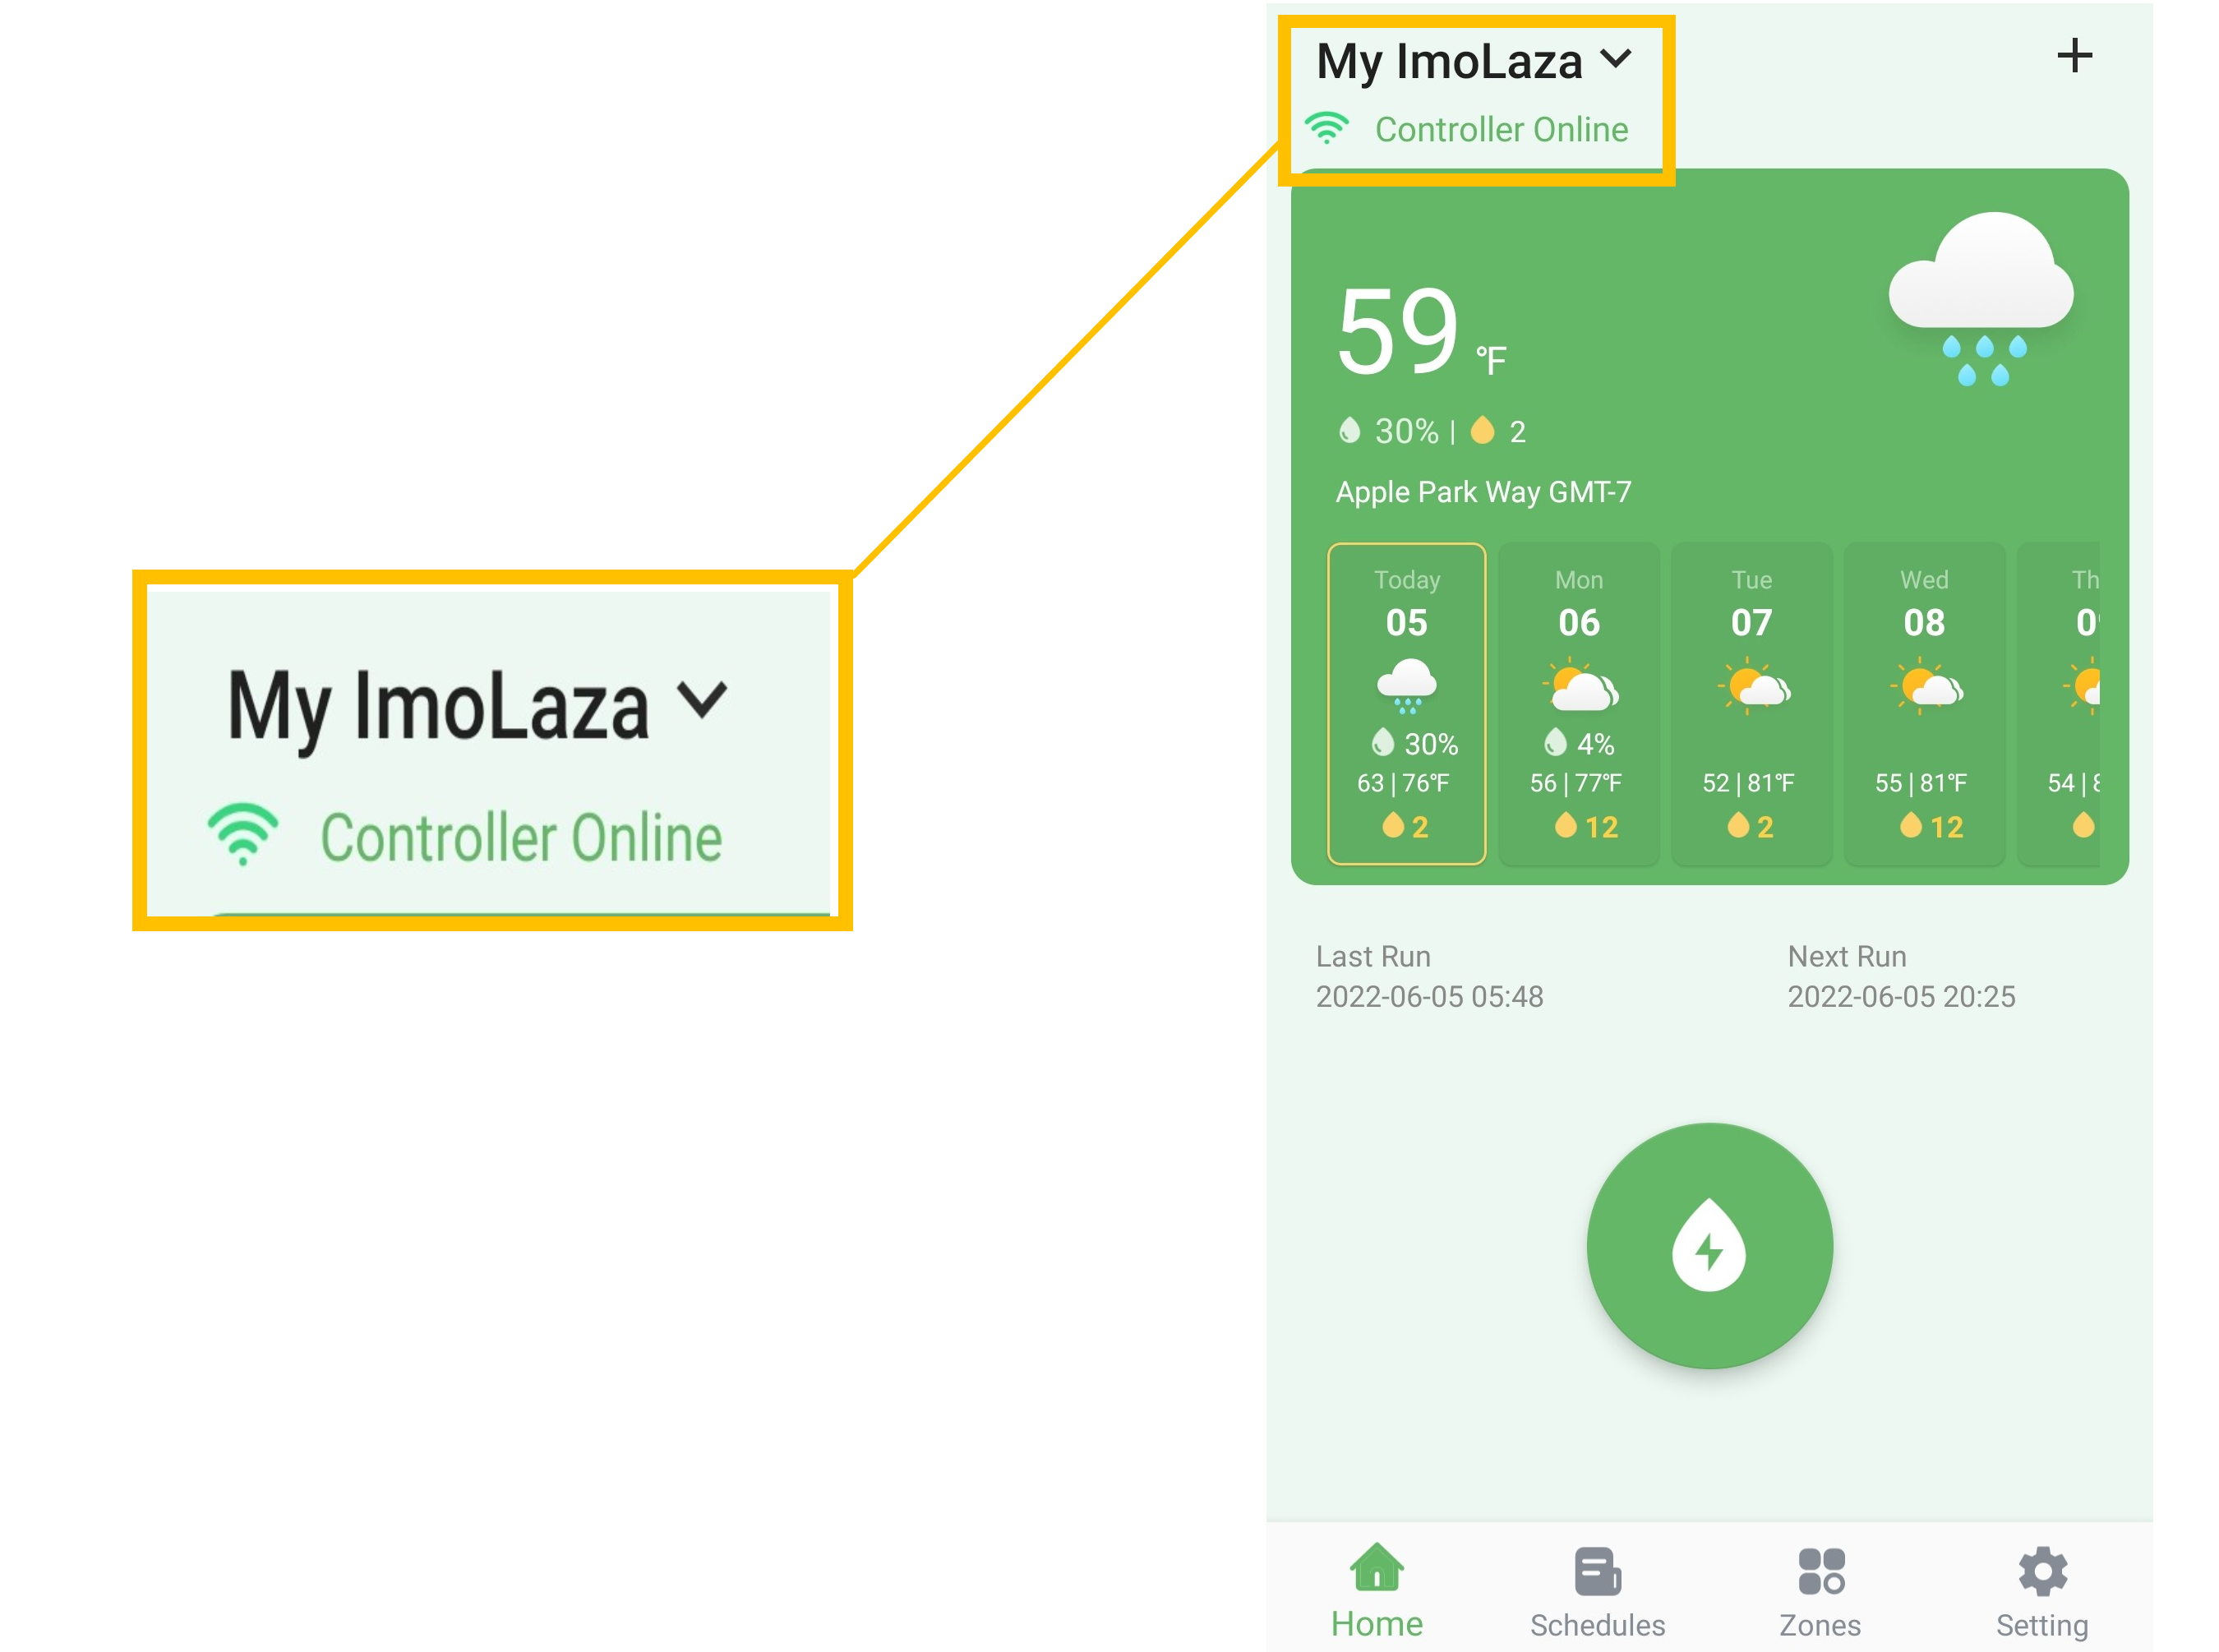
Step3: Waiting for Imolaza smart controller to finish setting up your device. If your ImoLaza App shows "Online" and the indicator light flashes blue, it means that your controller has been activated successfully.
iOS Wi-Fi Connection
Step1: When you see the following screen that says "Not connecting to device". Open the Wi-Fi settings on your phone and find a Wi-Fi network named "Imolaza_XXXX" to connect.
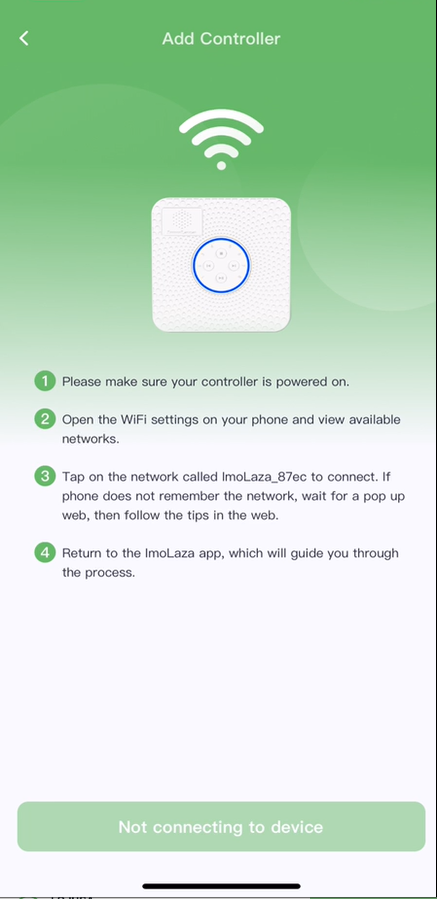
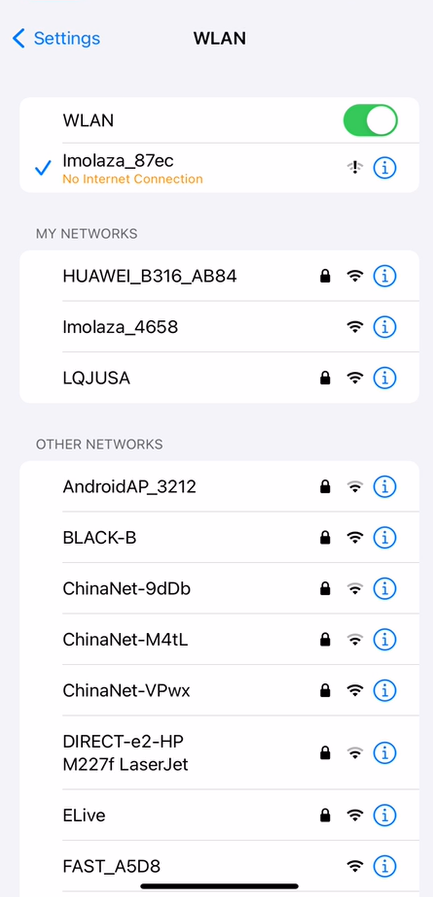
Step2: Once you connected with the ImoLaza Wi-Fi network, a prompt will show up. Follow the prompt to click the "Cancel" button on the top right corner, then click the "Use Without Internet" option to close the prompt.
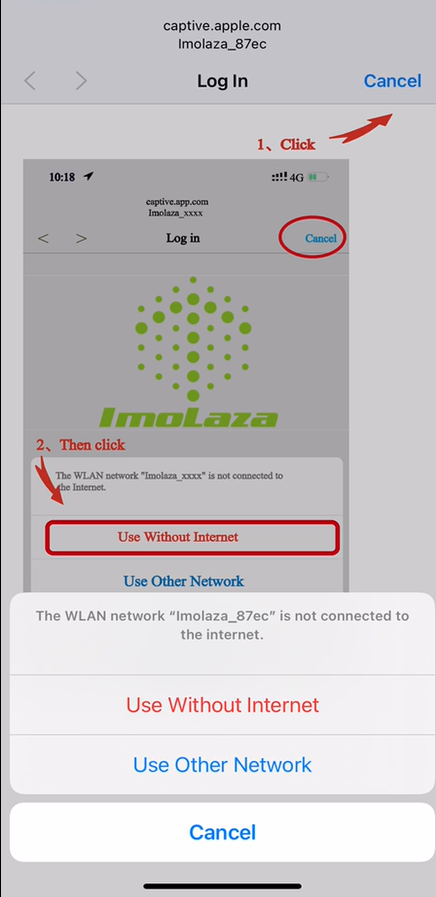
Step3: Go back to the ImoLaza App, wait for the bottom button to become available and then click. Choose your wifi network for your ImoLaza device to connect, tap your Wi-Fi router SSID and enter the password.
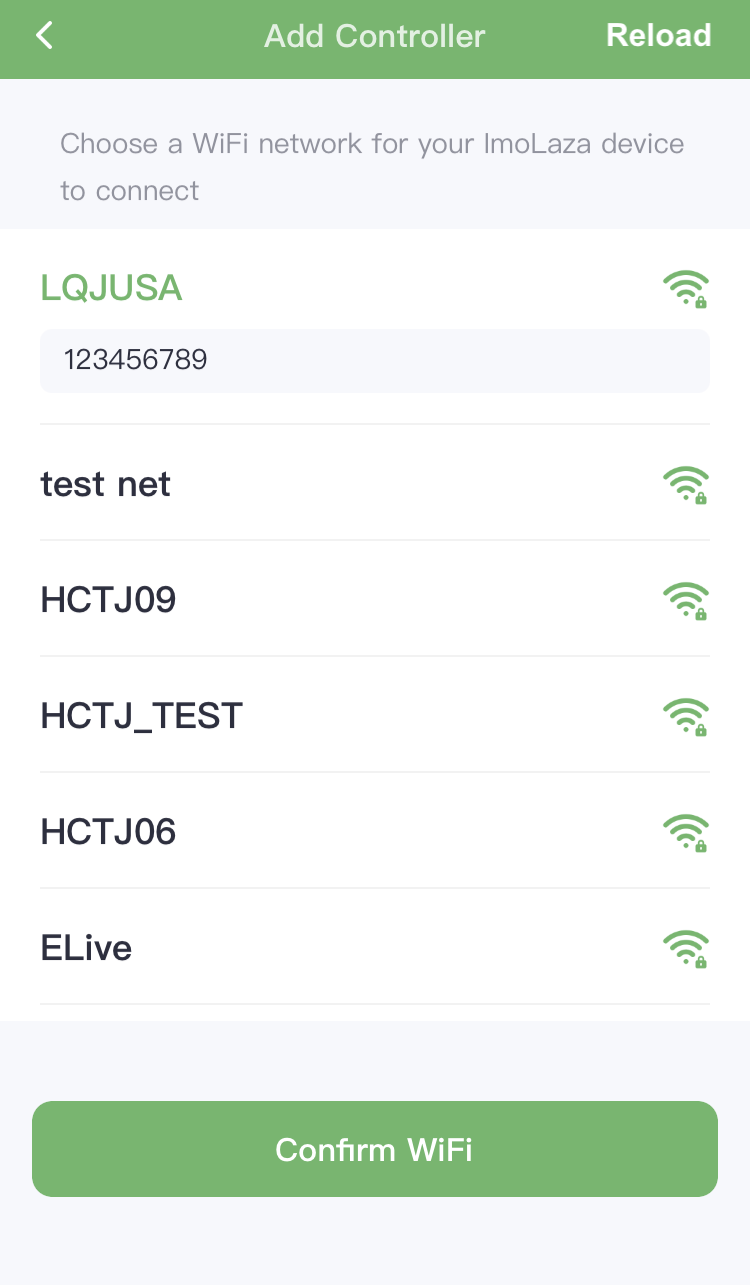
Step4: Waiting for ImoLaza smart controller to finish setting up your device. If your ImoLaza App shows "Online" and the indicator light flashes blue, it means that your controller has been activated successfully.
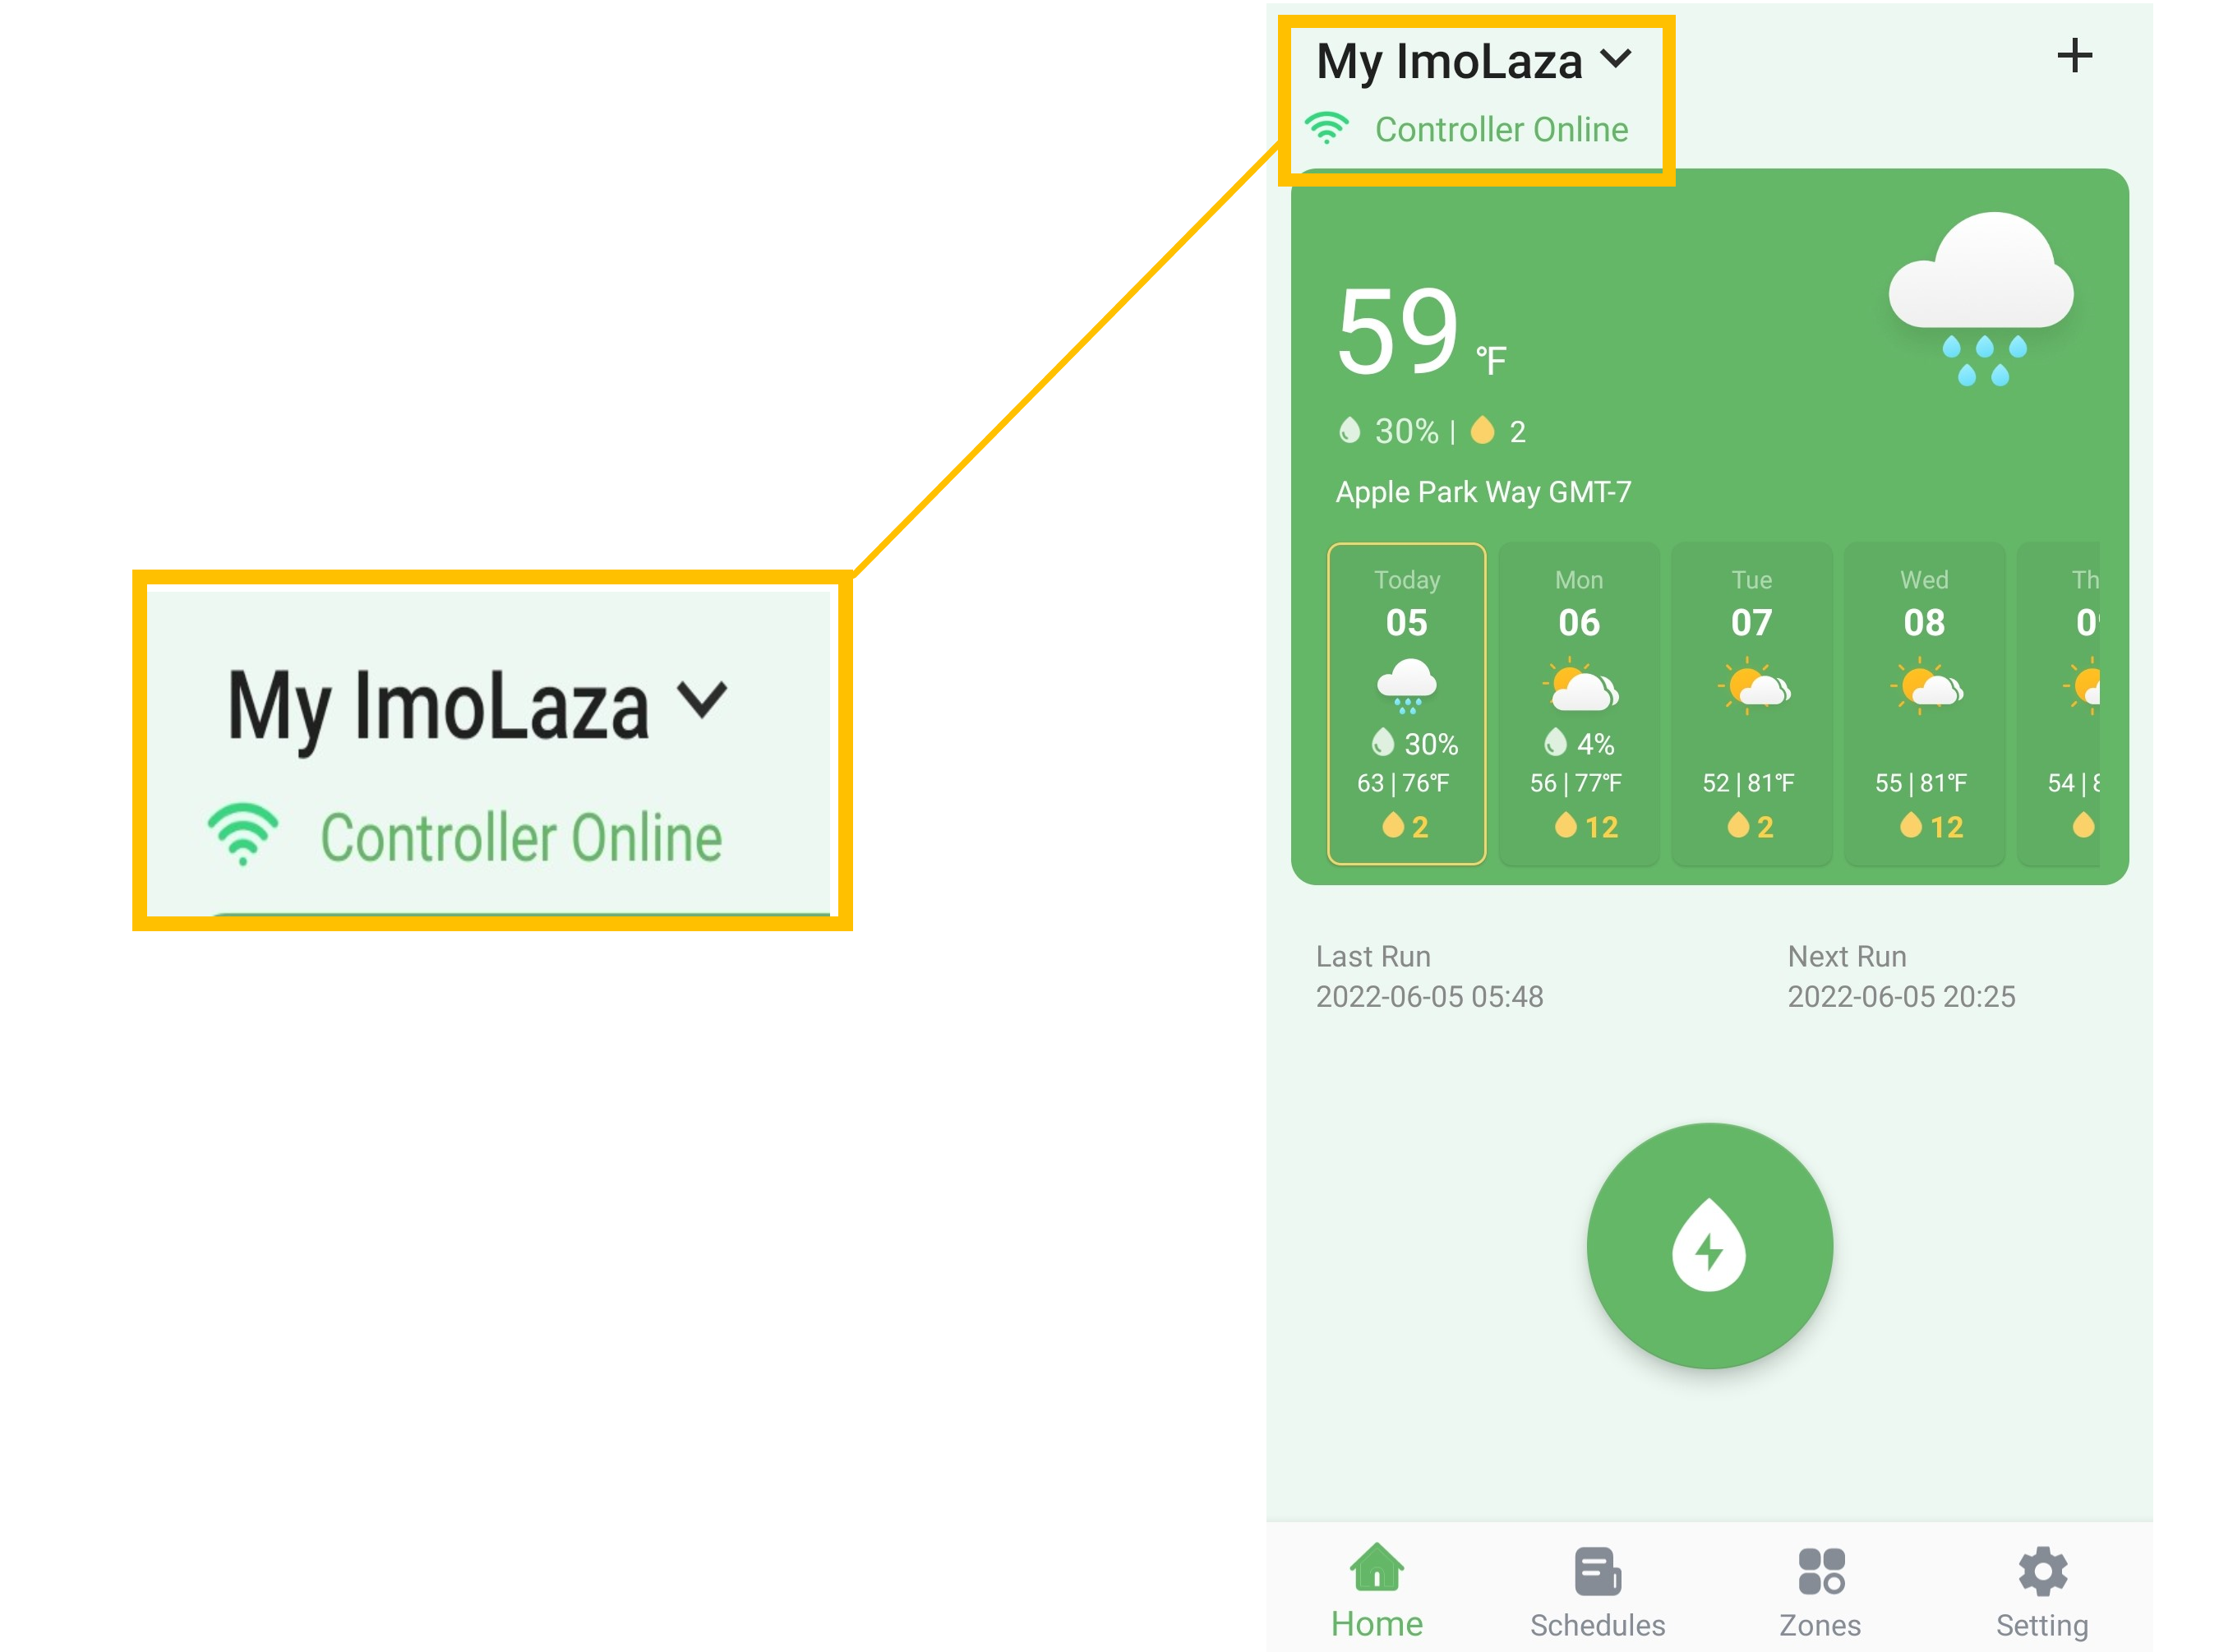
Now your ImoLaza app is ready to use.
You can use the quick run by clicking the green drop button on the homepage and selecting all the zones to test if your sprinklers are working as expected.
If you have questions about using the app, don’t hesitate to contact our technical support team directly by scanning the QR code or emailing us. We will reply to you by email within 24 hours of receiving your message.
Still need help?
In case the above method doesn’t work for you, please contact our technical support team directly using the contact information below. We will respond to you by email within 12h after your message reaches us.
Email: Support@imolaza.com
